Removal Procedure
- Remove the fuel tank filler cap in order to release the fuel vapor pressure in the fuel tank. After releasing the pressure, reinstall the filler cap.
- Release the fuel pressure. Refer to Fuel Pressure Relief in Engine Controls.
- Disconnect the negative battery cable.
- Drain the cooling system. Refer to Cooling System Draining and Filling in Engine Cooling.
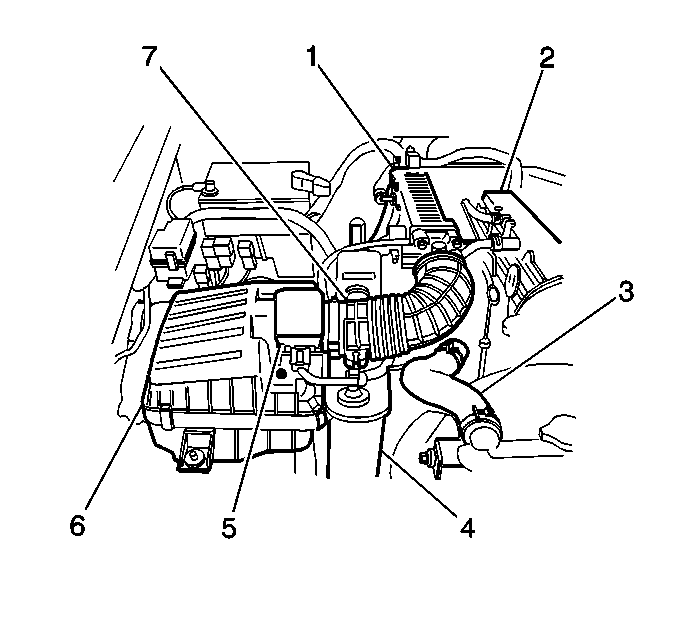
- Disconnect the Intake Air Temperature (IAT) Sensor.
- Disconnect the Mass Air Flow (MAF) Sensor.
- Depress the electrical harness clamps and remove the harness from the air cleaner assembly.
- Remove the air intake hose (7) from the throttle body.
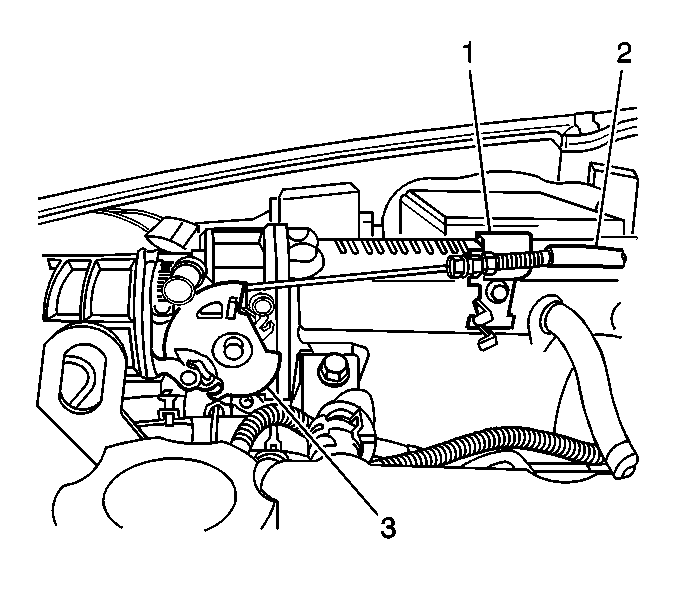
- Remove the accelerator cable (2) from the accelerator cable bracket (1).
- Remove the accelerator cable from the throttle body bellcrank (3).
- Disconnect the following electrical connectors:
- Remove the EVAP canister purge valve vacuum hose.
- Remove the EVAP canister purge valve bracket bolt.
- Remove the EVAP canister purge valve bracket and valve assembly.
- Remove the coolant hose from the throttle body (1).
- Disconnect the following electrical connectors:
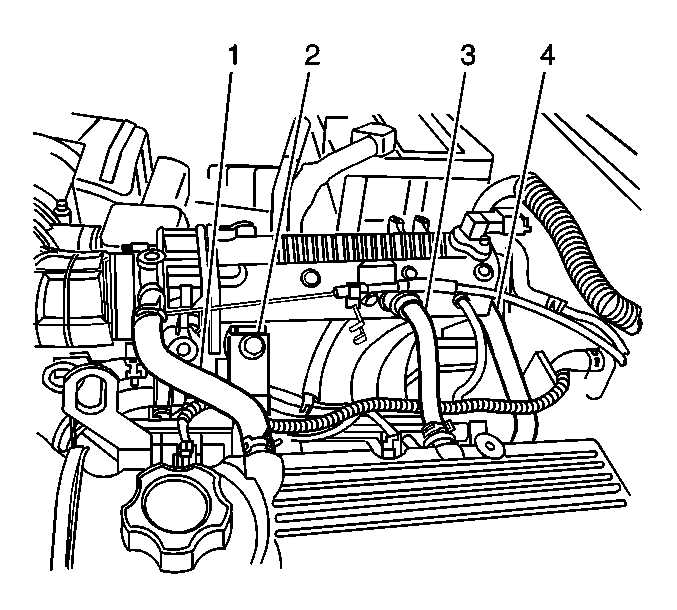
- Remove the brake booster supply hose (3) from the intake manifold.
- Disconnect the inlet fuel line (1).
- Disconnect the return fuel line (2).
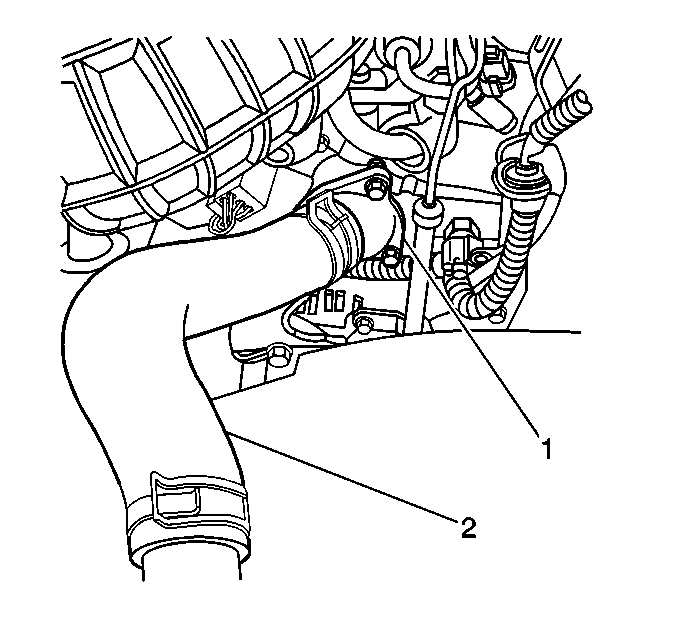
- Remove the upper radiator (2) hose from the thermostat housing (1).
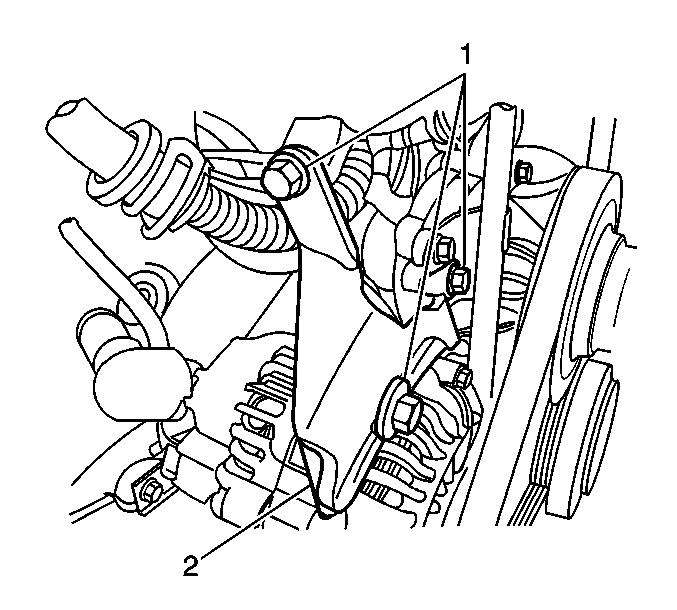
- Remove the upper generator mounting bracket (2).
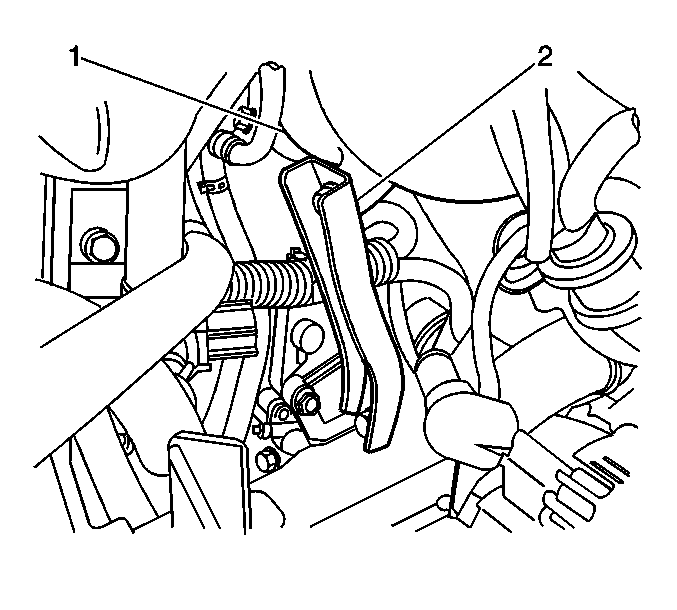
- Remove the lower intake manifold support bracket (2) from the intake manifold (1).
- Remove the two bolts and the upper front intake manifold support bracket (2) from the intake manifold.
- Remove the two bolts and the upper rear intake manifold support bracket (4) from the intake manifold.
- Remove the crankcase vent hose (1).
- Remove the PCV hose from the PCV valve (3).
- Disconnect the fuel injector 6-way connector at the rear of the intake manifold.
- Remove the EGR valve.
- Remove the following from the cylinder head:
- Remove the following components from the intake manifold and transfer as required:
Caution: Unless directed otherwise, the ignition and start switch must be in the OFF or LOCK position, and all electrical loads must be OFF before servicing any electrical component. Disconnect the negative battery cable to prevent an electrical spark should a tool or equipment come in contact with an exposed electrical terminal. Failure to follow these precautions may result in personal injury and/or damage to the vehicle or its components.
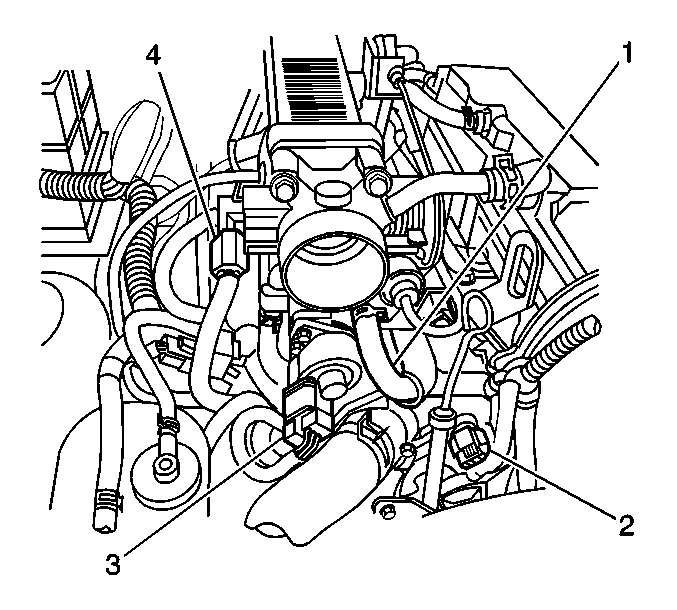
| • | Throttle Position (TP) Sensor (4) |
| • | Idle Air Control (IAC) Valve (3) |
| • | Engine Coolant Temperature (ECT) Sensor (2) |
| • | Evaporative emission canister purge valve |
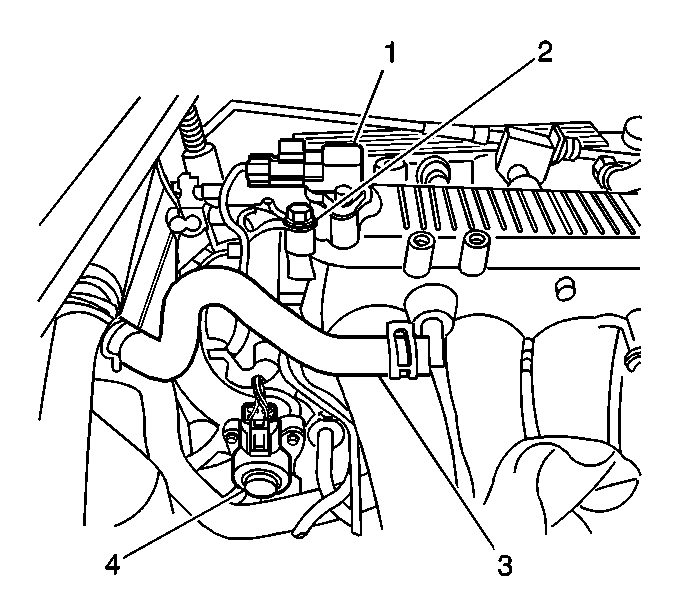
| • | Exhaust gas recirculation (EGR) connector (4) |
| • | Manifold absolute pressure (MAP) sensor connector (1) |
| • | Engine ground wire (2) from intake manifold |
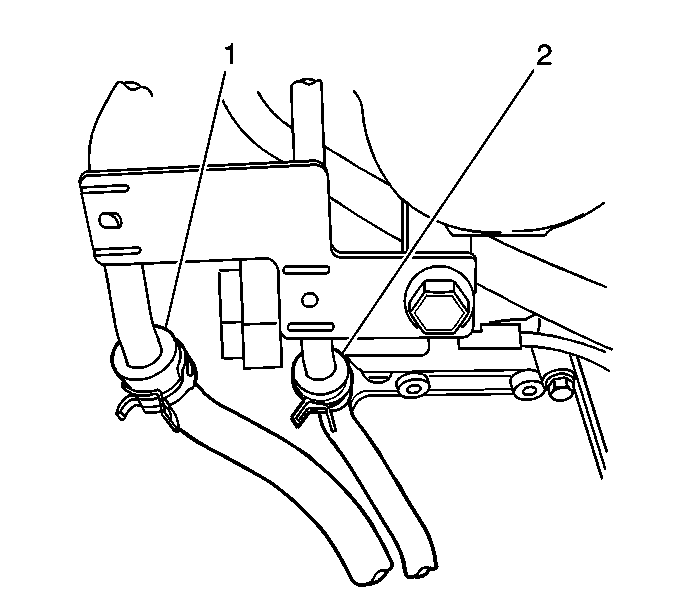
Important: Use a shop rag to catch any fuel that may leak during the disconnection of the fuel lines.
| • | The eight nuts |
| • | The three bolts |
| • | The intake manifold with the gasket |
| • | The ECT sensor |
| • | The ECT sensor sending unit |
| • | The throttle body |
| • | The fuel rail |
| • | The fuel injector harness |
| • | The MAP sensor |
| • | The EGR tube |
| • | The accelerator cable bracket |
Installation Procedure
- Insure the following are installed to the intake manifold as required:
- Install a new intake manifold gasket and the intake manifold to the cylinder head. Secure with 8 nuts and 3 bolts.
- Install the upper rear intake manifold support bracket (4) to the intake manifold. Secure the bracket with two bolts.
- Install the upper front intake manifold support bracket (2) to the intake manifold. Secure the bracket with 2 bolts.
- Install the crankcase vent hose (1).
- Install the PCV hose (3) to the PCV valve.
- Connect the fuel injector 6-way connector at the rear of the intake manifold.
- Install the lower intake manifold support bracket (2) to the intake manifold (1). Secure the bracket with 2 bolts.
- Install the upper generator mounting bracket (2). Secure the bracket with two bolts.
- Adjust the generator drive belt tension. Refer to Drive Belt Replacement .
- Reinstall the EVAP canister.
- Install the upper radiator hose to the thermostat housing (1).
- Install the fuel inlet hose (1) to the fuel line union.
- Install the fuel return hose (2) to the fuel line union.
- Connect the following electrical connectors:
- Install the brake booster supply hose (3) to the intake manifold.
- Connect the following electrical connectors:
- Install the EVAP canister purge valve vacuum hose.
- Install the coolant hose to the throttle body (1).
- Install the accelerator cable (2) to the accelerator cable bracket (1).
- Install the accelerator cable to the throttle body bellcrank (3). Adjust the accelerator cable as necessary. Refer to Accelerator Control Cable Replacement in Engine Controls.
- Connect the intake air temperature (IAT) sensor.
- Connect the mass air flow (MAF) sensor.
- Install the electrical harness clamps to the air cleaner assembly.
- Install the air intake pipe (7) to the throttle body.
- Refill the cooling system as necessary. Refer to Cooling System Draining and Filling in Engine Cooling.
- Connect the negative battery cable.
| • | The EGR valve |
| • | The ECT sensor |
| • | The ECT sensor sending unit |
| • | The throttle body |
| • | The fuel rail |
| • | The fuel injector harness |
| • | The MAP sensor |
| • | The EGR tube |
| • | The accelerator cable bracket |
Notice: Use the correct fastener in the correct location. Replacement fasteners must be the correct part number for that application. Fasteners requiring replacement or fasteners requiring the use of thread locking compound or sealant are identified in the service procedure. Do not use paints, lubricants, or corrosion inhibitors on fasteners or fastener joint surfaces unless specified. These coatings affect fastener torque and joint clamping force and may damage the fastener. Use the correct tightening sequence and specifications when installing fasteners in order to avoid damage to parts and systems.
Tighten
Tighten the intake manifold nuts and bolts to 23 N·m (17 lb ft).

Tighten
Tighten the upper rear intake manifold support bracket bolts to 50 N·m
(37 lb ft).
Tighten
Tighten the upper front intake manifold support bracket bolts to 50 N·m
(37 lb ft).

Tighten
Tighten the lower intake manifold support bracket bolts to 50 N·m
(37 lb ft).

Tighten
Tighten the upper generator mounting bracket bolts to 50 N·m
(37 lb ft).


| • | Exhaust gas recirculation (EGR) connector (4) |
| • | Manifold absolute pressure (MAP) sensor connector (1) |
| • | Engine ground wire (2) from intake manifold |

| • | Throttle position (TP) sensor (4) |
| • | Idle air control (IAC) valve (3) |
| • | Engine coolant temperature (ECT) sensor (2) |
| • | Evaporative emission canister purge valve |


Tighten
Tighten the negative battery cable bolt to 15 N·m (11 lb ft).
