Tools Required
| • | J 26900-2 Outside Micrometer 0-2 in |
| • | J 8001 Dial Indicator Set |
| • | J 26900-13 Magnetic Base |
Removal Procedure
- Disconnect the negative battery cable.
- Remove the timing chain housing. Refer to Timing Chain Housing Replacement .
- Remove the camshaft timing chain and the exhaust camshaft sprocket. Refer to Timing Chain and Sprocket Replacement .
- Apply matchmarks to the camshaft position sensor and the cylinder head and remove the camshaft position sensor.
- Rotate the crankshaft 90 degrees to prevent interference between the valves and the pistons.
- Loosen the exhaust camshaft bearing caps in sequence.
- Remove the exhaust camshaft bearing caps.
- Remove the exhaust camshaft.
- Remove the valve lifters.
Caution: Unless directed otherwise, the ignition and start switch must be in the OFF or LOCK position, and all electrical loads must be OFF before servicing any electrical component. Disconnect the negative battery cable to prevent an electrical spark should a tool or equipment come in contact with an exposed electrical terminal. Failure to follow these precautions may result in personal injury and/or damage to the vehicle or its components.


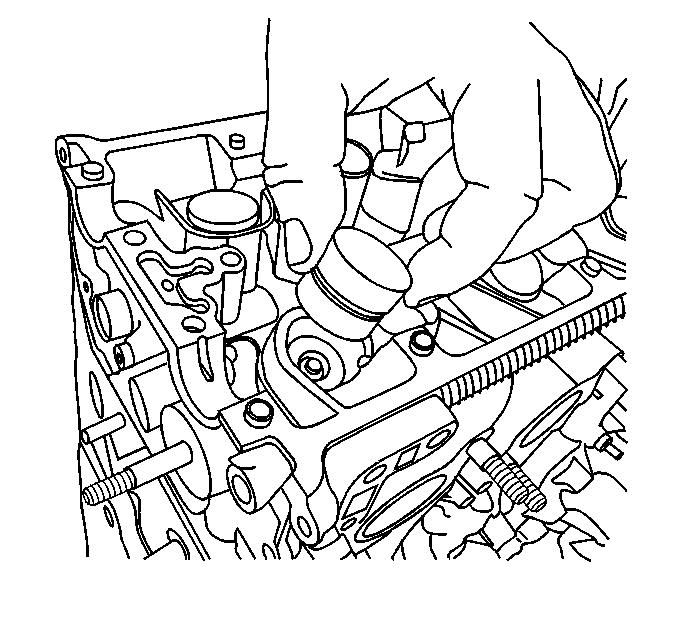
Important:
• Store the valve lifters so that they can be installed in the same bore
from which they were removed. • Do not disassemble the valve lifter. • Do not apply force to the body (valve side) of the valve lifter, this
will force oil to leak out of the valve lifter. • Store the valve lifters submerged in clean engine oil camshaft side down
until installation. • Store the valve lifters camshaft side up if left in air until installation.
Do not store in air with the camshaft side down or on the valve lifter side.
Inspection Procedure
- Measure the camshaft lobe height using the J 26900-2 . Replace the camshaft if any lobe is below the minimum.
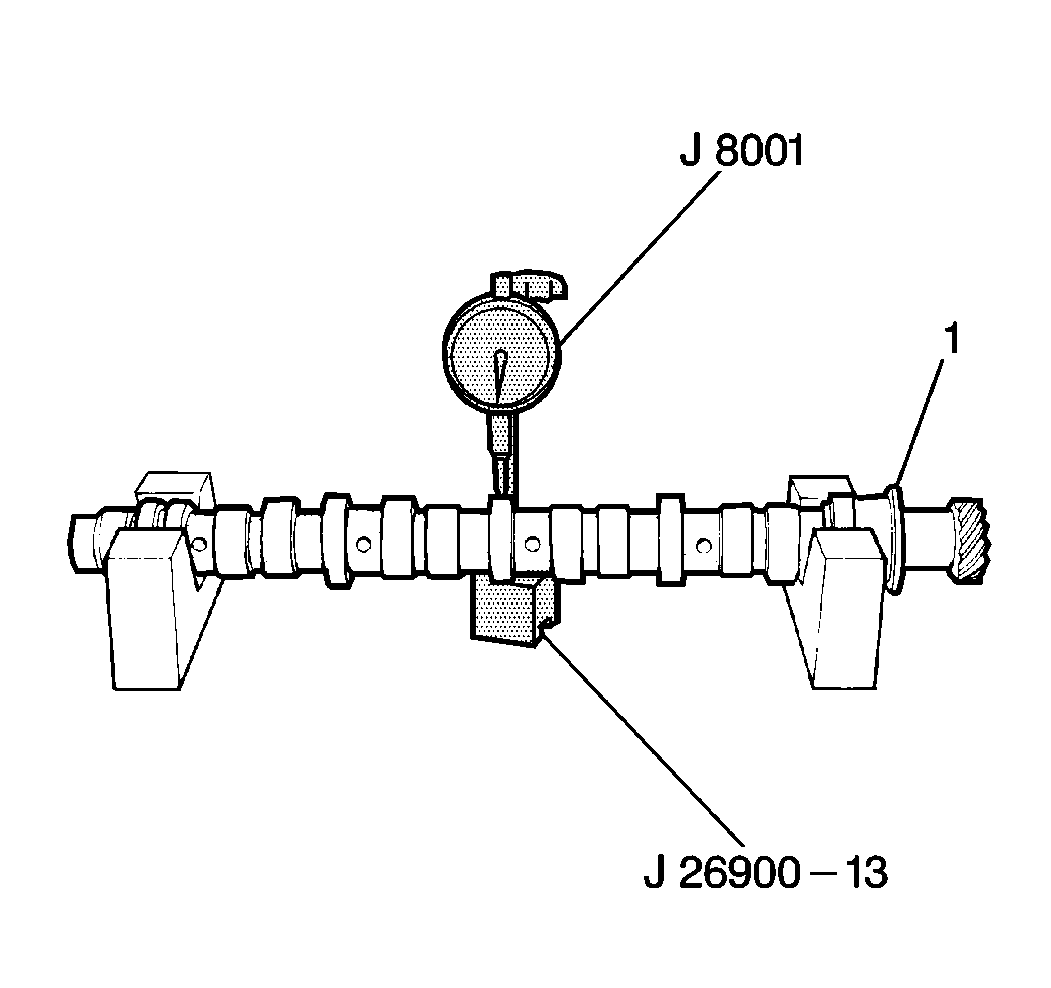
- Place the camshaft (1) onto V-blocks. Measure the camshaft runout using the J 8001 with the J 26900-13 . Replace the camshaft if the runout exceeds 0.10 mm (0.0039 in).
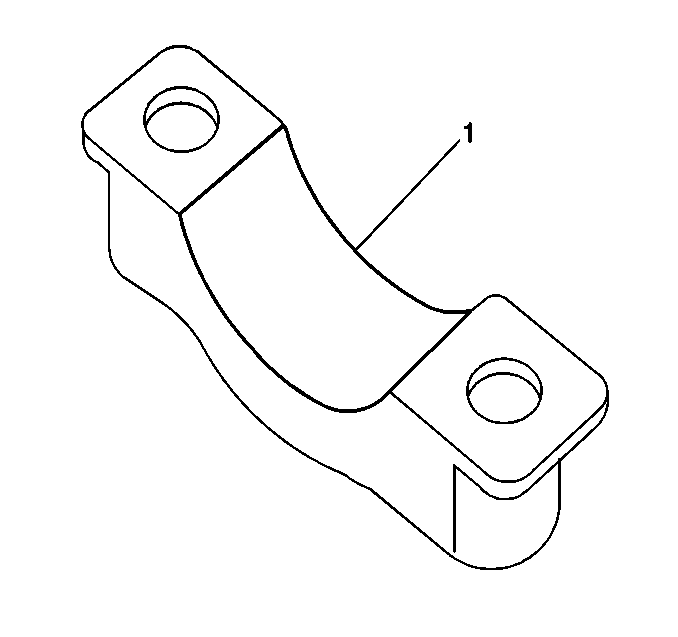
- Inspect the camshaft bearing caps (1) for wear, cracks and scoring.
- Inspect the camshaft bearing journals in the cylinder head for wear, cracks and scoring.
- If excessive wear or scoring is present, or if the cylinder head is cracked, replace the cylinder head (with bearing caps).
- Clean the journals of the camshaft and the cylinder head.
- Do not install the valve lifters.
- Install the camshafts. The rear end of the exhaust camshaft is slotted to mate with the camshaft position sensor.
- Place a piece of gauging plastic across the full width of each camshaft journal.
- Install the camshaft bearing caps. The caps are marked intake or exhaust (1), position away from the timing chain (2), and direction toward the timing chain (3).
- Use 3 progressive steps to tighten the camshaft bearing cap bolts in sequence.
- Remove the camshaft bearing caps.
- Measure the gauging plastic at its widest point (1).
- If the clearance is greater than the maximum perform the following:
- Replace the component (camshaft or cylinder head with caps) that has the greatest difference from specification.
- Inspect the valve lifters for wear, scoring and damage.
- Measure the valve lifters with the J 26900-2 .
- Measure the valve lifter bores in the cylinder head.
- The valve lifter-to-valve bore clearance is found by subtracting the valve lifter outside diameter from the valve lifter bore inside diameter.
- If the oil clearance is greater than the maximum, replace the lifter. If the oil clearance is still greater than the maximum, replace the cylinder head.
- Inspect that the oil control valve in the cylinder head is clean and that the check ball is free.
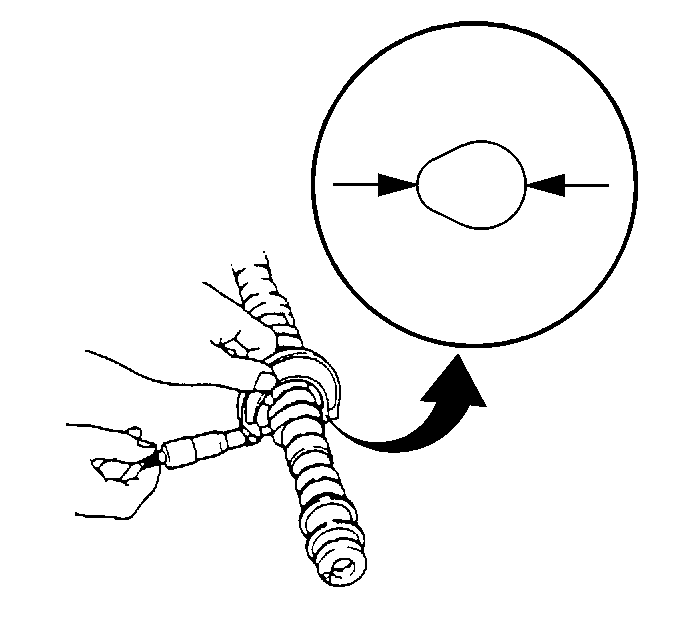
Standard Exhaust Camshaft Lobe Height
39.921-40.081 mm
(1.5717-1.5780 in)
Minimum Exhaust Camshaft Lobe Height
39.721 mm (1.5638 in)
Important: Do not turn the camshafts while the gauging plastic is installed.

Important: Cylinder head and camshaft damage may result if the bearing caps are incorrectly installed. The oil clearance measurement will also be incorrect.
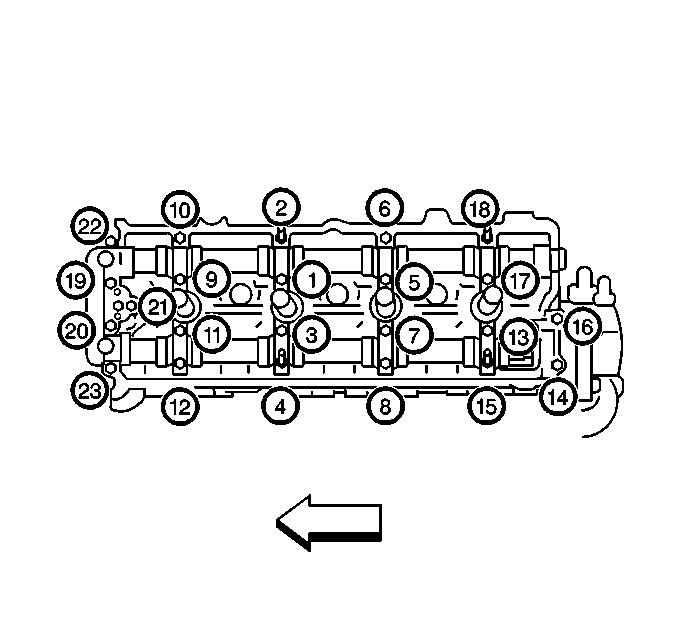
Notice: Use the correct fastener in the correct location. Replacement fasteners must be the correct part number for that application. Fasteners requiring replacement or fasteners requiring the use of thread locking compound or sealant are identified in the service procedure. Do not use paints, lubricants, or corrosion inhibitors on fasteners or fastener joint surfaces unless specified. These coatings affect fastener torque and joint clamping force and may damage the fastener. Use the correct tightening sequence and specifications when installing fasteners in order to avoid damage to parts and systems.
Tighten
Tighten the bolts to 11 N·m (97 lb in).

Standard Oil Clearance
0.020-0.074 mm (0.0008-0.0029 in)
Maximum Oil Clearance
0.12 mm (0.0047 in)
| 14.1. | Remove the camshaft. |
| 14.2. | Measure the camshaft journal outside diameter with the J 26900-2 . |
Camshaft OD
25.959-25.980 mm (1.0220-1.0228 in)
| 14.3. | Install the camshaft bearing caps and torque to 11 N·m (97 lb in). |
| 14.4. | Measure the camshaft journal inside (bore) diameter. |
Camshaft Bore ID
26.000-26.033 mm (1.0236-1.0249 in)
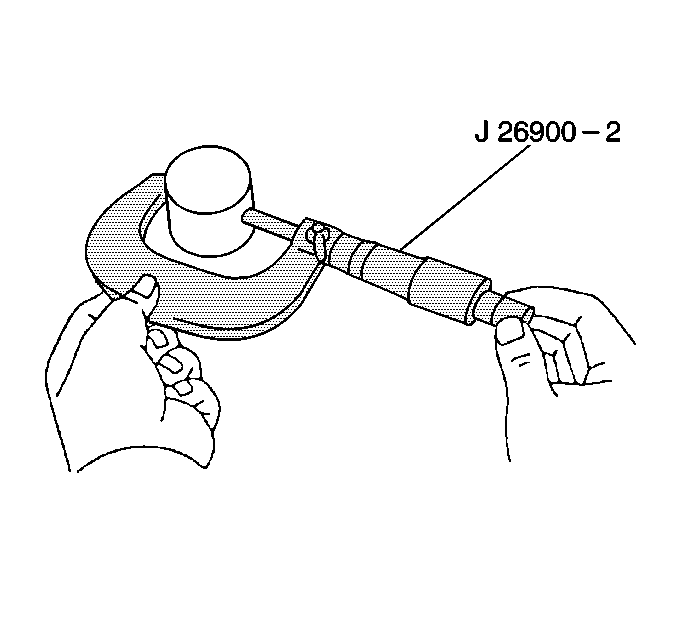
Valve Lifter OD
30.959-30.975 mm (1.2189-1.2194 in)
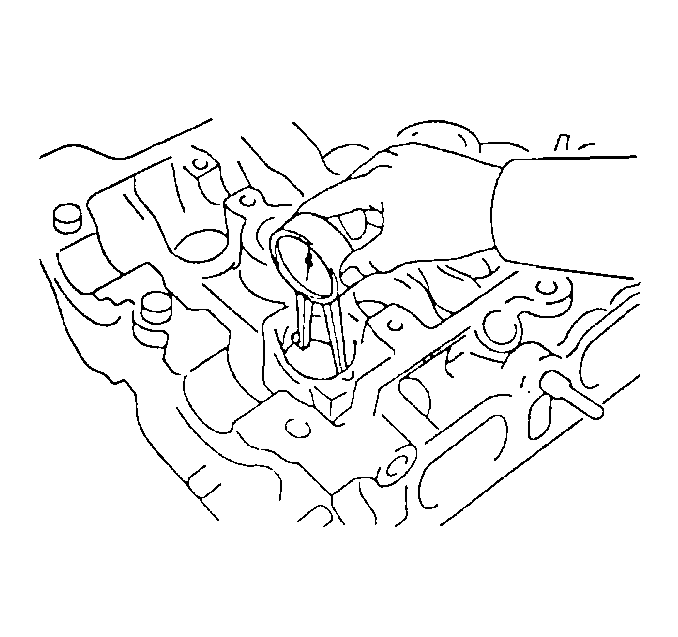
Valve Lifter Bore ID
31.000-31.025 mm (1.2205-1.2214 in)
Standard Valve Lifter-to-Valve Bore Clearance
0.025-0.066 mm
(0.0010-0.0025 in)
Maximum Valve Lifter-to-Valve Bore Clearance
0.15 mm
(0.0059 in)

Installation Procedure
- Pour engine oil into the oil feed hole in the valve lifter bore in order to flush any debris from the gallery and to prelube the bore.
- Apply engine oil to the valve lifter and install the valve lifters in the same bore from which they were removed.
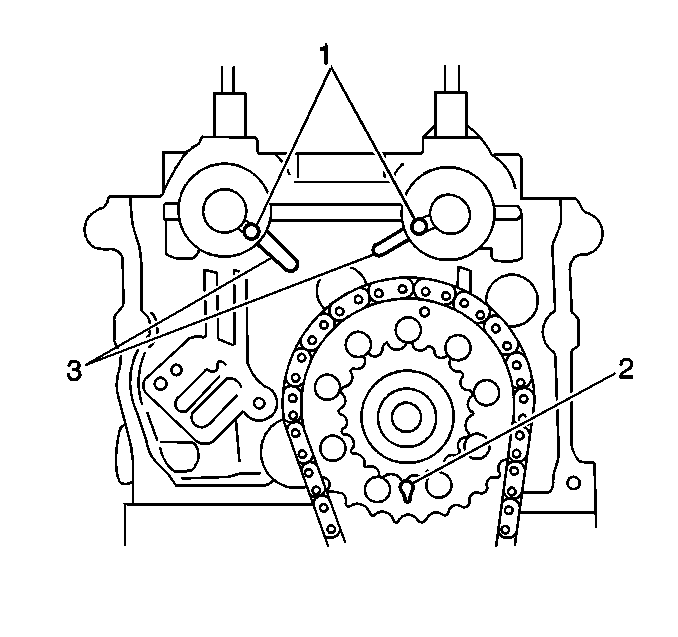
- Line up the crankshaft keyway with the timing mark on the engine block (3).
- Apply engine oil to the camshaft journals and lobes.
- Install the camshafts aligning the guide pins (1) with the notches (3) on the cylinder head. The exhaust camshaft rear end is slotted to mate with the camshaft position sensor.
- Install the dowel pins (1) to the cylinder head.
- Apply a bead of GM P/N 12346240 or equivalent to the exhaust camshaft end housing (2).
- Install the camshaft bearing caps. The caps are marked intake or exhaust (1), position away from the timing chain (2), and direction toward the timing chain (3).
- Tighten the camshaft bearing caps.
- Align the matchmarks and install the camshaft position sensor (CMP). The sensor shaft is offset and can only be installed 1 way. Secure the CMP with the bolt.
- Install the exhaust camshaft sprocket and the timing chain. Refer to Timing Chain and Sprocket Replacement .
- Install the timing chain housing. Refer to Timing Chain Housing Replacement .
- Connect the negative battery cable.
- Inspect and adjust the ignition timing if necessary. Refer to Ignition Timing Adjustment in Engine Controls.

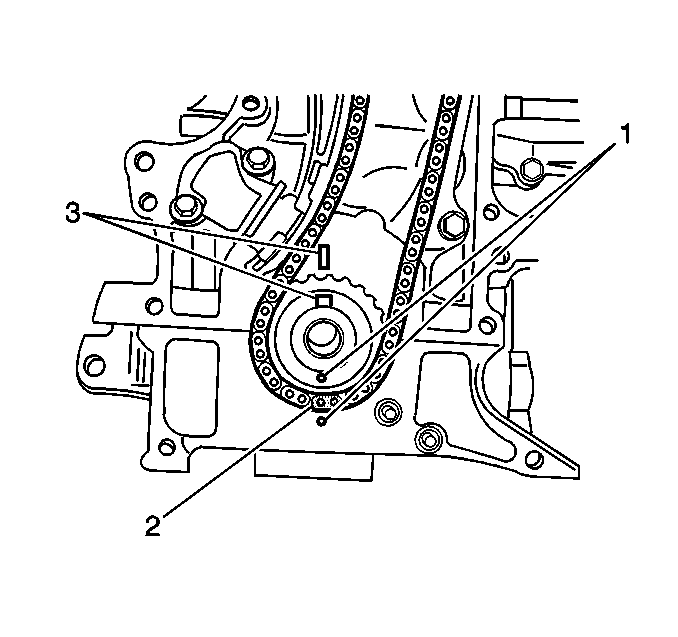


Important: Cylinder head and camshaft damage may result if the bearing caps are incorrectly installed.

Notice: Use the correct fastener in the correct location. Replacement fasteners must be the correct part number for that application. Fasteners requiring replacement or fasteners requiring the use of thread locking compound or sealant are identified in the service procedure. Do not use paints, lubricants, or corrosion inhibitors on fasteners or fastener joint surfaces unless specified. These coatings affect fastener torque and joint clamping force and may damage the fastener. Use the correct tightening sequence and specifications when installing fasteners in order to avoid damage to parts and systems.
Tighten
Tighten the camshaft bearing caps in 3 progressive
steps in the sequence shown to 11 N·m (97 lb in).
Important:
• Do not turn the camshafts or start the engine (valves should not be operated)
for approximately 30 minutes after replacing the valve lifters and camshafts. • Allow approximately 30 minutes for the valves to settle in place.
Operating the valves before this time may cause valve or piston damage. • The valve(s) may make a tapping/ticking sound after replacement if air
is trapped in the valve lifter. Run the engine at 2000 RPM until the
air is purged from the lifter. • If the tapping/ticking does not stop, locate the defective lifter with
a stethoscope and replace. Or, remove the cylinder head cover with the engine
stopped and push the lifter down by hand with a force less than 20 kg
(44 lbs) when the camshaft is on the base circle. If clearance exists
between the camshaft and the lifter the lifter is defective and should be
replaced.
