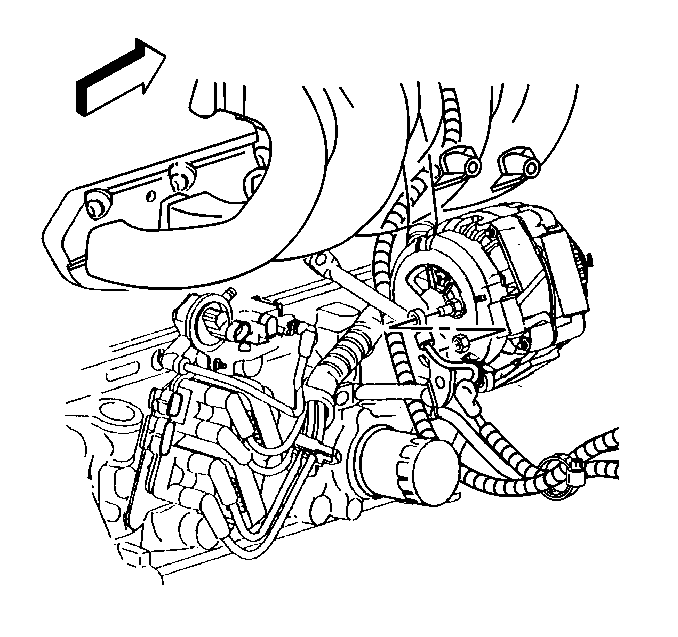
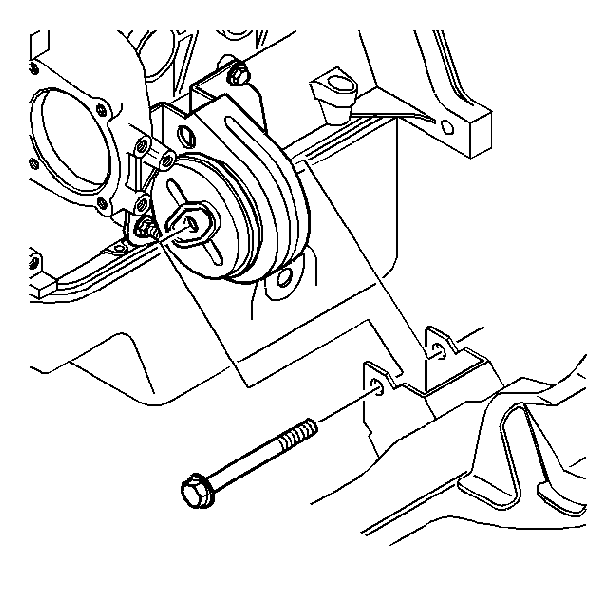
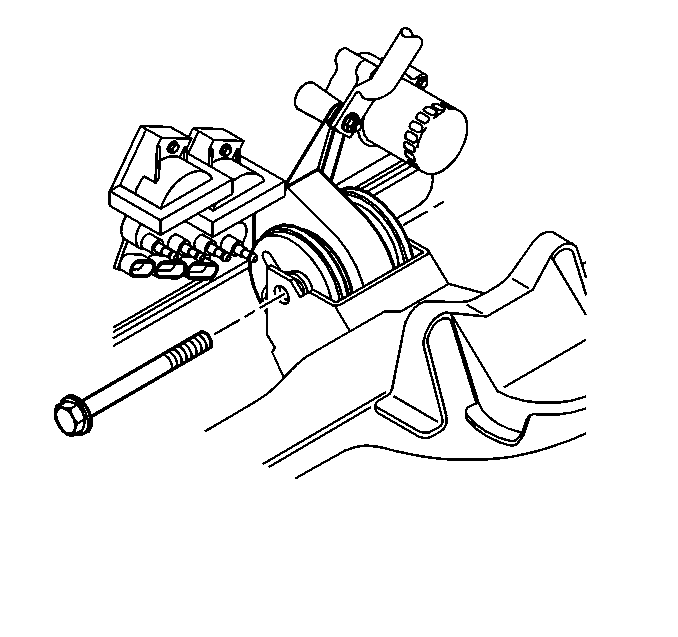
- Install the engine to the vehicle.
- Install the right side engine mount through-bolt. Refer to
Engine Mount Replacement - Right Side
.
- Install the left side engine mount through-bolt. Refer to
Engine Mount Replacement - Left Side
.
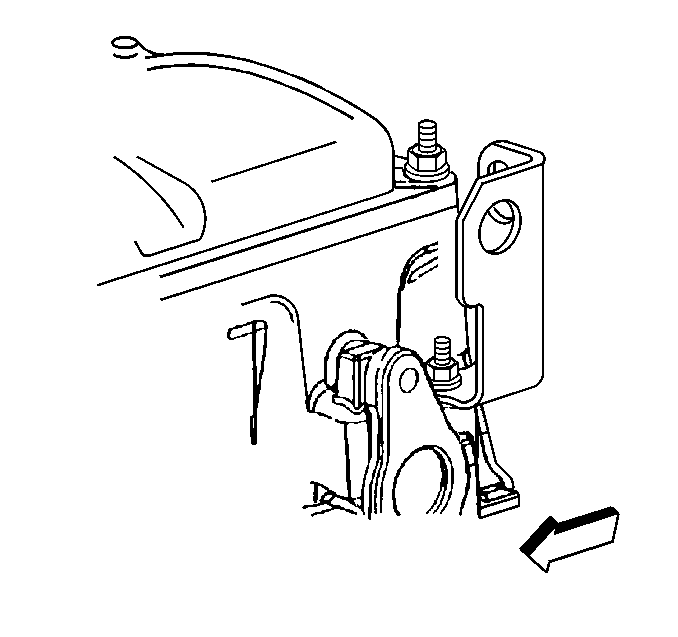
- Remove the engine lifting device from
the engine lift brackets.
- Connect the fuel hoses. Refer to
Fuel Hose/Pipes Replacement - Engine Compartment
in
Engine Controls 2.2 L (L43).
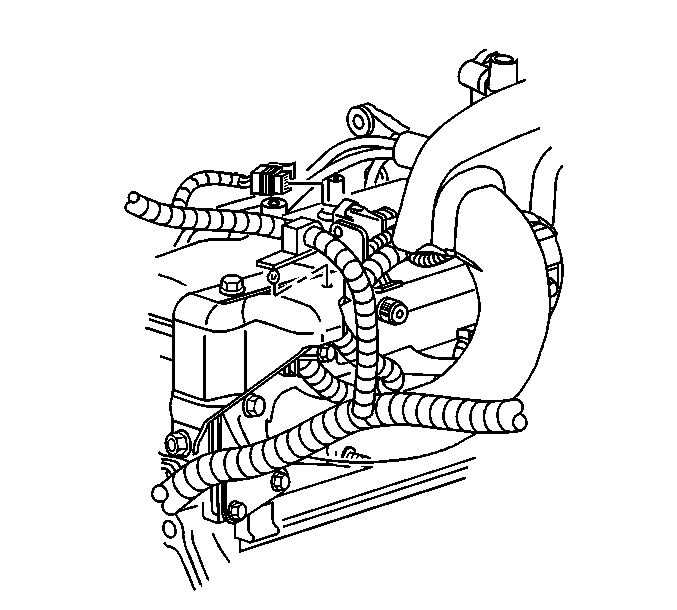
- Position the engine wiring harness.
- Install the engine wiring harness to the bracket.
- Install the fuel injector harness electrical connector to the
bracket on the valve rocker arm cover.
- Connect the fuel injector harness electrical connector.
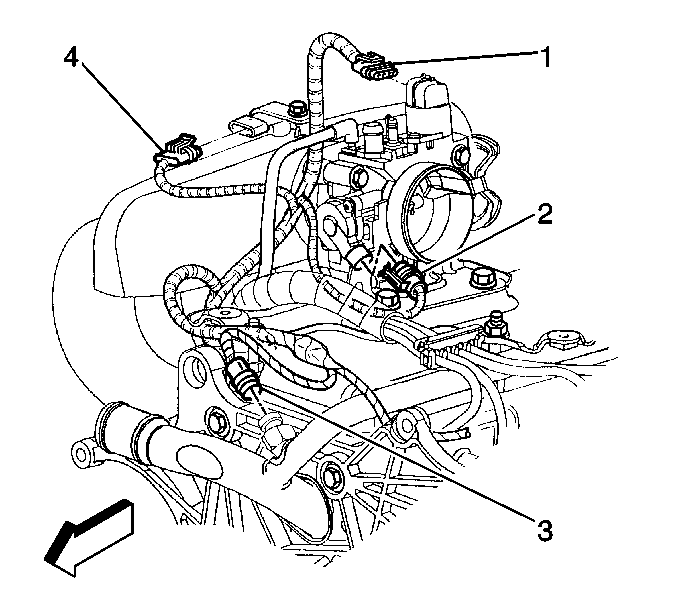
- Connect the following electrical connectors
to the top of the engine:
| • | Engine coolant temperature (ECT) sensor (3) |
| • | Idle air control (IAC) motor (1) |
| • | Manifold absolute pressure (MAP) senor (4) |
| • | Throttle position (TP) sensor (2) |
- Connect the engine coolant heater, if equipped. Refer to
Coolant Heater Replacement
in Engine Electrical.
- Connect the generator electrical connectors. Refer to
Generator Replacement
in Engine Electrical.
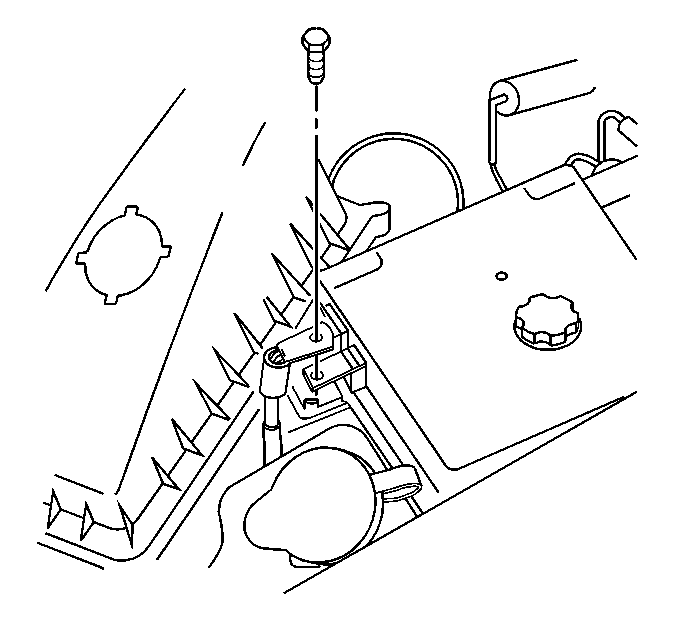
- Attach the battery positive cable with
bolt to the underhood fuse block.
Tighten
Tighten the battery positive cable to the underhood fuse block bolt
to 10 N·m (89 lb in).
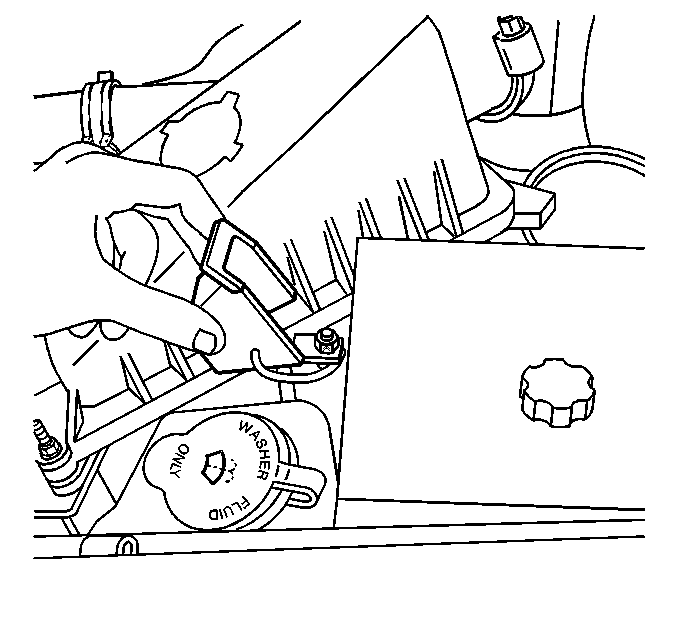
- Install the battery positive cable cover.
Caution: In order to avoid possible injury or vehicle damage, always replace
the accelerator control cable with a NEW cable whenever you remove the engine
from the vehicle.
In order to avoid cruise control cable damage, position the cable out
of the way while you remove or install the engine. Do not pry
or lean against the cruise control cable and do not kink the cable. You must
replace a damaged cable.
- Install a NEW accelerator control
cable. Refer to
Accelerator Control Cable Replacement
in Engine Controls 2.2 L
(L43).
- Connect the cruise control cable to the throttle body, if equipped.
Refer to
Cruise Control Cable Replacement
in Cruise Control.
- Install both heater hoses to the heater core. Refer to
Heater Inlet Hose Replacement
and
Heater Outlet Hose Replacement
in Heating Ventilation and
Air Conditioning.
- Install the power steering pump. Refer to
Power Steering Pump Replacement
in
Power Steering Systems.
- Install the air conditioning compressor, if equipped. Refer to
Air Conditioning Compressor Replacement
in Heating Ventilation and Air Conditioning.
- Install the drive belt. Refer to
Drive Belt Replacement
.
- Install the radiator. Refer to
Radiator Replacement
in
Engine Cooling.
- Install the air intake duct. Refer to
Air Cleaner Outlet Resonator Replacement
in
Engine Controls 2.2 L (L43).
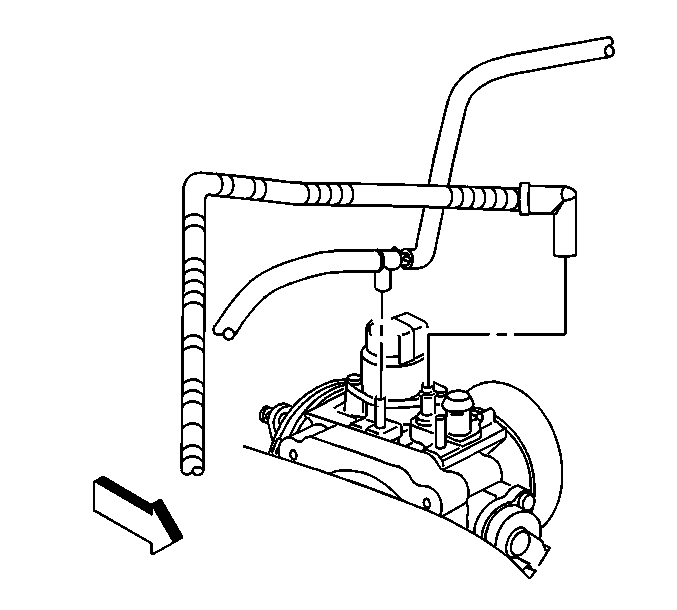
- Connect the heating and air conditioning
control vacuum source hose.
- Connect the EVAP emission purge tube from the throttle body.
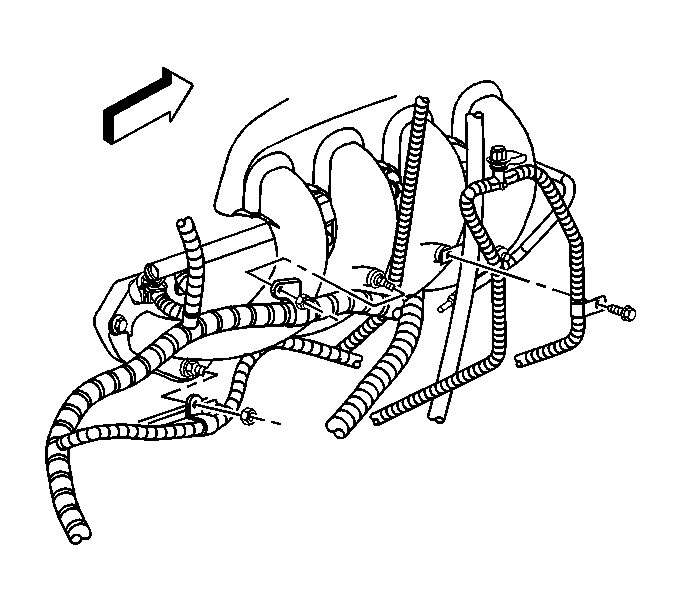
- Install he bolt holding the EVAP emission
canister purge harness and if equipped the transmission fluid fill tube.
Tighten
Tighten the bolts to 10 N·m (89 lb in).
- Install the nut holding the engine wiring harness clip and the
battery negative cable clip to the intake manifold.
Tighten
Tighten the engine wiring harness clip nut to 10 N·m (89 lb ft).
- Install the nut holding the engine wiring harness clip to the
intake manifold rear lower stud.
Tighten
Tighten the engine wiring harness clip nut to 30 N·m (22 lb ft).
- Raise the vehicle to a height in order to work through the wheelhouse
opening.
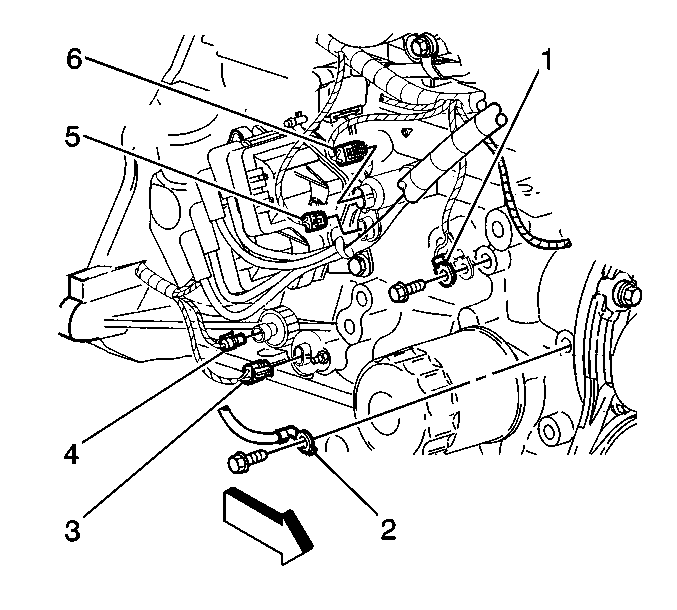
- Connect the following electrical connectors
to the right side of the engine:
| • | Engine oil pressure sensor (6) |
| • | Camshaft position (CMP) sensor (5) |
| • | Crankshaft position (CKP) sensor (3) |
- Install the bolt and the ground wires (1) to the engine.
Tighten
Tighten the ground wire bolt to 35 N·m (26 lb ft).
- Install the bolt and the battery negative cable (2) to the engine.
Tighten
Tighten the battery negative cable bolt to 35 N·m (26 lb ft).
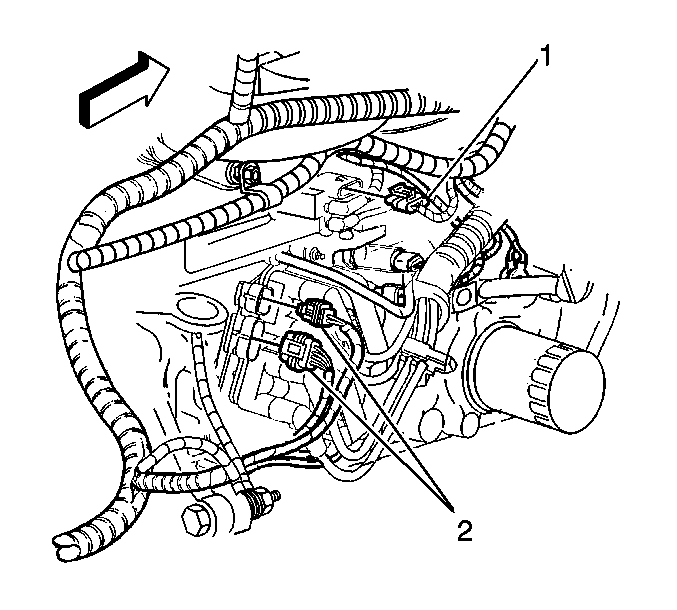
- Connect both ignition control module
(ICM) electrical connectors (2).
- Connect the EVAP purge canister solenoid valve electrical connector
(1).
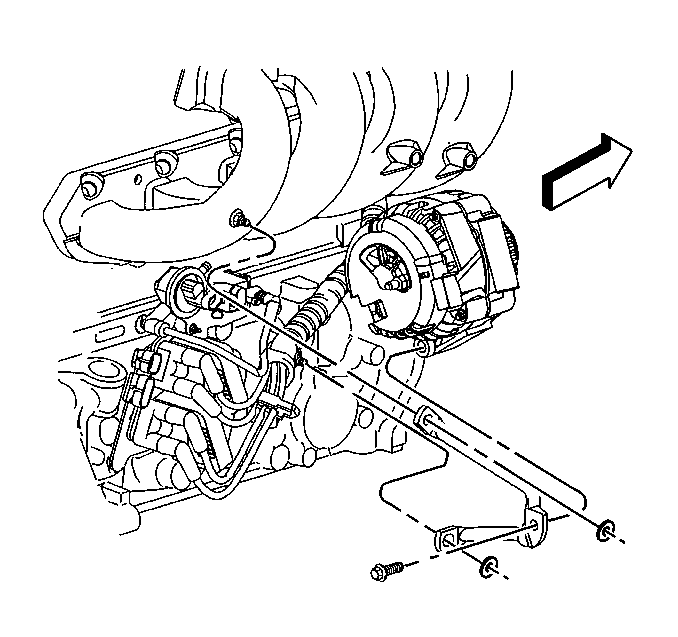
- Install the generator brace using the
following procedure.
| 34.1. | Install the brace to the engine. |
| 34.2. | Install the two nuts holding the brace to the engine. |
| 34.3. | Install the bolt to the rear of the generator. |
Tighten
Tighten the generator rear brace nuts and bolt to 25 N·m
(18 lb ft).
- Install the right fender wheelhouse extension. Refer to
Wheelhouse Extension Replacement
in Body Front End.
- Connect the oxygen sensor electrical connector. Refer to
Oxygen Sensor Replacement
in Engine Controls 2.2 L (L43).
- Install the transmission.
- Install the starter motor. Refer to
Starter Motor Replacement
in
Engine Electrical.
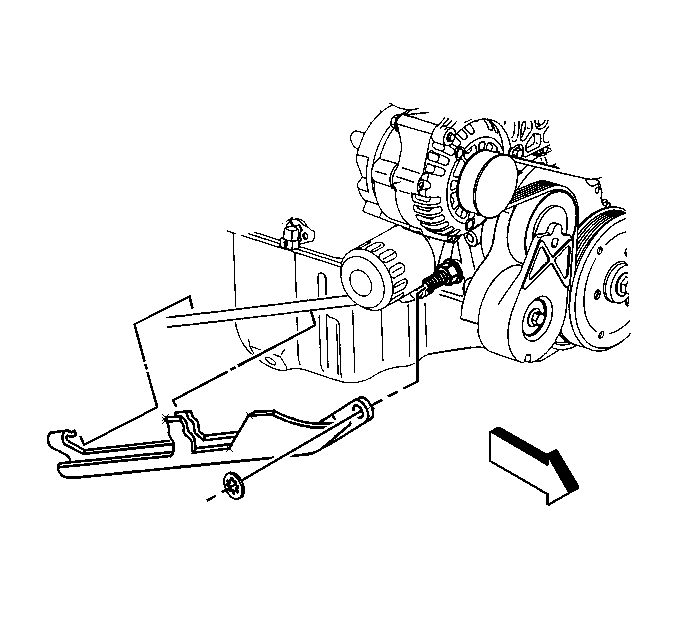
- Install the oil filter drain deflector
on the transmission brace rod, if equipped.
- Connect the exhaust pipe to the exhaust manifold. Refer to
Exhaust Manifold Pipe Replacement
in Engine Exhaust.
- Lower the vehicle.
- Install the manual transmission shift tower, if removed. Refer
to
Shift Tower Replacement
in Manual Transmission - NV 1500.
- Install the hood. Refer to
Hood Replacement
in Body
Front End.
- Connect the negative battery cable. Refer to
Battery Negative Cable Disconnection and Connection
in
Engine Electrical.
- Fill the crankcase with engine oil. Refer to
Engine Oil and Oil Filter Replacement
.
- Fill the cooling system with coolant. Refer to
Cooling System Draining and Filling
in
Engine Cooling.
- With the ignition OFF or disconnected, crank the engine several
times. Listen for any unusual noises or evidence that any of the parts are
binding.
- Start the engine and listen for unusual noises.
- Check the vehicle oil pressure gauge or light and confirm that
the engine has acceptable oil pressure.
If necessary, install an oil pressure gauge and measure the engine oil
pressure.
- Operate the engine at about 1,000 RPM until the engine
has reached normal operating temperature.
- Listen for improperly adjusted or sticking valves, sticking valve
lifters, or other unusual noises.
- Inspect for oil and/or coolant leaks while the engine is operating.
- Verify that the distributor is properly positioned.
- Perform a final inspection for the proper engine oil and coolant
levels.


