Removal Procedure
Tools Required
| • | J 36800 Camshaft Sprocket Timing Alignment Pin |
| • | J 39579 Camshaft Sprocket Wrench |
- Disconnect the negative battery cable.
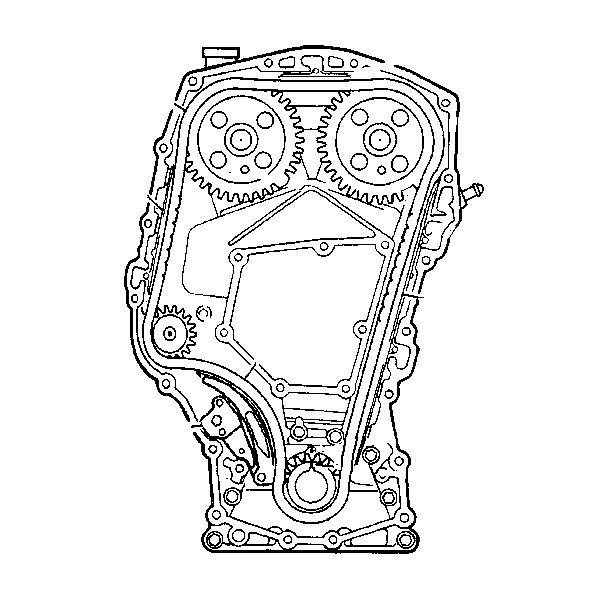
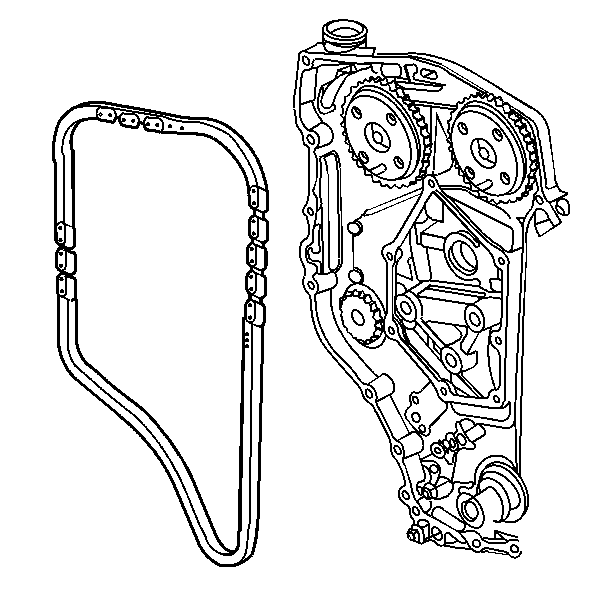
- Remove the engine front cover. Refer to Engine Front Cover Replacement .
- Rotate the crankshaft clockwise (as viewed from the front of the engine, normal rotation) until the camshaft sprocket timing dowel pin holes line up with the holes in the timing chain housing.
- The crankshaft sprocket keyway should point upwards and line up with the centerline of the cylinder bores. This is the Timed position.
- Remove the timing chain guides.
- Raise and support the vehicle. Refer to Lifting and Jacking the Vehicle in General Information.
- Ensure that all of the slack in the timing chain is above the tensioner assembly.
- Remove the timing chain tensioner.
- The timing chain must be disengaged from any wear grooves in the tensioner shoe in order to remove the shoe. Slide a screwdriver blade under the timing chain while pulling the shoe outward.
- If difficulty is encountered in removing the timing chain tensioner shoe, use the following procedure in order to remove the intake camshaft sprocket:
- Remove the tensioner assembly retaining bolts and tensioner.
- Mark the crankshaft sprocket and the timing chain outer surface.
- Remove the timing chain.
- Clean the old sealant off of the bolt with a wire brush.
- Clean the threaded hole in the camshaft with a round nylon bristle brush.
- Inspect the parts for wear and replace the parts as necessary.
Important:
• Before remove the timing chain, read the entire procedure. • The timing chain on the LD9 (VIN T) Twin Cam Engine is not to
be replaced with the timing chain from any other model year. The timing sprockets
are different on the Twin Cam engine and the shape of the links matches
the sprockets. Engine damage may result if the wrong timing chain is
used. • The timing chain and the crankshaft sprocket must be marked in
order to insure reassembly with the same side facing out at the time of reassembly.
Caution: Unless directed otherwise, the ignition and start switch must be in the OFF or LOCK position, and all electrical loads must be OFF before servicing any electrical component. Disconnect the negative battery cable to prevent an electrical spark should a tool or equipment come in contact with an exposed electrical terminal. Failure to follow these precautions may result in personal injury and/or damage to the vehicle or its components.
Notice: Do not attempt to pry the sprocket off the camshaft or damage to the sprocket or chain housing could occur.
| 10.1. | Lower the vehicle. |
| 10.2. | Hold the intake camshaft sprocket with the J 39579 Camshaft Sprocket Wrench and remove the sprocket bolt and washer. |
| 10.3. | Remove the washer from the bolt and rethread the bolt back into the camshaft by hand (the bolt provides a surface to push against). |
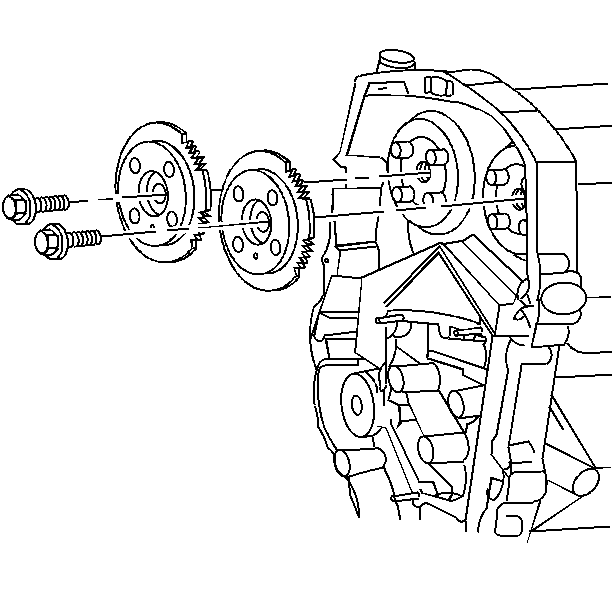
| 10.4. | Remove the intake camshaft sprocket. Use a three-jaw puller in the three relief holes in the sprocket. |
Important: The timing chain and the crankshaft sprocket must be marked prior to removal. If the chain or the crankshaft sprocket is installed with the wear pattern in the opposite direction, noise and increased wear may occur.
Some scoring of the timing chain shoe and the guides is normal.
Installation Procedure
- Install the intake camshaft sprocket onto the camshaft with the marked surface showing.
- Install the intake camshaft sprocket retaining bolt and washer.
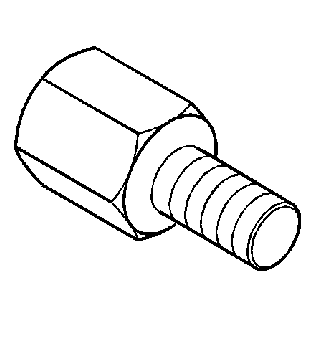
- Use Adhesive/Sealant Compound GM P/N 12345493 or equivalent on the camshaft sprocket bolt.
- Install the J 36800
- If the camshafts are out of position and must be rotated more than 1/8 turn in order to install the alignment dowel pins, use the following procedure:
- Install the timing chain over the exhaust camshaft sprocket, around the idler sprocket and around the crankshaft sprocket.
- Set the camshaft sprockets at the timed position and use the following procedure in order to install the timing chain:
- Leave the alignment dowel pins installed.
- Raise and support the vehicle. Refer to Lifting and Jacking the Vehicle
- With the slack removed from the chain between the intake camshaft sprocket and the crankshaft sprocket, the timing marks on the crankshaft and the cylinder block should be aligned. If the marks are not aligned, move the chain one tooth forward or rearward, remove the slack and the recheck marks.
- The timing chain tensioner must be reset on the workbench, refer to Camshaft Timing Chain, Sprocket, and Tensioner Installation
- Install the tensioner assembly to the chain housing.
- Install the timing chain tensioner bolts.
- Lower the vehicle enough to reach and remove the alignment dowel pins.
- Rotate the crankshaft clockwise (normal rotation) two full rotations.
- Align the crankshaft keyway with the mark on the cylinder block and reinstall alignment dowel pins.
- Alignment dowel pins will slide in easily if the engine is timed correctly.
- Install the timing chain guides.
- Install the engine front cover. Refer to Engine Front Cover Replacement
- Connect the negative battery cable.
Notice: Failure to follow this procedure could result in severe engine damage.
Notice: Use the correct fastener in the correct location. Replacement fasteners must be the correct part number for that application. Fasteners requiring replacement or fasteners requiring the use of thread locking compound or sealant are identified in the service procedure. Do not use paints, lubricants, or corrosion inhibitors on fasteners or fastener joint surfaces unless specified. These coatings affect fastener torque and joint clamping force and may damage the fastener. Use the correct tightening sequence and specifications when installing fasteners in order to avoid damage to parts and systems.
Tighten
Tighten the bolt to 70 N·m (52 lb ft) while
holding the sprocket with the J 39579
| 5.1. | The crankshaft must be rotated 90 degrees clockwise off of the TDC in order to give the valves adequate clearance to open. |
| 5.2. | Once the camshafts are in position and the dowels installed, rotate the crankshaft counter clockwise back to the top dead center. |
Notice: Do not rotate the crankshaft clockwise to TDC. Valve or piston damage could occur.
Important: The side of the timing chain that was marked during removal must be showing when the chain is installed.
| 7.1. | Remove the alignment dowel pin from the intake camshaft. |
| 7.2. | Use the J 39579 |
| 7.3. | Release the J 39579 |
| 7.4. | If properly timed the intake camshaft alignment dowel pin should slide in easily. If the dowel pin does not fully index, the camshafts are not timed correctly and the procedure must be repeated. |

Recheck the plunger assembly installation, it is correctly installed when the long end is toward the crankshaft.
Tighten
Tighten the bolts to 10 N·m (89 lb in).
Tighten
Tighten the bolt to 16 N·m (12 lb ft).
