Removal Procedure
Tools Required
| • | J 28733-B Front Hub Spindle Remover |
| • | J 29794 Drive Axle Removal Extension |
| • | J 2619-01 Slide Hammer |
| • | J 33008 Axle Remover |
- Raise and suitably support the vehicle. Refer to Lifting and Jacking the Vehicle in General Information.
- Remove the tire and the wheel assembly. Refer to Tire and Wheel Removal and Installation in Tires and Wheels.
- Place shop towels underneath the outer joint to protect from any sharp edges.
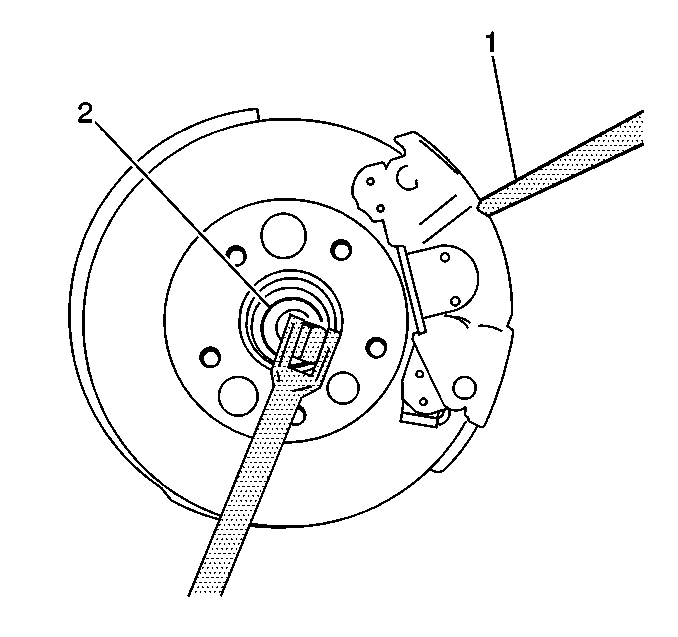
- Insert a drift (1) into the caliper and the rotor to prevent the rotor from turning.
- Remove the drive axle nut (2) and the washer.
- Remove the lower ball joint from the steering knuckle. Refer to Lower Control Arm Ball Joint Replacement in Front Suspension. If you remove the right axle, turn the wheel to the left. If you remove the left axle, turn the wheel to the right.
- Disconnect the wheel speed sensor harness. Refer to Front Wheel Speed Sensor Replacement in Antilock Brake System.
- Disconnect the stabilizer link from the lower control arm. Refer to Stabilizer Shaft Link Replacement in Front Suspension.
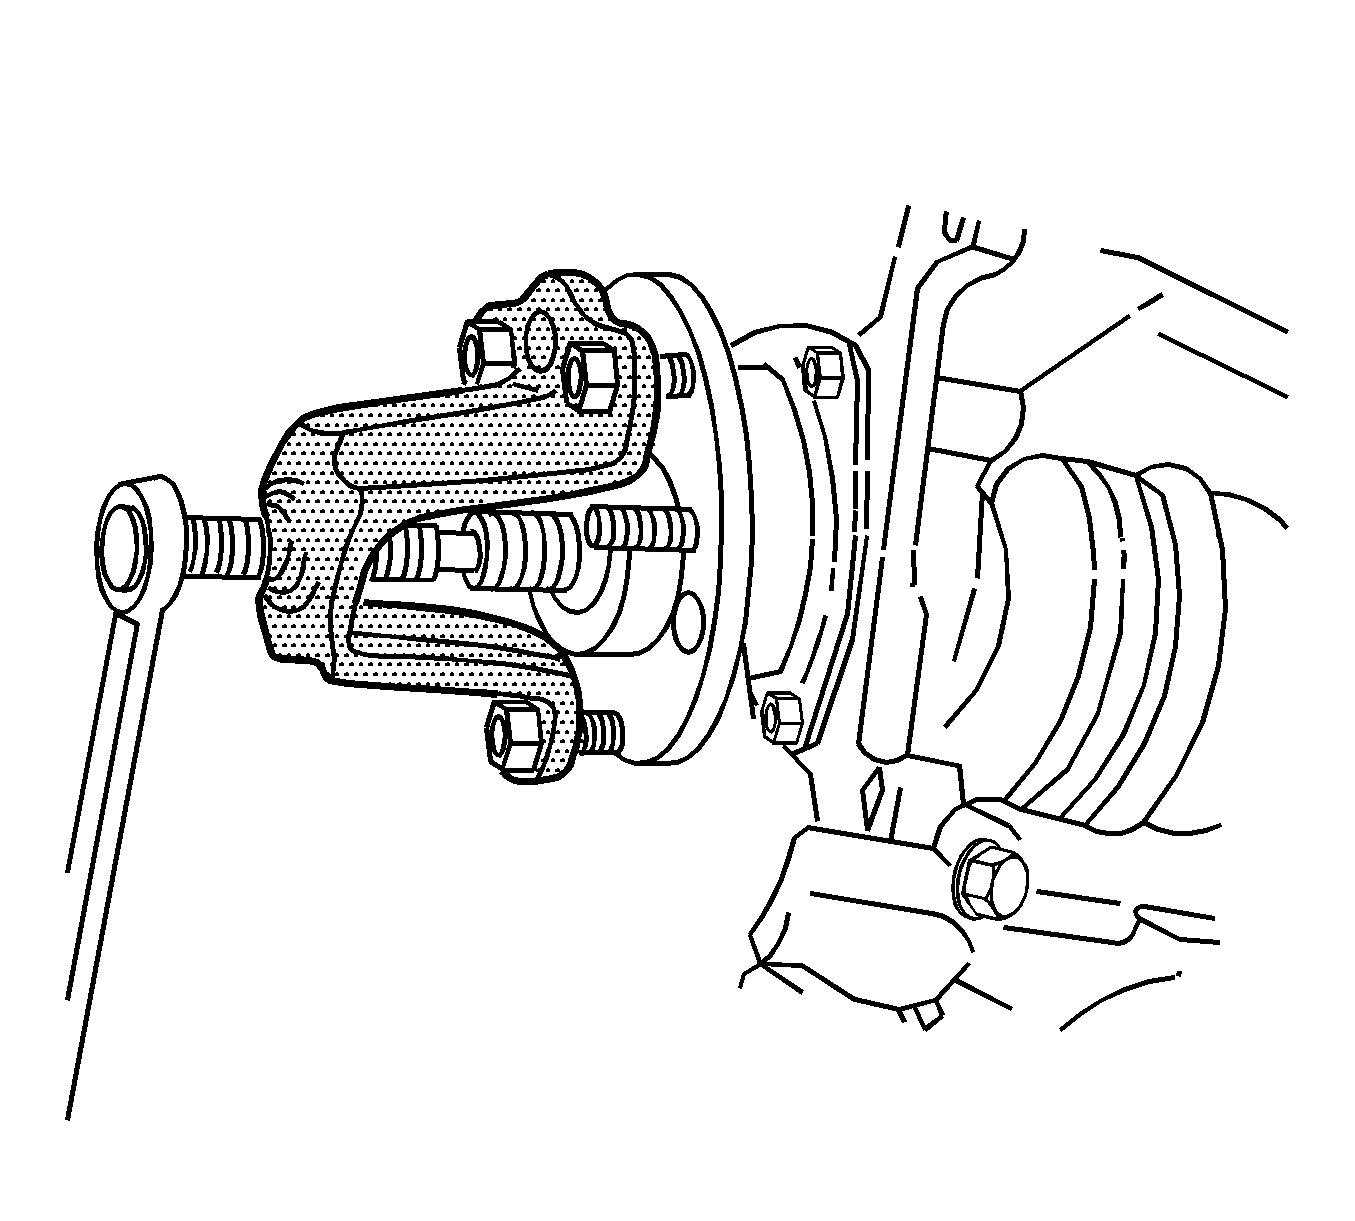
- Use the J 28733-B in order to disengage the axle from the hub and the bearing.
- Separate the hub and the bearing assembly from the drive axle. Move the strut and the knuckle assembly rearward.
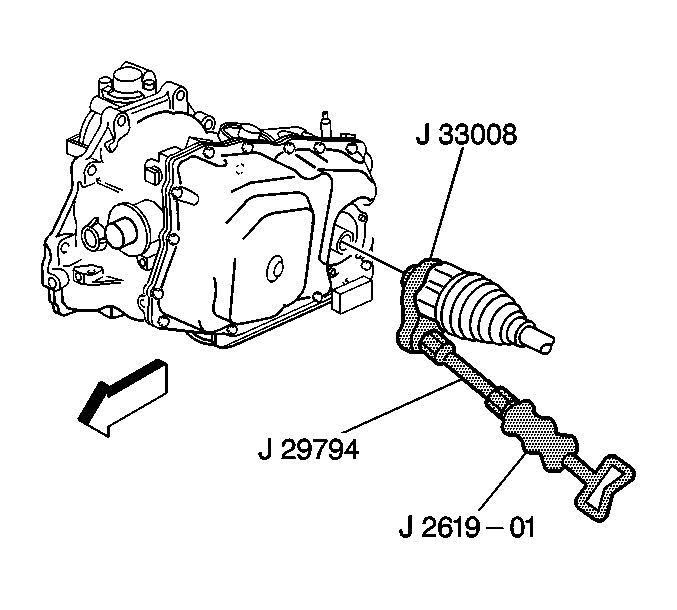
- Remove the inner joint from the transaxle using J 33008 attached to J 29794 and J 2619-01 .
Notice: Care must be exercised to prevent the constant-velocity joints from being over-extended. When either end of the drive axle is disconnected, over-extension of the joint could result in separation of internal components and possible joint failure. Drive axle joints and seals should be protected any time service is performed on or near the drive axles. Failure to observe this can result in interior joint or seal damage and possible joint failure.
Notice: Prior to removal of drive axle assembly, cover all sharp edges in the area of the drive axle with shop towels so that the seal is not damaged during removal.
Installation Procedure
Notice: Prior to installation of drive axle assembly, cover all sharp edges in the area of the drive axle with shop towels so that the seal is not damaged during installation.
Any time the front halfshaft is removed, the transmission (the halfshaft male and female shank) and the knuckle sealing surfaces should be inspected for debris or corrosion.
If debris or corrosion are present on the sealing surfaces, clean them with a 320 grit cloth or equivalent. Transmission fluid may be used to clean off any of the remaining debris. The surface should be wiped dry, and the halfshaft should be reinstalled free of any debris or corrosion buildup.
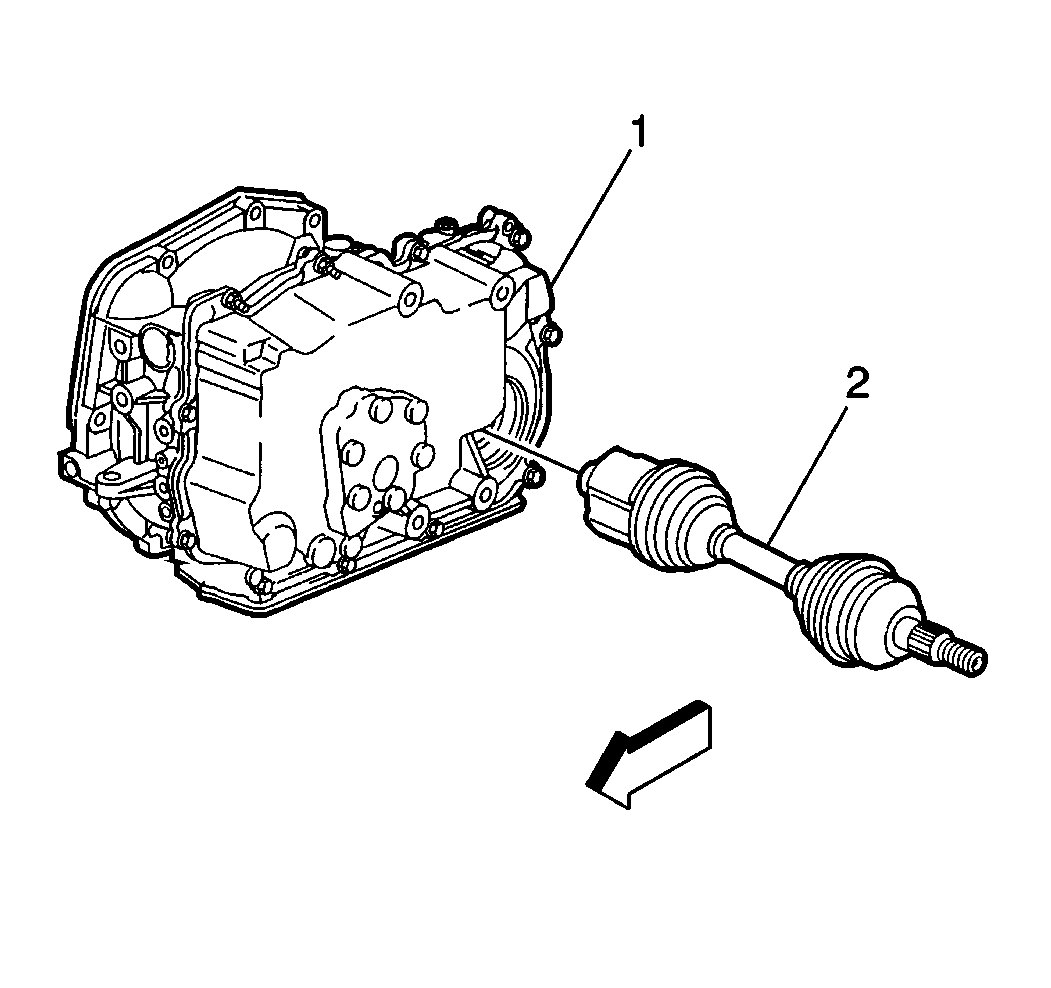
- Install the drive axle (2) into the transaxle (1). Place a non-ferrous drift into the groove on the joint housing and then tap until the drift is seated. Be careful not to damage the axle seal or dislodge the seal garter spring when you install the axle.
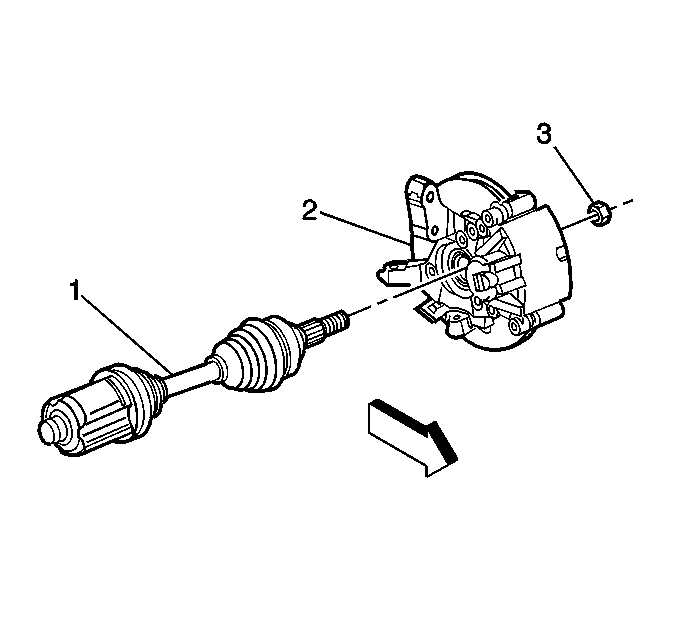
- Install the drive axle (1) into the hub and bearing assembly (2).
- Install the stabilizer link. Refer to Stabilizer Shaft Link Replacement in Front Suspension.
- Connect the wheel speed sensor harness. Refer to Front Wheel Speed Sensor Replacement in Antilock Brake System.
- Install the lower ball joint to the steering knuckle. Refer to Lower Control Arm Ball Joint Replacement in Front Suspension.
- Install the washer and the new drive axle nut (2).
- Install the tire and the wheel assembly. Refer to Tire and Wheel Removal and Installation in Tires and Wheels.
- Lower the vehicle.
Important: Verify that the drive axle is seated by grasping on the inner joint housing and pulling outboard.

Notice: Use the correct fastener in the correct location. Replacement fasteners must be the correct part number for that application. Fasteners requiring replacement or fasteners requiring the use of thread locking compound or sealant are identified in the service procedure. Do not use paints, lubricants, or corrosion inhibitors on fasteners or fastener joint surfaces unless specified. These coatings affect fastener torque and joint clamping force and may damage the fastener. Use the correct tightening sequence and specifications when installing fasteners in order to avoid damage to parts and systems.
Insert a drift (1) into the caliper and the rotor in order to prevent the rotor from turning.
Tighten
Tighten the drive axle nut to 200 N·m (144 lb ft).
