For 1990-2009 cars only
Removal Procedure
- Remove the left or right sound insulator panel. Refer to Instrument Panel Insulator Replacement in Instrument Panel, Gauges and Console.
- Remove the windshield side upper garnish moldings. Refer to Windshield Pillar Garnish Molding Replacement in Interior Trim.
- Remove the sunshades. Refer to Sunshade Replacement in Interior Trim.
- Remove the sunroof control switch. Refer to Sunroof Switch Replacement .
- Remove the sunroof opening trim lace. Refer to Sunroof Opening Trim Finish Lace Replacement .
- Remove the headliner as required. Refer to Headlining Trim Panel Replacement .
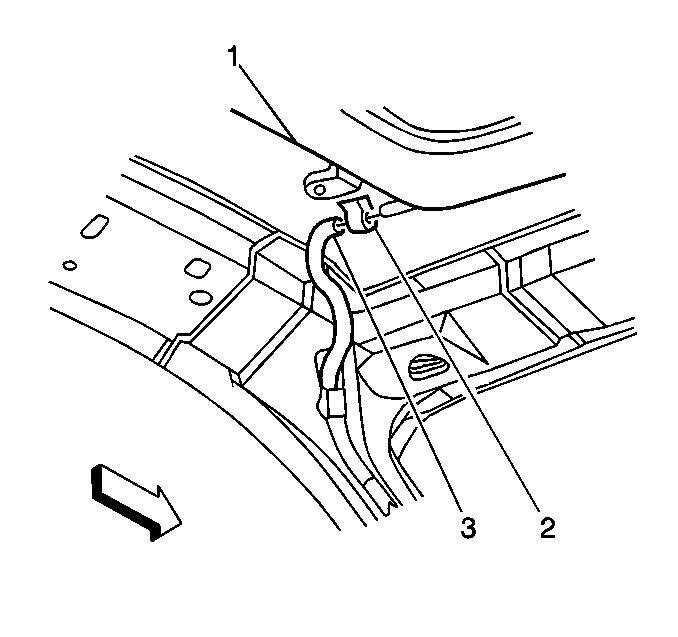
- Disconnect the drain hose (3) connection from the sunroof module (1).
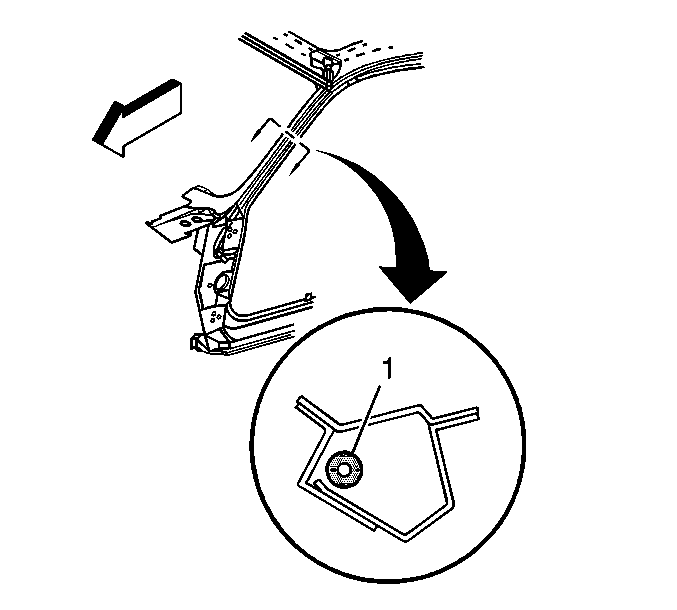
- Cut through the sealer that is located inside the bottom of the A-pillar in order to loosen the drain hose (3).
- Remove the sunroof drain hose (3).

Use a stiff rod bent at 90 degrees.
Installation Procedure
- Route the sunroof front drain hose (1) through the A-pillar and into the drain hole. The drain hose is located near the door hinges.
- Connect the sunroof front drain hose (3) connection to the sunroof module (1).
- Apply sealer to the inside bottom of the A-pillar and around the sunroof front drain hose (3).
- Install the sunroof opening trim lace. Refer to Sunroof Opening Trim Finish Lace Replacement .
- Install the sunroof control switch. Refer to Sunroof Switch Replacement .
- Install the sunshade. Refer to Sunshade Replacement in Interior Trim.
- Install the windshield side upper garnish moldings. Refer to Windshield Pillar Garnish Molding Replacement in Interior Trim.
- Install the left or right sound insulator panel. Refer to Instrument Panel Insulator Replacement in Instrument Panel, Gauges and Console.
- Install the headliner. Refer to Headlining Trim Panel Replacement .


