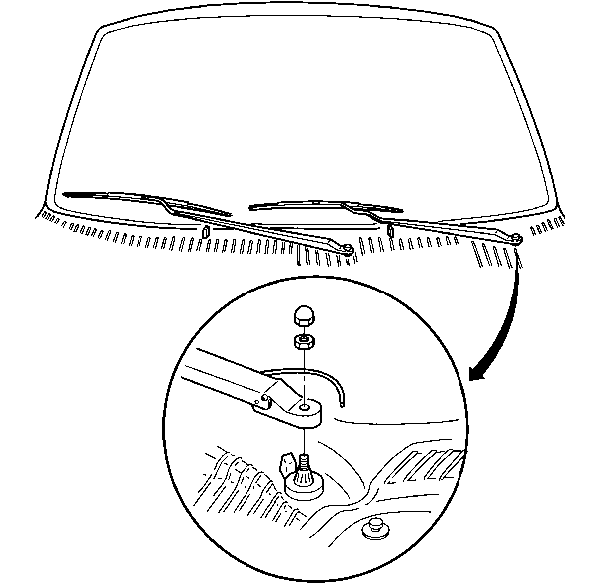
Removal Procedure
- Place the wiper arms in the park position.
- Open the hood.
- Install a protective covering over the fenders.
- Remove the washer hose from the washer nozzle.
- Remove the cover from the nut.
- Remove the nut from the wiper arm and the wiper transmission drive shaft.
- Remove the wiper arm from the wiper transmission drive shaft by rocking.

Important: Use a battery terminal puller to remove the wiper arms if they cannot be removed by rocking.
Installation Procedure
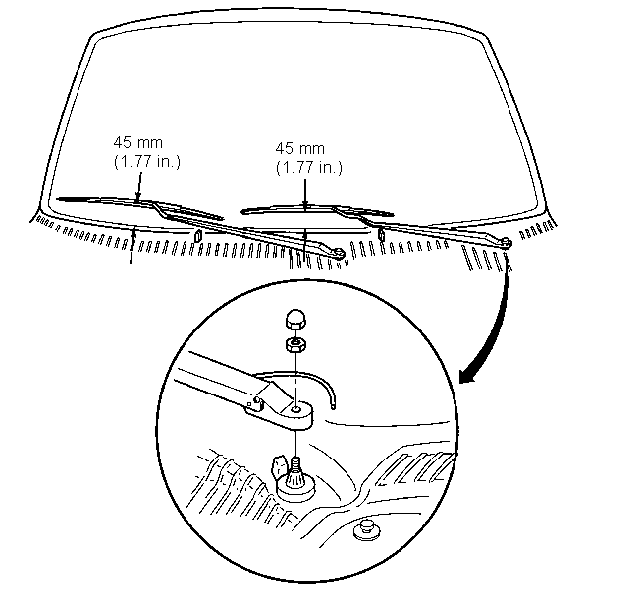
- Install the wiper arm onto the wiper transmission drive shaft while maintaining a distance of 45 mm (1.77 in) between the wiper blade and the bottom of the windshield.
- Install the nut onto the wiper transmission drive shaft and the wiper arm.
- Place the cover on the nut.
- Connect the washer hose to the washer nozzle.
- Remove the protective covering from the fenders.
- Close the hood.
- Operate the wipers and inspect for proper operation.

Important: Hold the measuring device at 90 degrees (perpendicular) to the wiper blade.
Notice: Use the correct fastener in the correct location. Replacement fasteners must be the correct part number for that application. Fasteners requiring replacement or fasteners requiring the use of thread locking compound or sealant are identified in the service procedure. Do not use paints, lubricants, or corrosion inhibitors on fasteners or fastener joint surfaces unless specified. These coatings affect fastener torque and joint clamping force and may damage the fastener. Use the correct tightening sequence and specifications when installing fasteners in order to avoid damage to parts and systems.
Tighten
Tighten the nut to 30 N·m (22 lb ft).
Important: Lubricate the washer hose with windshield washer solvent in order to ease installation onto the washer nozzle.
