For 1990-2009 cars only
Removal Procedure
- Raise and support the vehicle. Refer to Lifting and Jacking the Vehicle in General Information.
- Pull and hold the cable towards the rear of the car in order to create slack in the cable.
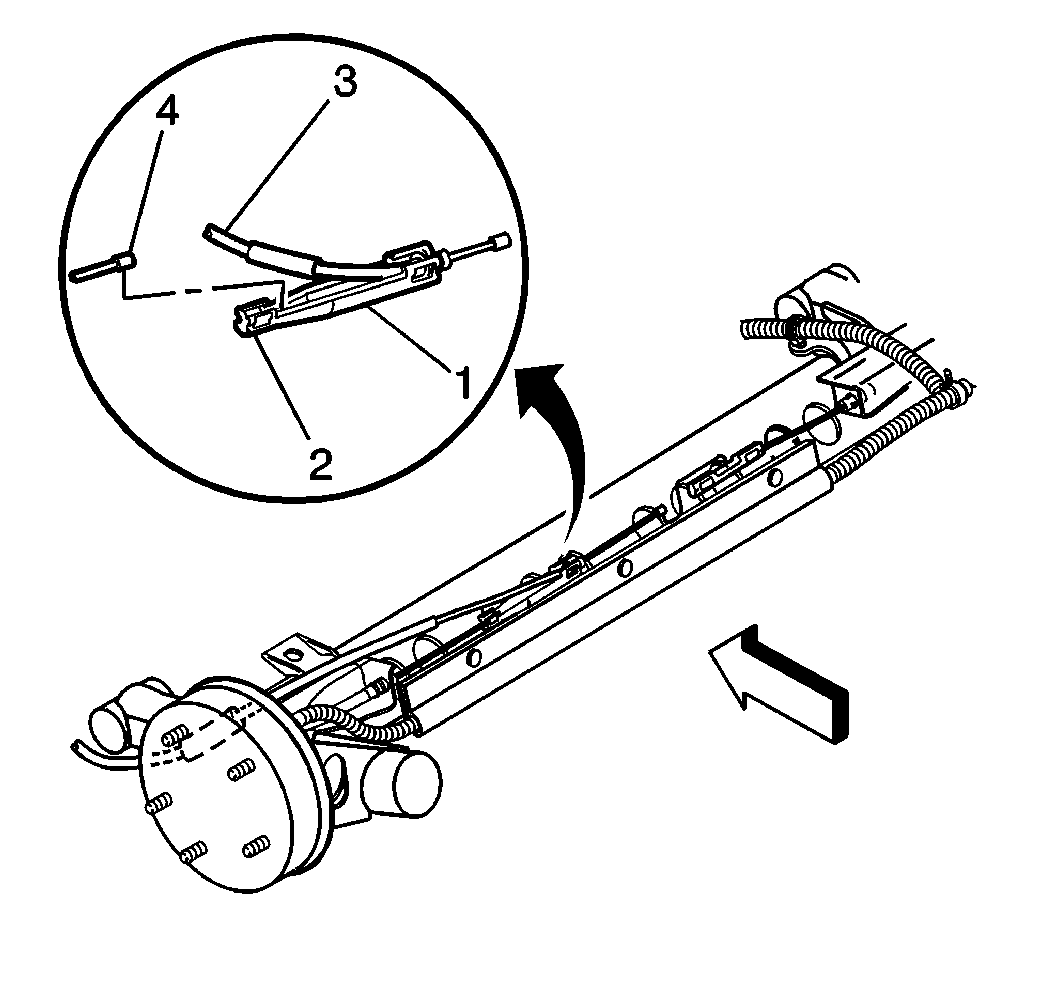
- Bend the tang (2) on the connector (1) in order to allow cable removal.
- Disconnect the cable (3) from the connector (1).
- Fold over the retaining clip.
- Disconnect the cable (3) from the equalizer.
- Remove the safety stands. Lower the vehicle.
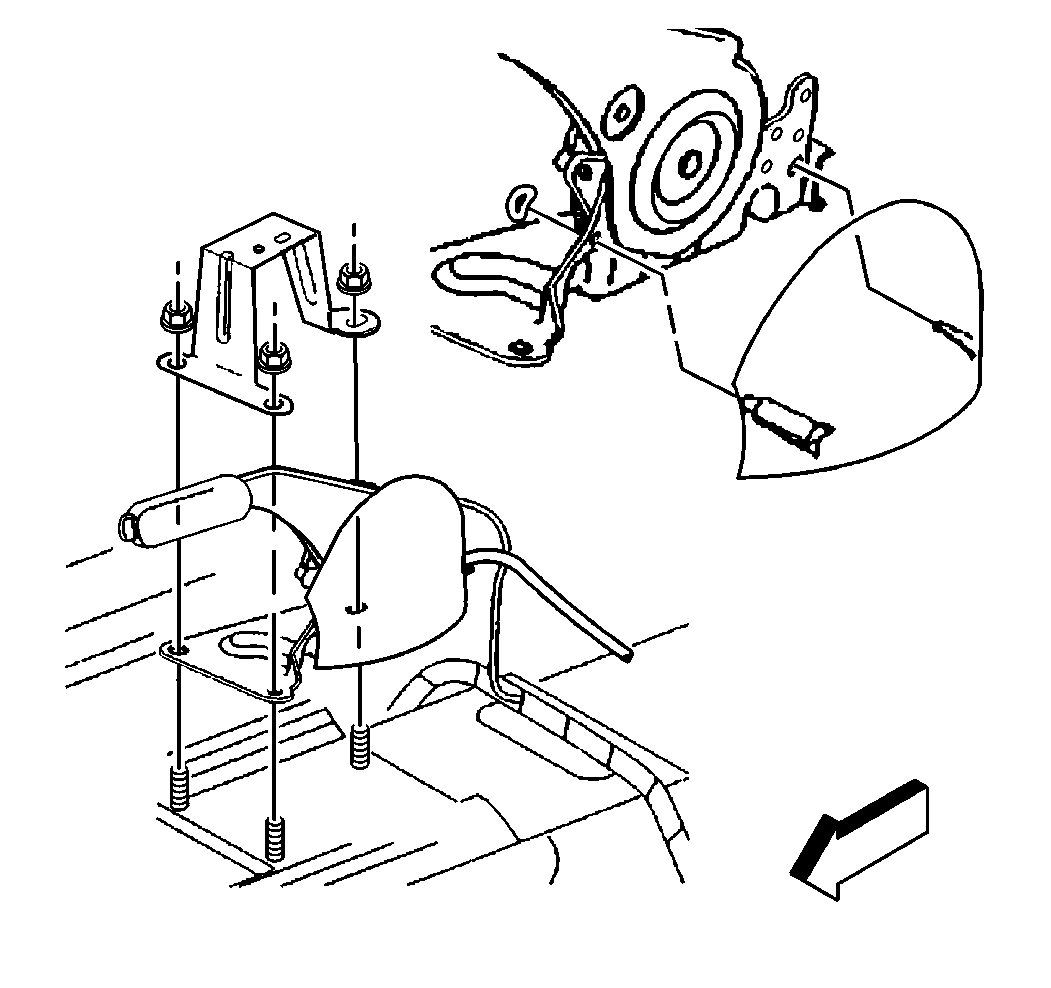
- Remove the console. Refer to Console Replacement in Instrument Panel, Gauges and Console. If you are repairing a Pontiac, remove the shifter boot. Refer to Console Replacement in Interior Trim.
- Move the lever to the OFF position.
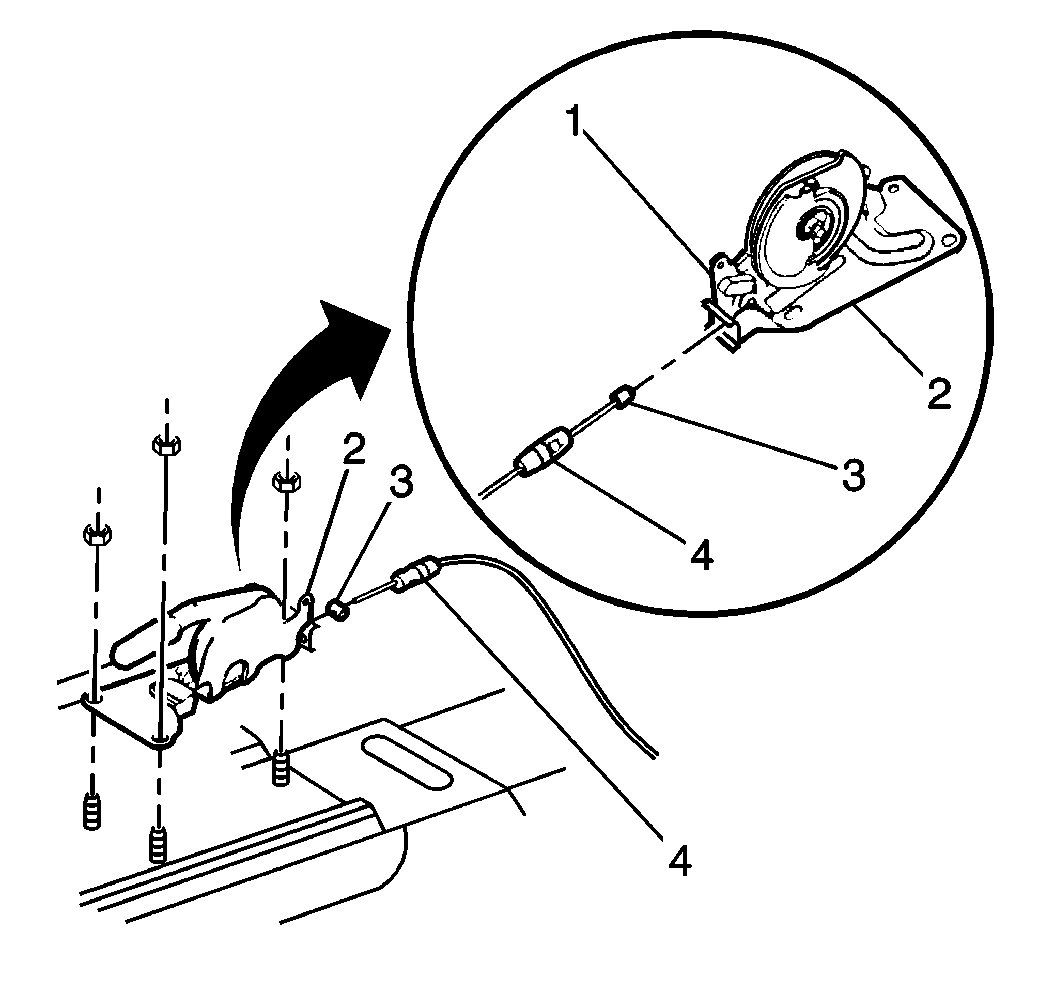
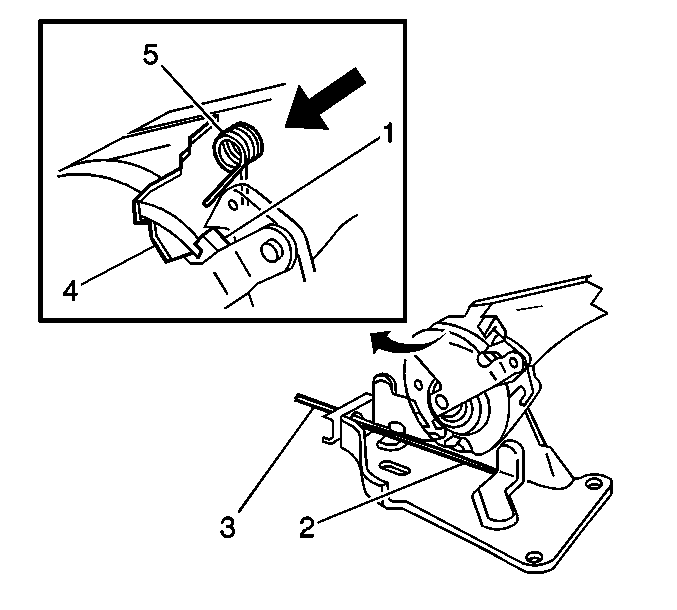
- Remove the cable conduit end fitting (3) from the lever assembly (1).
- Pull the cable (3) until the notch on the ratchet (1) is visible through the cover plate opening (4).
- Push the pawl spring downward toward the notch in the ratchet.
- Release the cable (3) slowly in order to allow the notch to catch the leg of the spring (5).
- Remove the front parking brake cable button (2) from the reel assembly.
- Remove the left door sill plate. Refer to Door Sill Plate Replacement in Interior Trim.
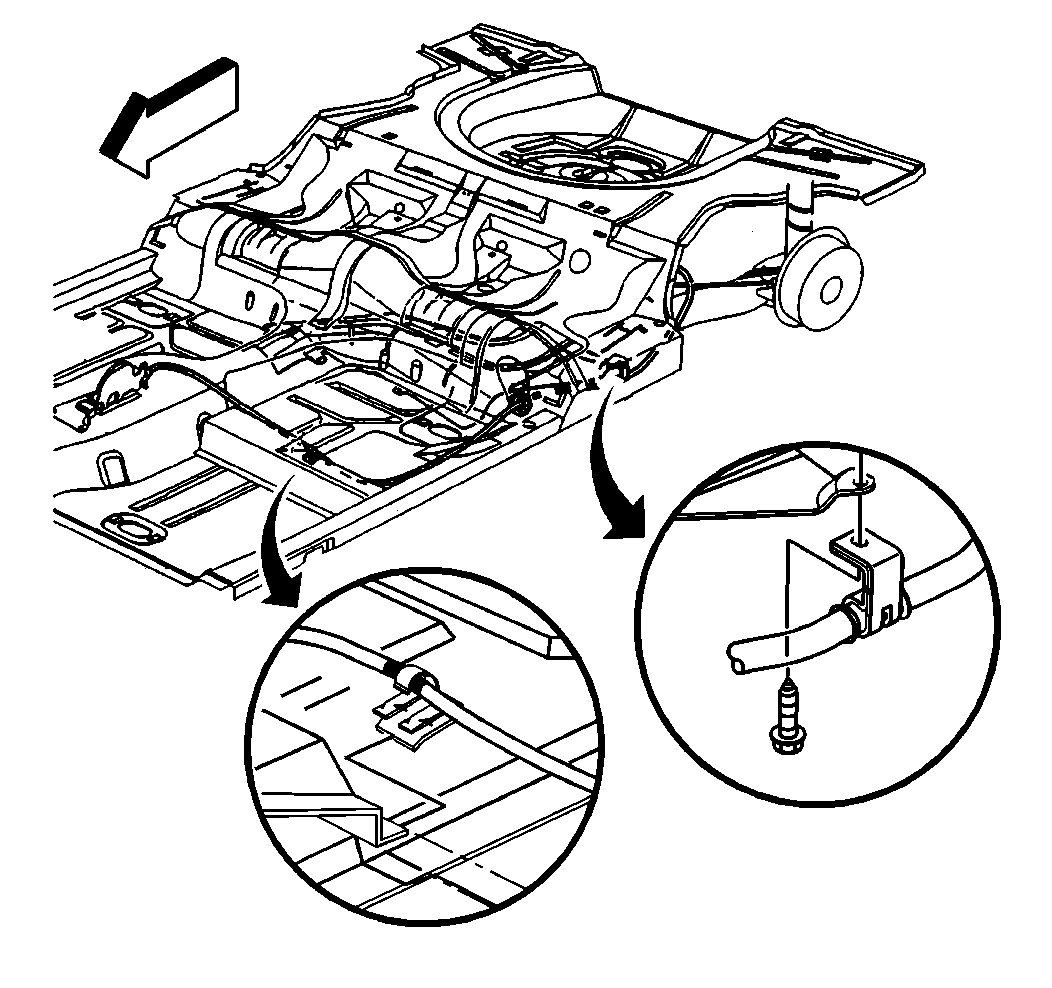
- Remove the grommet and retainer from the floor pan.
- Remove the cable from the clip.
- Remove the front cable.

Installation Procedure
- Install the cable through the floor pan, from the interior to the exterior.
- Install the cable conduit fitting to the lever assembly.
- Install the front parking brake cable button to the reel assembly.
- Install the cable into the clip.
- Install the console. Refer to Console Replacement in Instrument Panel, Gauges and Console.
- Install the shifter boot if you are repairing a Pontiac. Refer to Console Trim Plate Replacement in Interior Trim.
- Install the left door sill plate. Refer to Door Sill Plate Replacement in Interior Trim.
- Raise and support the vehicle. Refer to Lifting and Jacking the Vehicle in General Information.
- Fold over the bracket to the body.
- Install the cable (3) to the equalizer assembly.
- Install the cable to the connector (1).
- Bend the tang (2) on the connector (1) in order to retain the cable.
- Remove the safety stands. Lower the vehicle.
- Fully apply and release the hand brake 4-6 times in order to activate the self adjust system.


Notice: Parking brake adjustment is not necessary. This is a self adjusting system and damage may result from attempting to adjust or modify this system in any way. It may be necessary to adjust the rear brakes to obtain the proper tension in the system.
