Disassembly Procedure

- Remove the wheel cylinder
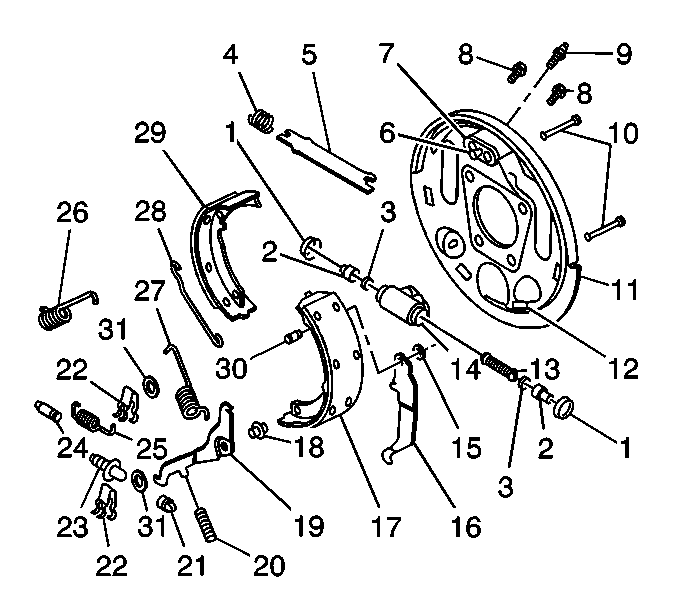
(14) from the vehicle. Refer to
Wheel Cylinder Replacement
.

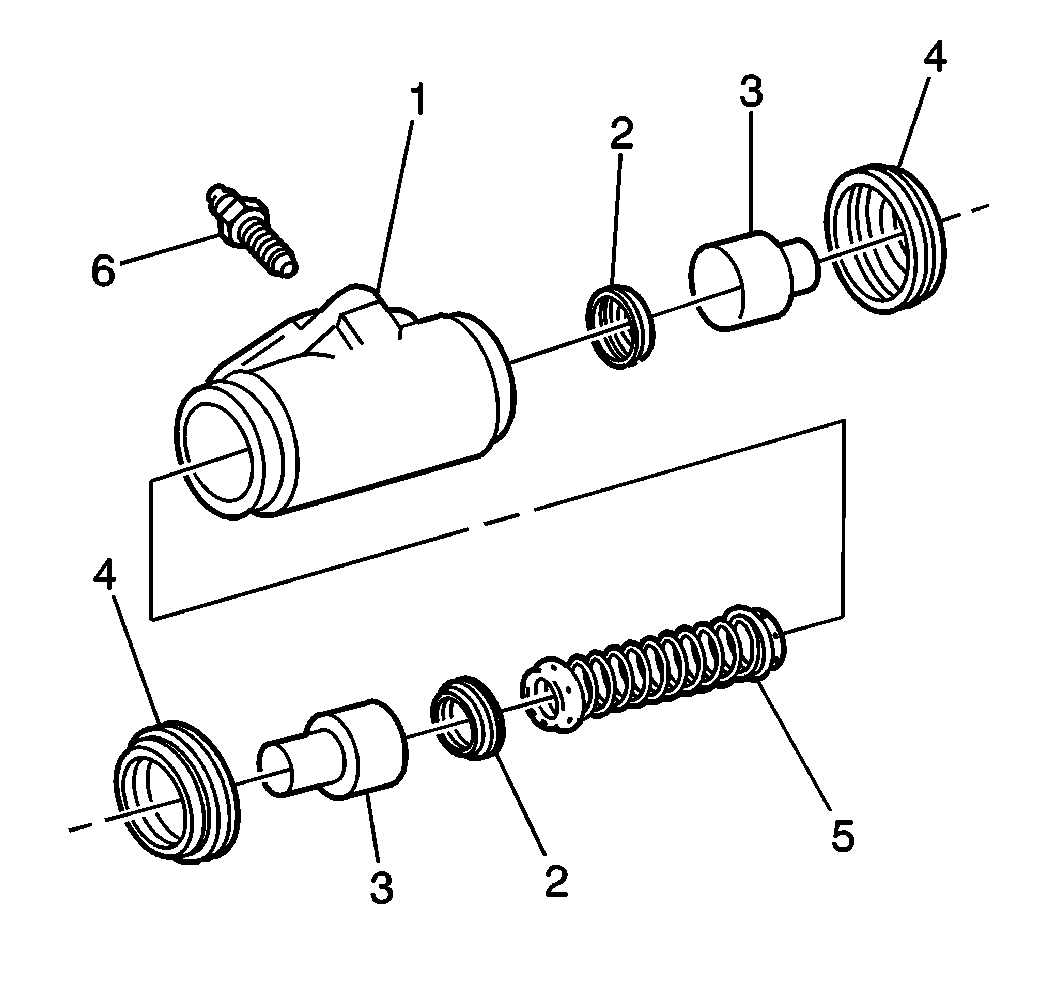
- Remove the wheel cylinder
boots (4).
- Remove the wheel cylinder pistons (3) and seals (2).
- Remove the wheel cylinder spring assembly (5).
- Remove the wheel cylinder bleeder valve (6).
- Inspect the cylinder bore (1) and pistons (3) for
the following conditions:
- Use a crocus cloth in order to polish out light corrosion. Replace
the wheel cylinder assembly if the bore does not clean up using the crocus
cloth.
- Clean all the parts in clean, denatured alcohol.
- Dry the parts with unlubricated, compressed air.
Caution: Avoid taking the following actions when you service wheel brake parts:
| • | Do not grind brake linings. |
| • | Do not sand brake linings. |
| • | Do not clean wheel brake parts with a dry brush or with compressed air. |
Notice: Brake fluid will damage electrical connections and painted surfaces.
Use shop cloths, suitable containers, and fender covers to prevent brake fluid
from contacting these areas. Always re-seal and wipe off brake fluid containers
to prevent spills.
- Lubricate the new seals (2) with clean brake fluid.
Assembly Procedure

Notice: Use the correct fastener in the correct location. Replacement fasteners
must be the correct part number for that application. Fasteners requiring
replacement or fasteners requiring the use of thread locking compound or sealant
are identified in the service procedure. Do not use paints, lubricants, or
corrosion inhibitors on fasteners or fastener joint surfaces unless specified.
These coatings affect fastener torque and joint clamping force and may damage
the fastener. Use the correct tightening sequence and specifications when
installing fasteners in order to avoid damage to parts and systems.
- Install the bleeder
valve (6).
Tighten
Tighten the bleeder valve to 7 N·m (62 lb in).
- Install the spring assembly (5).
- Install the following components:
- Install the wheel cylinder to the vehicle. Refer to
Wheel Cylinder Replacement
.


