For 1990-2009 cars only
Engine Mount Replacement Left
Removal Procedure
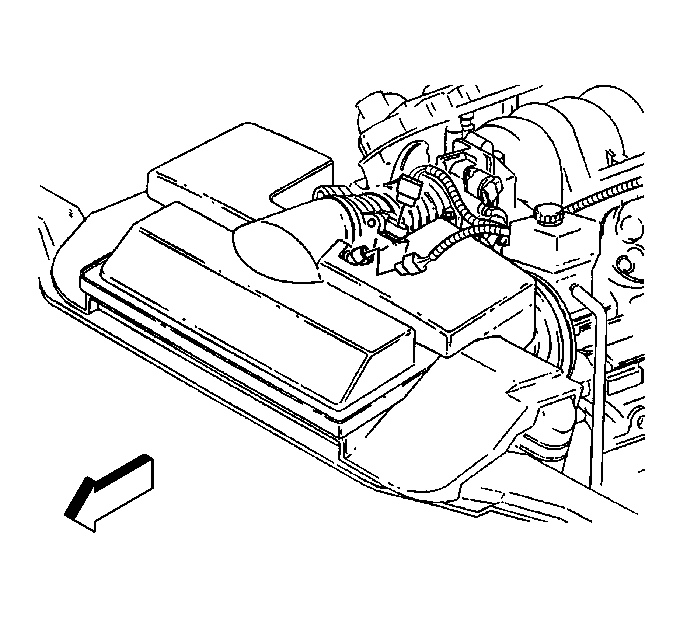
- Disconnect the intake air temperature (IAT) sensor electrical connector.
- Disconnect the mass airflow (MAF) sensor electrical connector.
- Remove the air intake duct from the throttle body and the air cleaner box.
- Install the engine support fixture. Refer to Engine Support Fixture .
- Raise and suitably support the vehicle. Refer to Lifting and Jacking the Vehicle in General Information.
- Remove the left oxidation catalytic converter. Refer to Oxidation Catalytic Converter Replacement in Engine Exhaust.
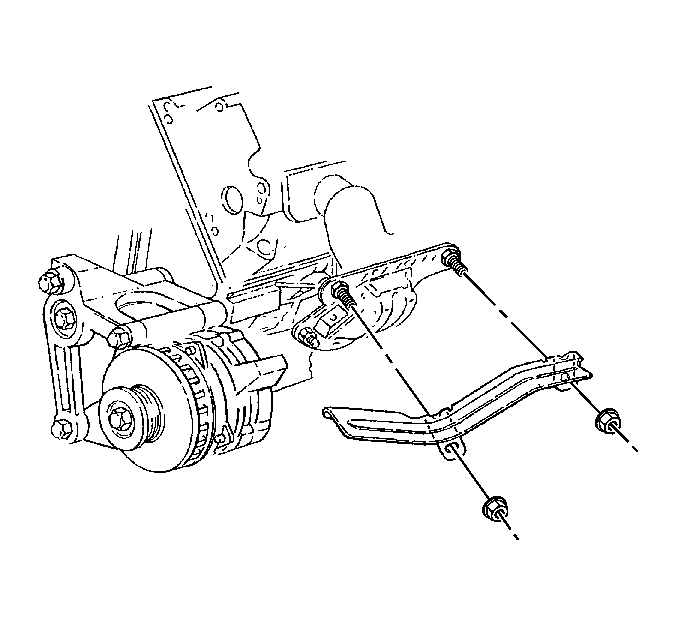
- Remove the engine mount heat shield nuts.
- Remove the engine mount heat shield.
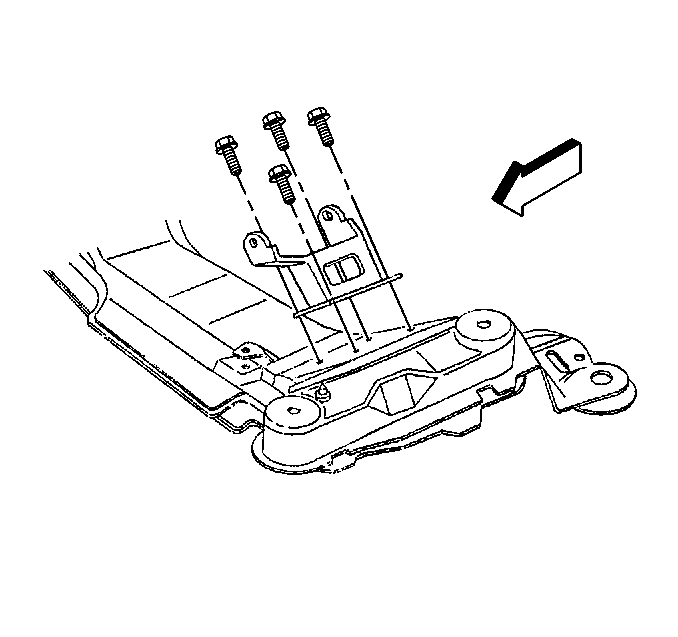
- Remove the engine mount bracket to crossmember bolts.
- Lower the vehicle.
- Raise the left side of the engine using the support fixture in order to remove tension on the engine mount.
- Raise and suitably support the vehicle. Refer to Lifting and Jacking the Vehicle in General Information.
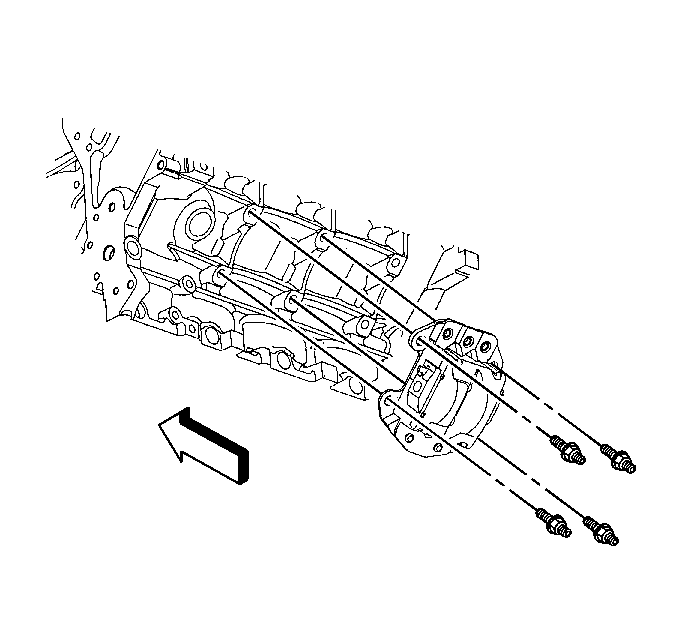
- Remove the engine mount bracket to block studs.
- Remove the engine mount assembly.
- Separate the upper and lower mount on the bench.

Installation Procedure
- Loosely install the upper and lower mount together on the bench.
- Install the engine mount assembly.
- Loosely install the engine mount bracket to block studs.
- Lower the vehicle.
- Lower the left side of the engine using the support fixture.
- Raise and suitably support the vehicle. Refer to Lifting and Jacking the Vehicle in General Information.
- Install the engine mount bracket to crossmember bolts.
- Tighten the engine mount through bolt and mount nut.
- Install the engine mount heat shield.
- Install the engine mount heat shield nuts.
- Install the left oxidation catalytic converter. Refer to Oxidation Catalytic Converter Replacement in Engine Exhaust.
- Lower the vehicle.
- Remove the engine support fixture.
- Install the air intake duct to the throttle body and the air cleaner box.
- Connect the IAT sensor electrical connector.
- Connect the MAF sensor electrical connector.


Tighten
| • | Tighten the engine mount bracket to crossmember bolts to 58 N·m (43 lb ft). |
| • | Tighten the engine mount bracket to block studs to 50 N·m (37 lb ft). |
Tighten
| • | Tighten the engine mount through bolt to 95 N·m (70 lb ft). |
| • | Tighten the engine mount through bolt nut to 80 N·m (59 lb ft). |

Tighten
Tighten the engine mount heat shield nuts to 10 N·m (89 lb in).


Engine Mount Replacement Right
Removal Procedure
- Disconnect the intake air temperature (IAT) sensor electrical connector.
- Disconnect the mass airflow (MAF) sensor electrical connector.
- Remove the air intake duct from the throttle body and the air cleaner box.
- Install the engine support fixture. Refer to Engine Support Fixture .
- Raise and suitably support the vehicle. Refer to Lifting and Jacking the Vehicle in General Information.
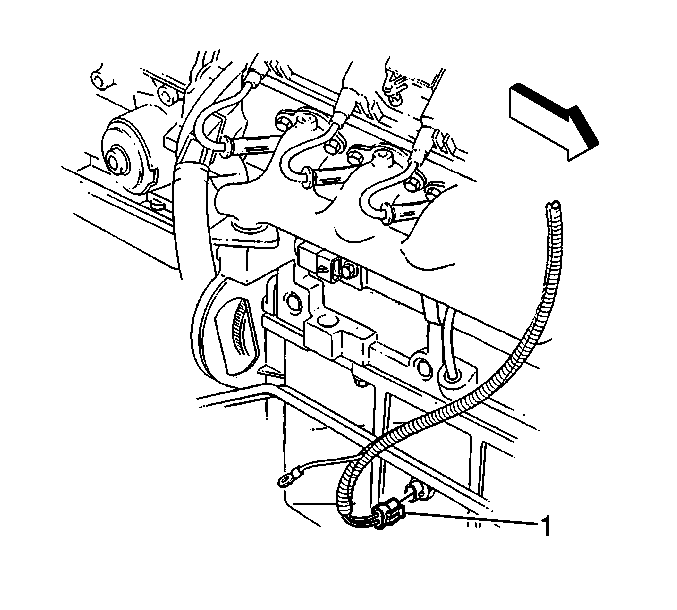
- Disconnect the oil level sensor electrical connector (1).
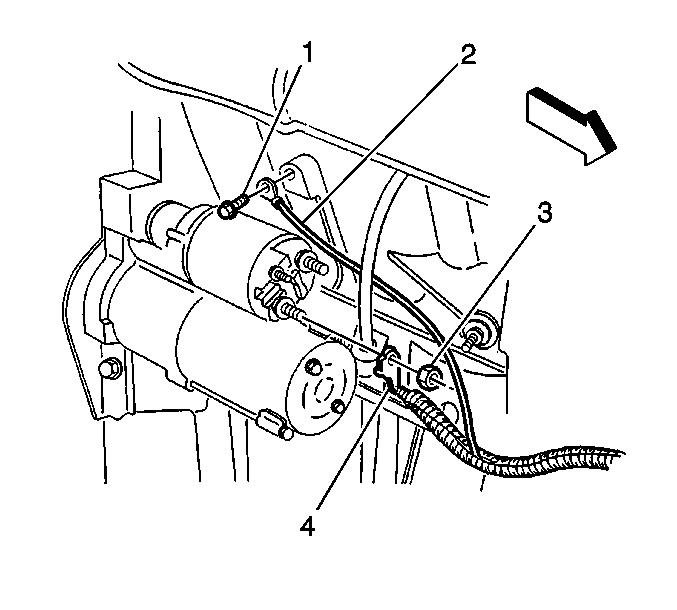
- Remove the negative battery cable lead to engine block bolt (1).
- Remove the starter motor. Refer to Starter Motor Replacement in Engine Electrical.
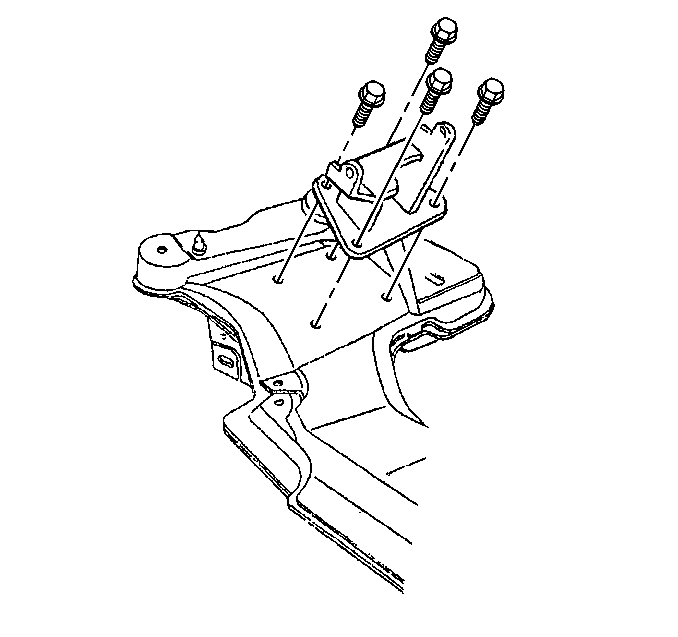
- Remove the engine mount bracket to crossmember bolts.
- Lower the vehicle.
- Raise the right side of the engine using the support fixture in order to remove tension on the engine mount.
- Raise and suitably support the vehicle. Refer to Lifting and Jacking the Vehicle in General Information.
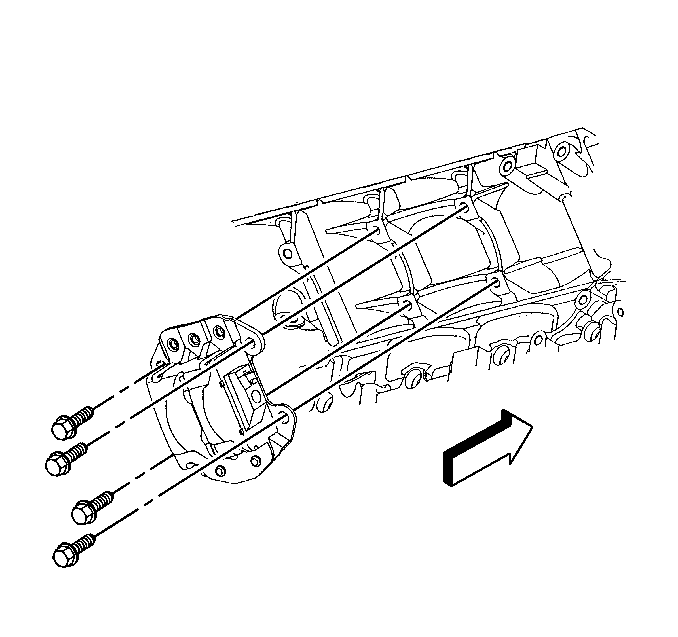
- Remove the engine mount bracket to block bolts.
- Remove the engine mount assembly.
- Separate the upper and lower mount on the bench.


Installation Procedure
- Loosely install the upper and lower mount together on the bench.
- Loosely install the engine mount bracket to block bolts.
- Lower the vehicle.
- Lower the right side of the engine using the support fixture.
- Raise and suitably support the vehicle. Refer to Lifting and Jacking the Vehicle in General Information.
- Install the engine mount bracket to crossmember bolts.
- Tighten the engine mount through bolt and mount nut.
- Install the starter motor. Refer to Starter Motor Replacement in Engine Electrical.
- Install the negative battery cable lead to engine block bolt (1).
- Connect the oil level sensor electrical connector (1).
- Lower the vehicle.
- Remove the engine support fixture.
- Install the air intake duct to the throttle body and the air cleaner box.
- Connect the IAT sensor electrical connector.
- Connect the MAF sensor electrical connector.


Tighten
| • | Tighten the engine mount bracket to crossmember bolts to 58 N·m (43 lb ft). |
| • | Tighten the engine mount bracket to block bolts to 50 N·m (37 lb ft). |
Tighten
| • | Tighten the engine mount through bolt to 95 N·m (70 lb ft). |
| • | Tighten the engine mount through bolt nut to 80 N·m (59 lb ft). |

Tighten
Tighten the negative battery cable lead to engine block bolt (1) to
32 N·m (24 lb ft)


