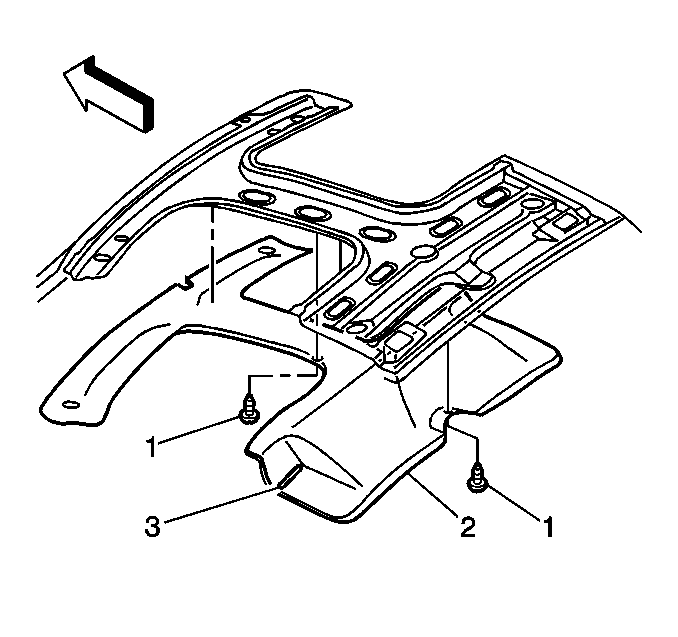
For 1990-2009 cars only
Removal Procedure
- Remove the lift-off windows from the roof panel, if equipped.
- Open the rear compartment lift window.
- Remove the sunshade. Refer to Sunshade Replacement .
- Remove the dome lamp housing.
- Remove the upper garnish molding from the windshield pillar. Refer to Windshield Pillar Garnish Molding Replacement .
- Remove the cargo area trim panel. Refer to Cargo Area Side Trim Panel Replacement .
- Loosen the seat belt escutcheons.
- Slide the seat belt downward.
- Remove the retainers (1) from the headliner panel (2).
- Pull on the headliner panel (2) in order to remove the panel from the roof panel.
- Slide the seat belt through the seat belt slots (3).
- Remove the headliner panel (2) from the vehicle through the opening in the rear compartment lift window.

Installation Procedure
- Peel the backing from the new headliner panel tape. Apply the tape to the depressions in the roof panel.
- Place the headliner panel (2) in the vehicle through the opening in the rear compartment lift window.
- Insert the seat belt into the seat belt slots (3).
- Pull the dome lamp electrical connector through the opening.
- Apply pressure at the centerline of the headliner panel (2) in order to engage the tape.
- Install the retainer (1) to the headliner panel (2).
- Slide the seat belt escutcheons up the seat belt.
- Snap the escutcheons into the retractor.
- Install the cargo area trim panel. Refer to Cargo Area Side Trim Panel Replacement .
- Install the upper garnish molding to the windshield pillar. Refer to Windshield Pillar Garnish Molding Replacement .
- Install the dome lamp housing.
- Install the sunshade. Refer to Sunshade Replacement .
- Close the rear compartment window.
- Install the lift-off windows to the roof panel, if equipped.
Important: The headlining panel is partially held in place with headlining panel
tape or 2-color matched retainers with lift-off windows. The headlining panel
is completely held in place when the following components are installed:
• The interior moldings • The sunshade • The dome lamp housing

