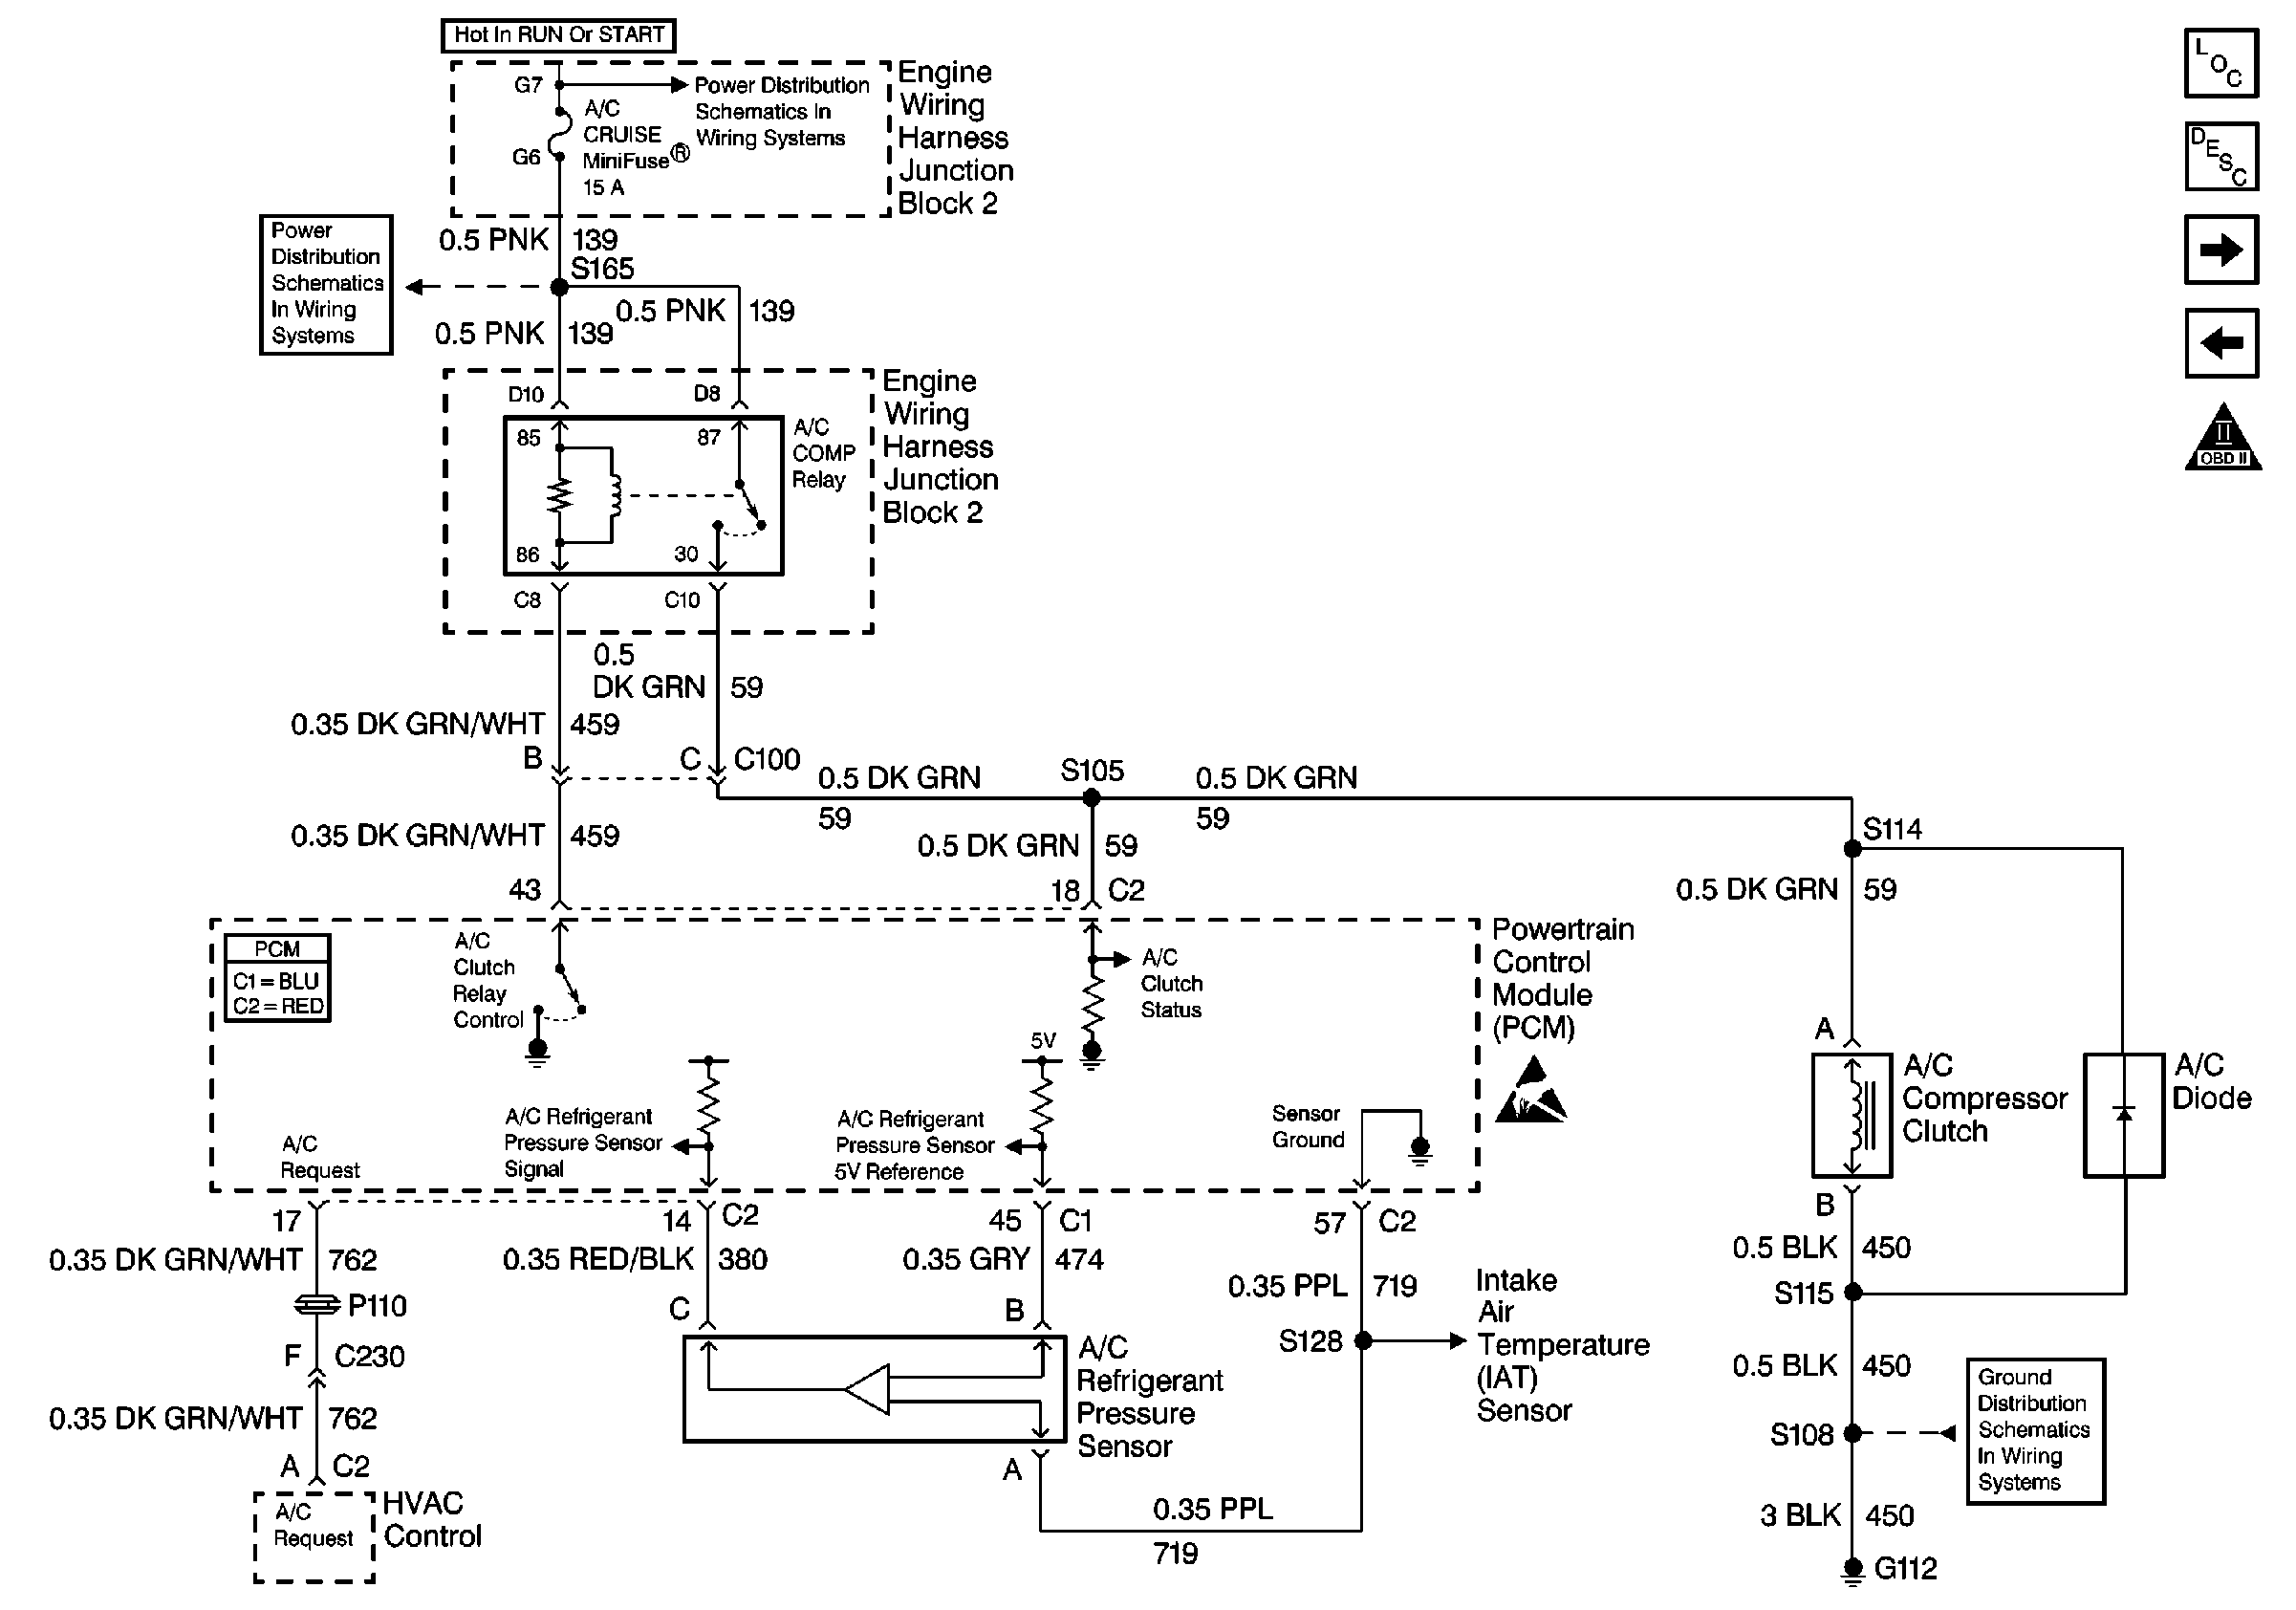
Refer to Engine Controls Schematics,
A/C Compressor Control

for complete circuit
details.
Circuit Description
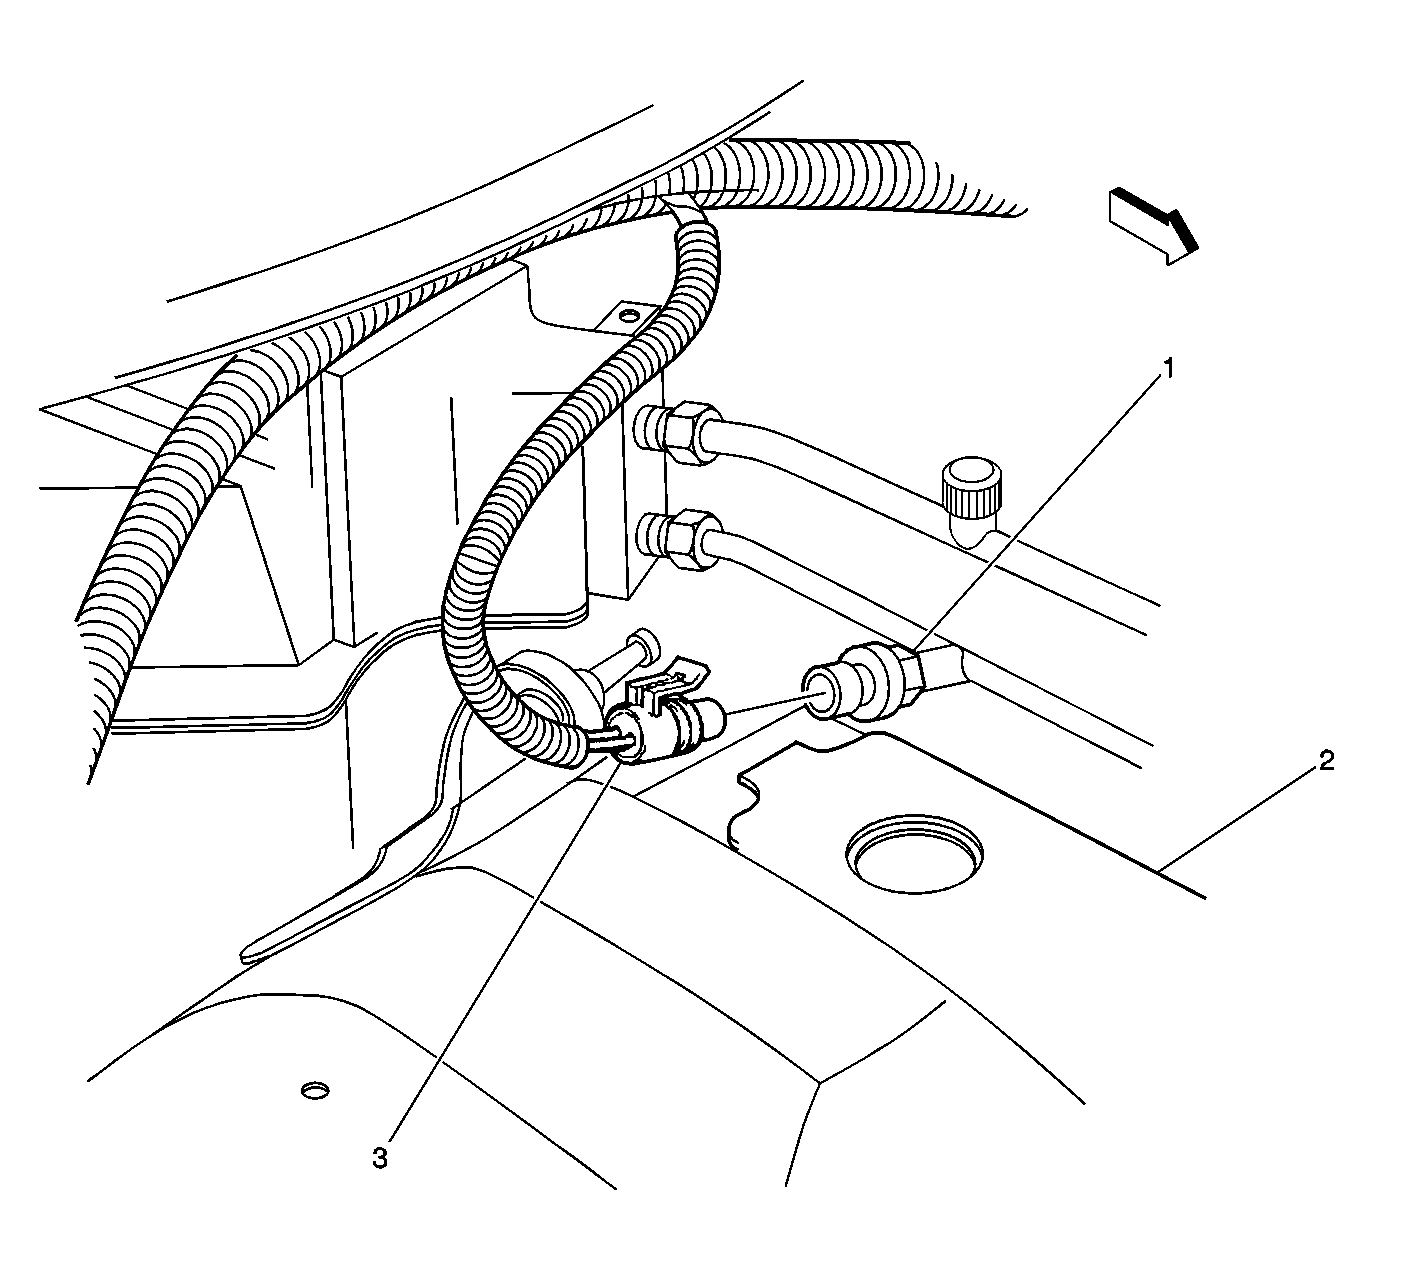
The A/C system uses an A/C refrigerant pressure sensor mounted in the high side of the A/C system to monitor A/C refrigerant pressure. The PCM utilizes this information in order to disable the A/C compressor clutch when the A/C system pressure is out of range. The PCM also uses A/C refrigerant pressure sensor to enable the engine coolant fans when the A/C refrigerant pressure is high.
The PCM supplies a 5 volt reference, a signal circuit, and a ground circuit to the A/C refrigerant pressure sensor. As the A/C pressure increases or decreases, the resistance of the sensor changes and varies the amount of signal voltage detected by the PCM.
Diagnostic Aids
Important:
• Remove any debris from the PCM connector surfaces before servicing
the PCM. Inspect the PCM connector gaskets when diagnosing/replacing
the PCM. Ensure that the gaskets are installed correctly. The gaskets
prevent contaminate intrusion into the PCM. • For any test that requires probing the PCM or a component
harness connector, use the J 35616
connector test adapter Kit. Using this kit prevents damage to the
harness/component terminals. Refer to
Using Connector Test Adapters
in Wiring Systems.
The following may cause an intermittent:
| • | Poor connections; Refer to Testing for Intermittent Conditions and Poor Connections in Wiring Systems. |
| • | Mis-routed harness. |
| • | Rubbed through wire insulation. |
| • | Broken wire inside the insulation. |
If the test did not fail this ignition cycle, move the related electrical harnesses and the connectors while monitoring a scan tool.
For an intermittent, refer to Symptoms .
Test Description
The numbers below refer to the step numbers on the diagnostic table.
-
The normal A/C voltage is between 1.0 and 1.8 volts.
-
If the A/C pressure/voltage stays high after disconnecting the A/C refrigerant pressure sensor electrical connector, this indicates the signal circuit is shorted to a voltage.
-
This step tests for a good ground circuit.
-
This step verifies the integrity of the A/C refrigerant pressure sensor signal circuit.
-
If you have thoroughly inspected the 5.0 volt reference circuit (for opens, shorts to ground, PCM connections etc.) and is OK, then replace the PCM.
-
If you have thoroughly inspected the ground circuit for opens and the PCM connections are OK, then replace the PCM.
Step | Action | Value(s) | Yes | No |
|---|---|---|---|---|
1 | Did you perform the Powertrain On-Board Diagnostic (OBD) System Check? | -- | ||
2 |
Did DTC P1639 fail this ignition cycle? | -- | ||
Does the scan tool indicate the A/C High Side Pressure voltage within the specified range? | 0.1-1.8V | |||
4 | Move related harnesses while monitoring the A/C High Pressure voltage. Does the scan tool indicate that the sensor values change while moving related electrical harnesses? | -- | Go to Diagnostic Aids | |
Disconnect the A/C refrigerant pressure sensor electrical connector.
Refer to
Does the scan tool indicate the A/C High Side less than the specified value? | 1V | |||
6 | Measure the voltage from the A/C refrigerant pressure sensor 5 volt reference circuit to the battery ground using the DMM. Is the voltage near the specified value? | 5V | ||
Measure the voltage from the A/C refrigerant pressure sensor 5 volt reference circuit to the sensor ground circuit using the DMM. Is the voltage at the specified value? | 5V | |||
Jumper the 5 volt reference circuit to the A/C refrigerant pressure sensor signal circuit using a fused jumper wire. Refer to Using Fused Jumper Wires in Wiring Systems. Does the scan tool indicate the A/C High Side voltage at the specified value? | 5V | |||
9 | Repair the faulty A/C refrigerant pressure sensor connection or faulty sensor. Refer to Air Conditioning (A/C) Refrigerant Pressure Sensor Replacement in Heating, Ventillation, and Air Conditioning. Is the action complete? | -- | System OK | -- |
10 | Repair the short to voltage in the A/C refrigerant pressure sensor signal circuit. Refer to Wiring Repairs in Wiring Systems. Is the action complete? | -- | System OK | -- |
Repair the A/C refrigerant pressure sensor 5 volt reference circuit . Refer to Wiring Repairs in Wiring Systems. Did you find and correct the condition? | -- | System OK | ||
Repair the A/C refrigerant pressure sensor ground circuit. Refer to Wiring Repairs in Wiring Systems. Did you find and correct the condition? | -- | System OK | ||
13 | Repair the A/C refrigerant pressure sensor signal circuit . Refer to Wiring Repairs in Wiring Systems. Did you find and correct the condition? | -- | System OK | |
14 |
Is the action complete? | -- | System OK | |
15 |
Important:: Program the replacement PCM. Refer to Powertrain Control Module Replacement/Programming . Replace the PCM. Is the action complete? | -- | System OK | -- |
16 |
Is the action complete? | -- | System OK | -- |

