For 1990-2009 cars only
Removal Procedure
- Remove the HVAC module. Refer to HVAC Module Assembly Replacement.
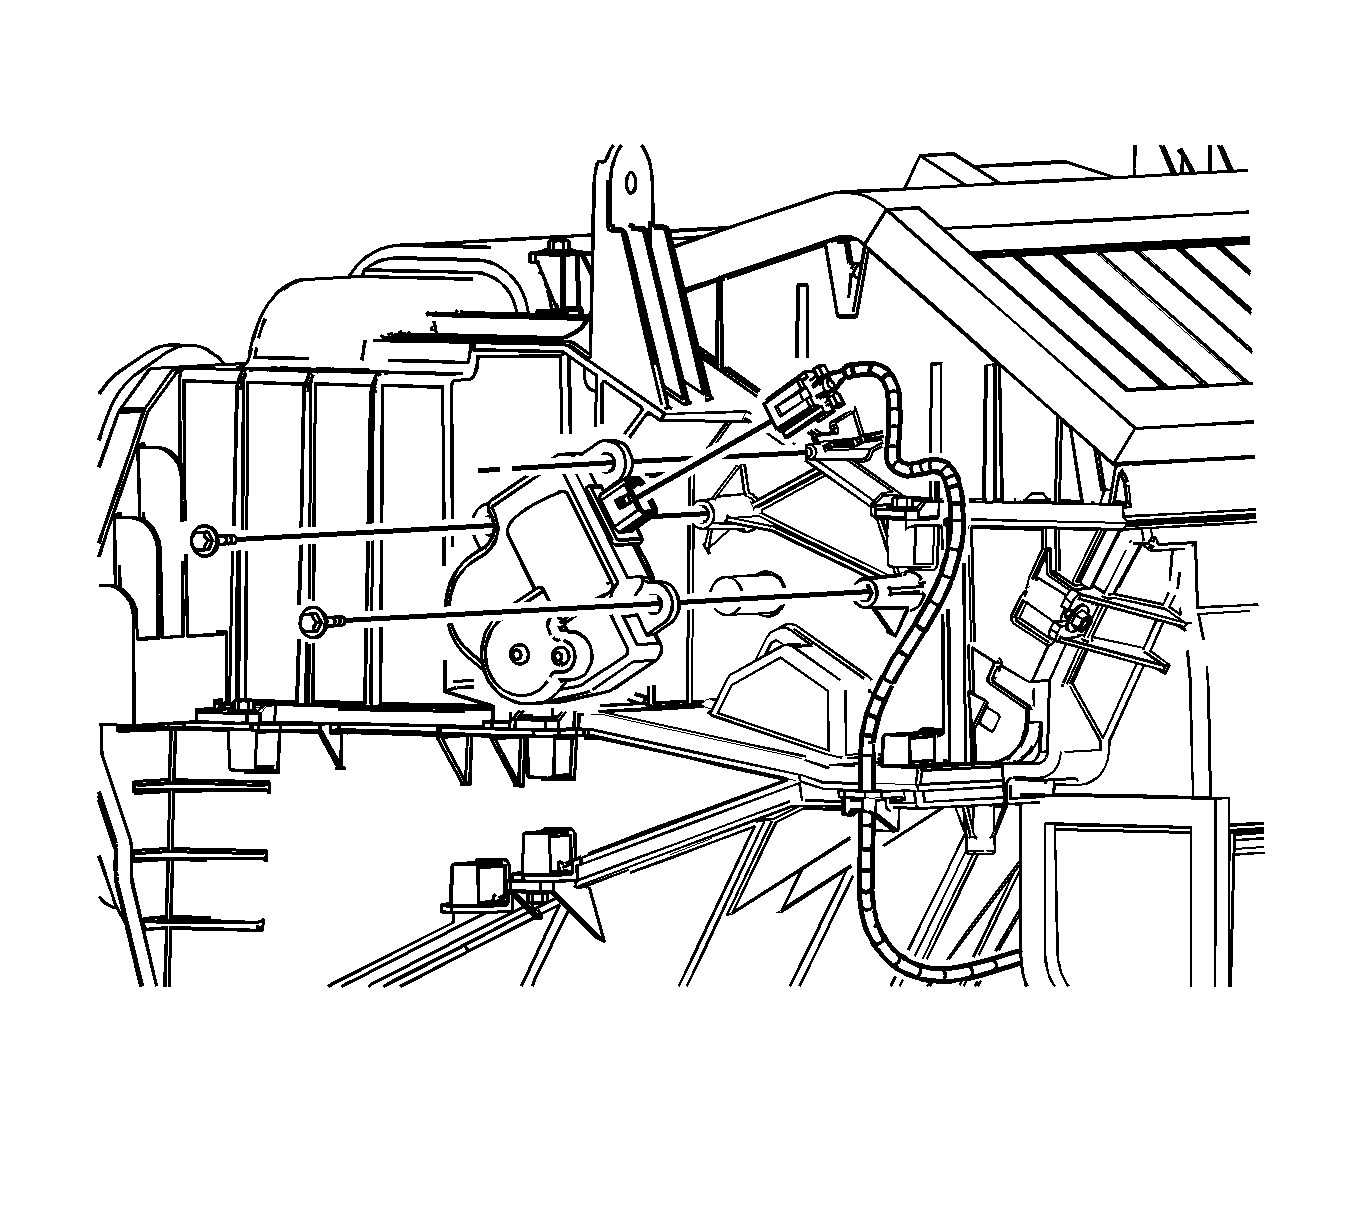
- Disconnect the LH air temperature actuator electrical connector.
- Remove the LH actuator retaining screws.
- Remove the LH actuator.
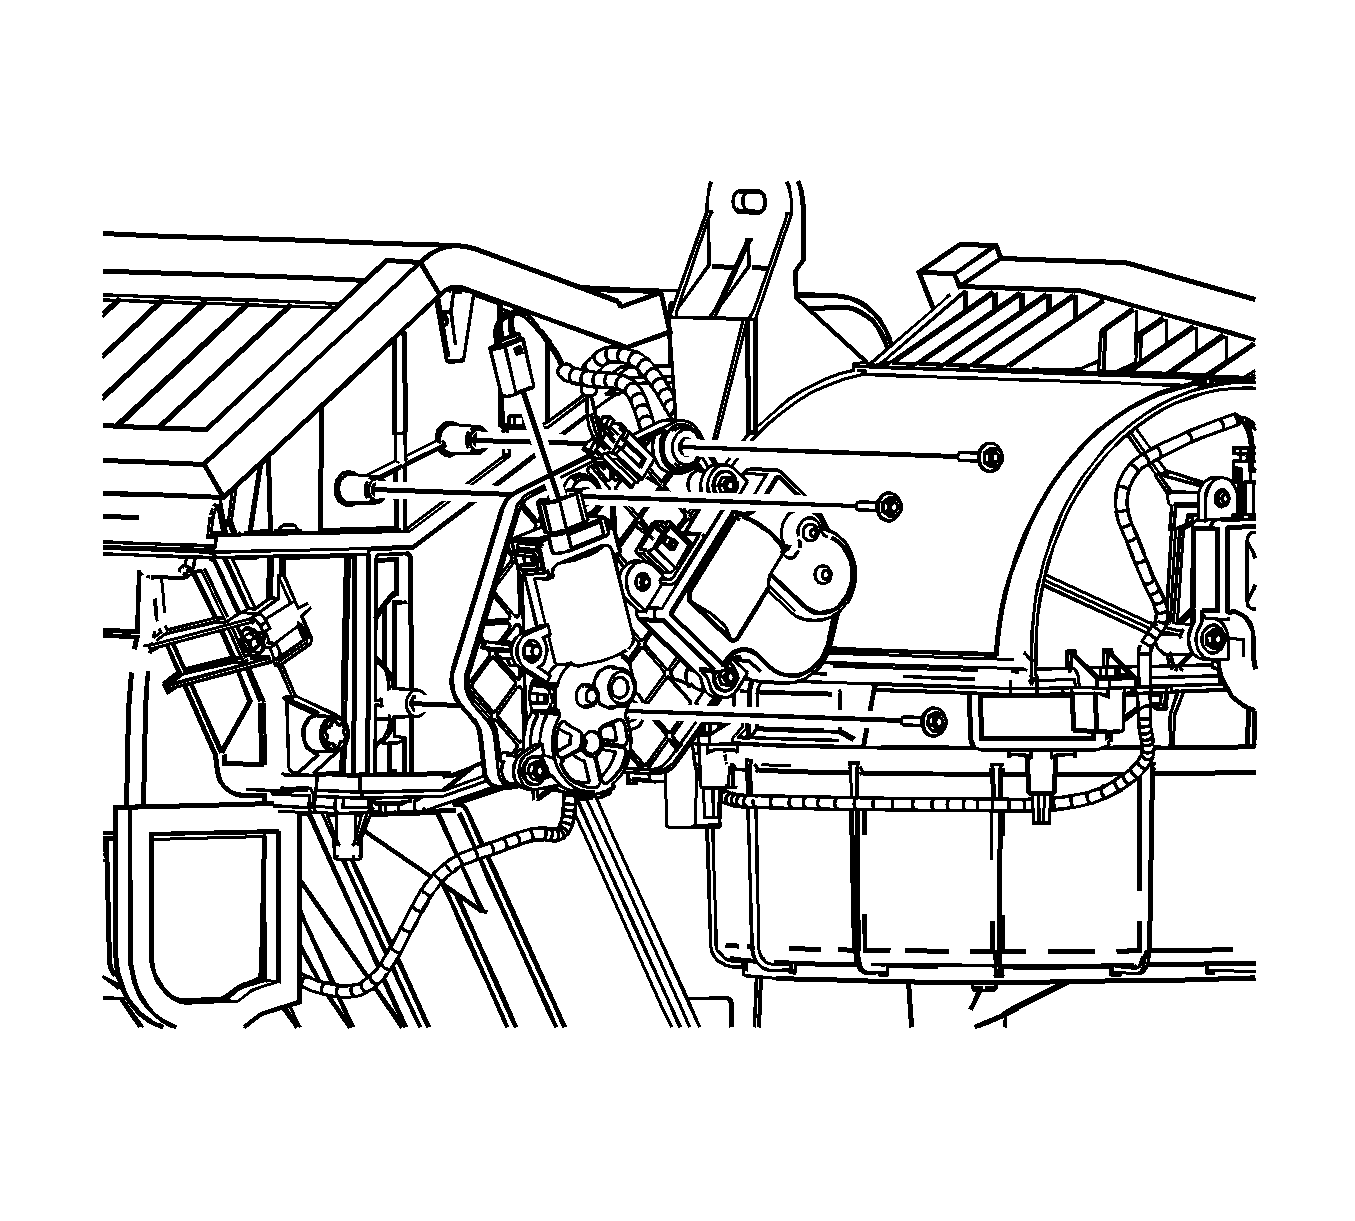
- Disconnect the mode actuator electrical connector.
- Disconnect the RH air temperature actuator electrical connector.
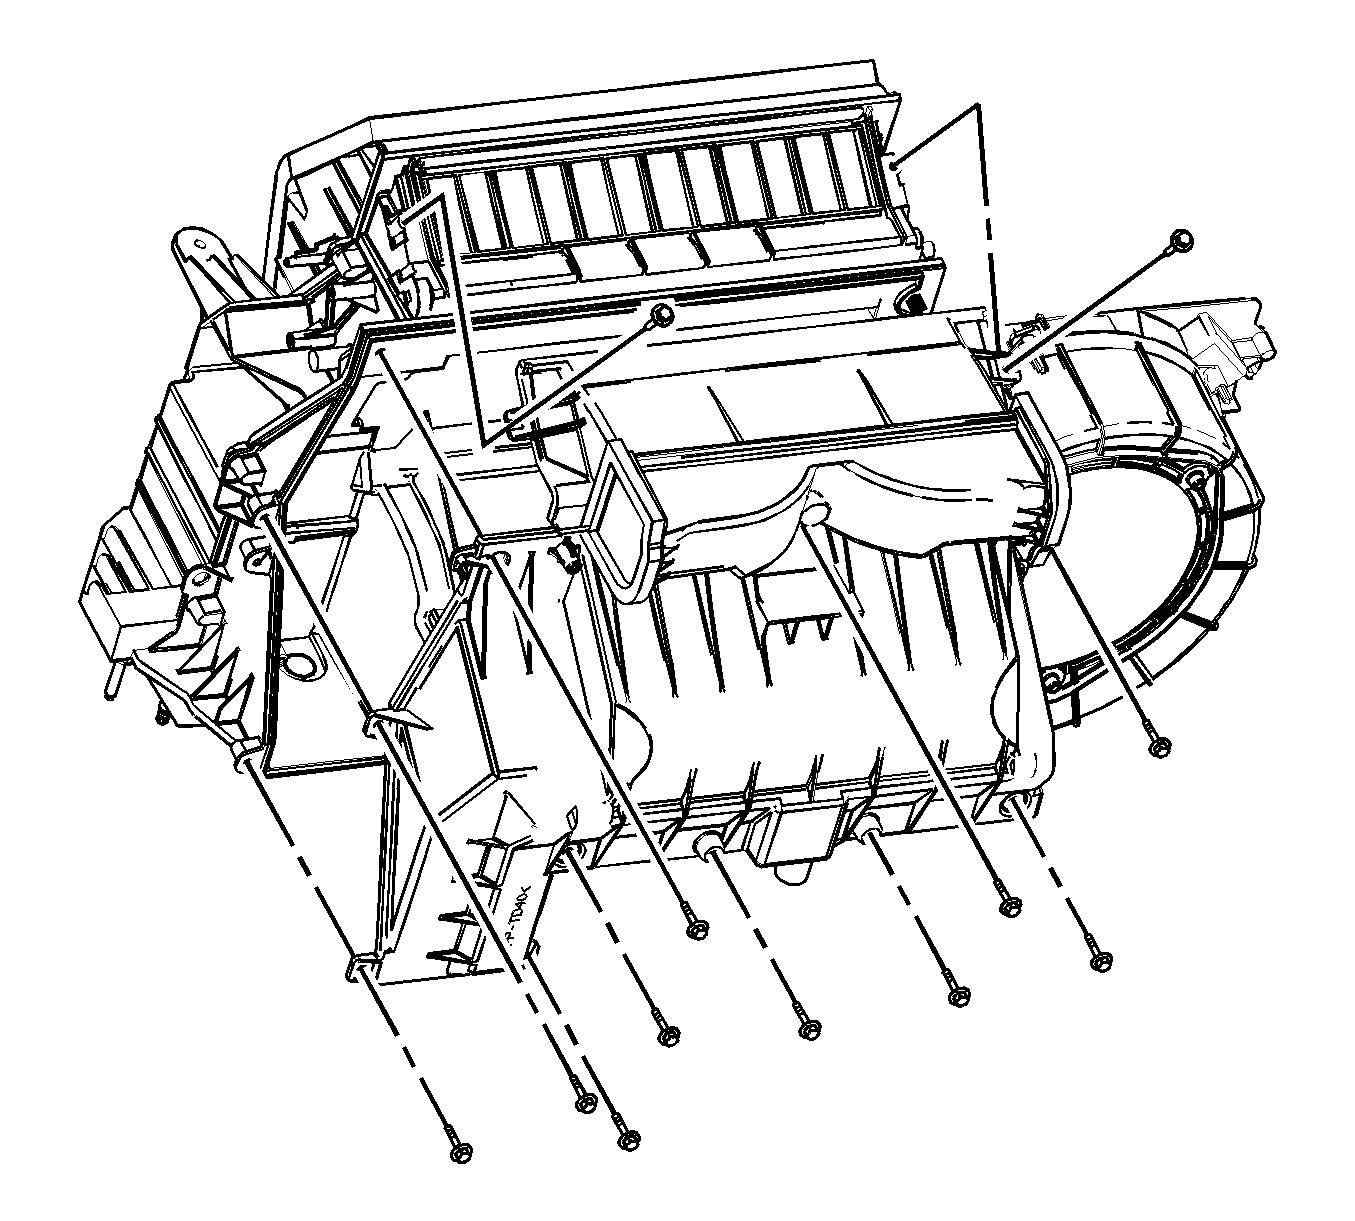
- Remove the actuator support bracket retaining screws.
- Remove the actuator support bracket and actuators.
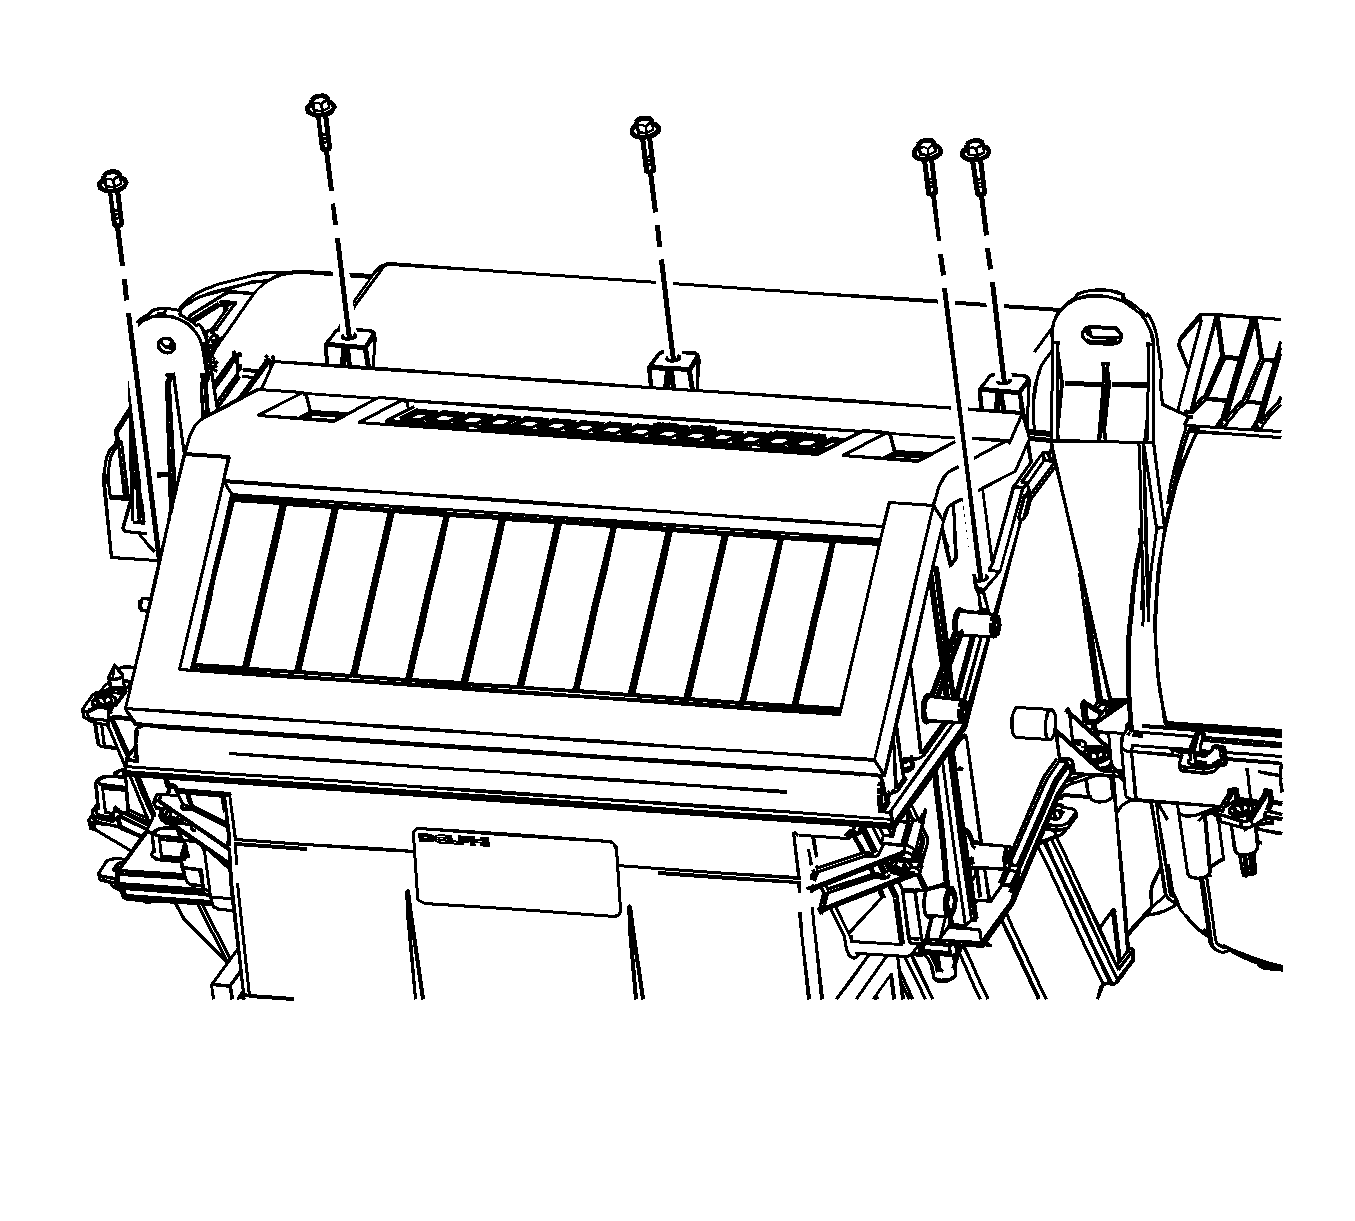
- Remove the mode valve assembly retaining screws.
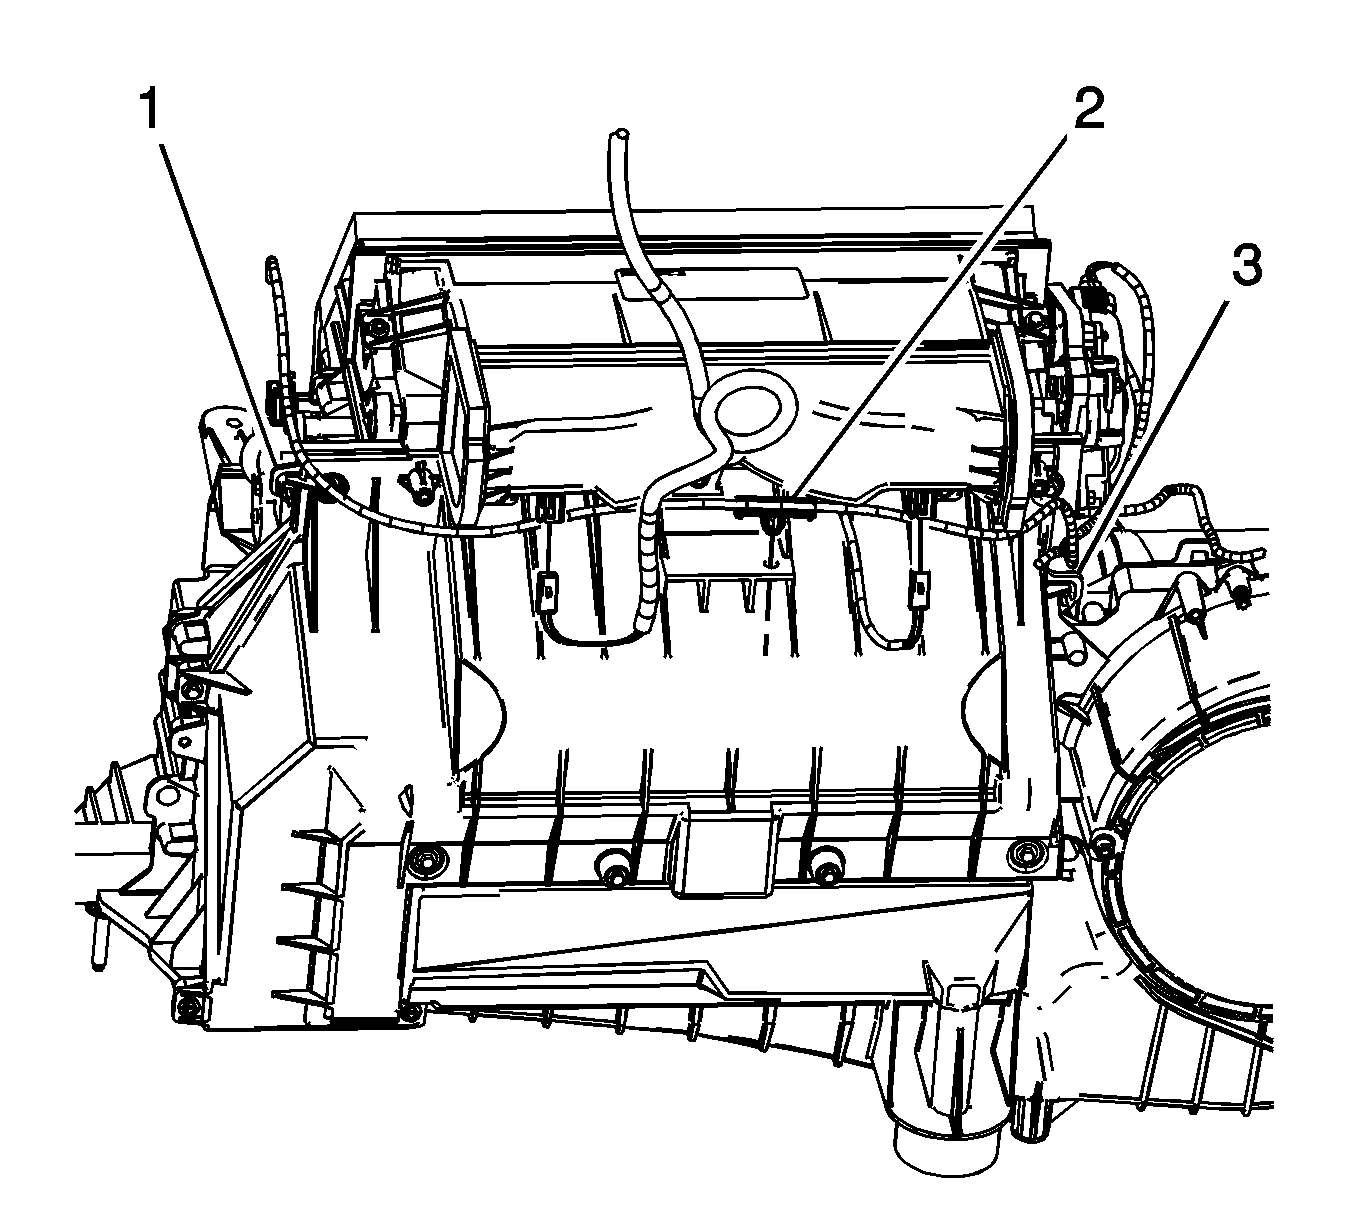
- Disconnect the HVAC module wiring harness retainer pin (1) from the HVAC module.
- Disconnect the wiring harness from the heater core cover wire harness retainer (2) and reposition the wiring harness aside.
- Disconnect the discharge temperature management (DTM) sensor electrical connectors.
- Remove the heater core cover screws.
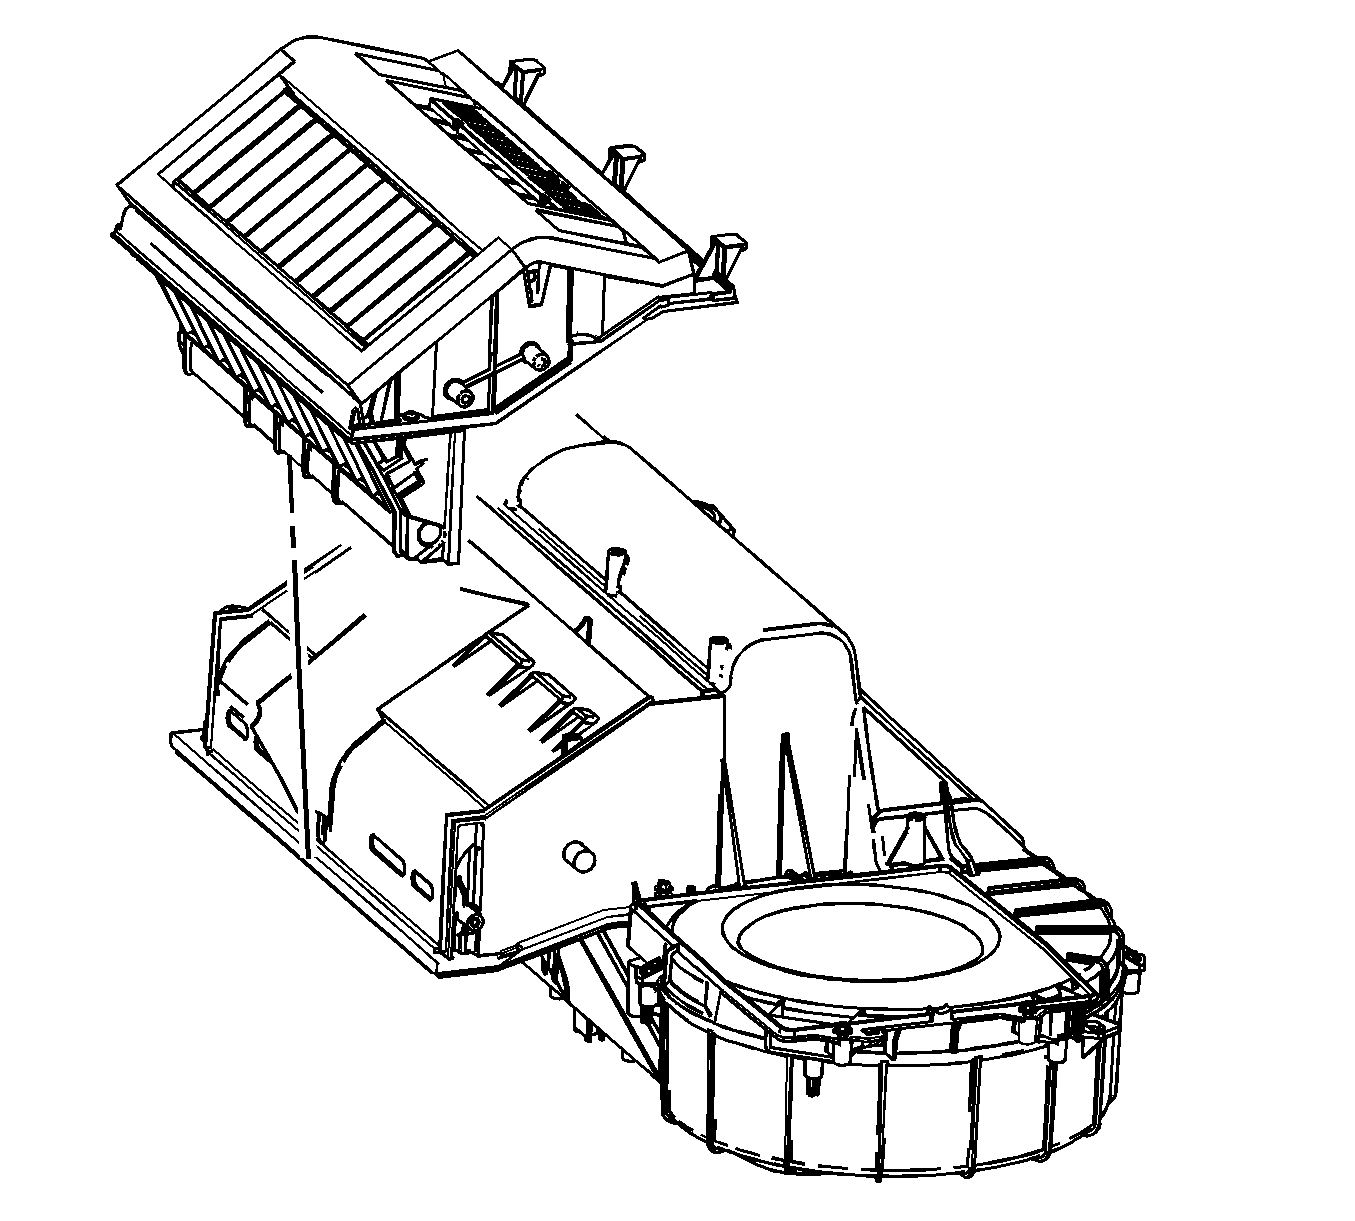
- Remove the heater core cover.
- Remove the mode valve assembly.
Caution: Do not remove the TORX screws from the mode valve assembly. Misalignment can cause damage to the film valve.
Installation Procedure
- Install the mode valve assembly.
- Install the heater core cover.
- Install the heater core cover screws and tighten to 1.6 N·m (14 lb in).
- Connect the wiring harness to the heater core cover wire harness retainer (2).
- Connect the HVAC module wiring harness retainer pin (1) to the HVAC module.
- Connect the discharge temperature management (DTM) sensor electrical connectors.
- Install the mode valve assembly retaining screws and tighten to 1.6 N·m (14 lb in).
- Install the actuator support bracket and actuators to the HVAC module.
- Install the actuator support bracket retaining screws and tighten to 1.6 N·m (14 lb in).
- Connect the RH air temperature actuator electrical connector.
- Connect the mode actuator electrical connector.
- Install the LH actuator.
- Install the LH actuator retaining screws.
- Connect the LH air temperature actuator electrical connector.
- Install the HVAC module. Refer to HVAC Module Assembly Replacement.
Caution: Do not tamper, adjust or disassemble the mode valve assembly. The proper setting of the pretensions on the springs is critical to the film valve function.

Caution: Refer to Fastener Caution in the Preface section.


Note: It may be necessary to gently rotate the RH temperature door to align the actuator support bracket and actuators.

