For 1990-2009 cars only
Removal Procedure
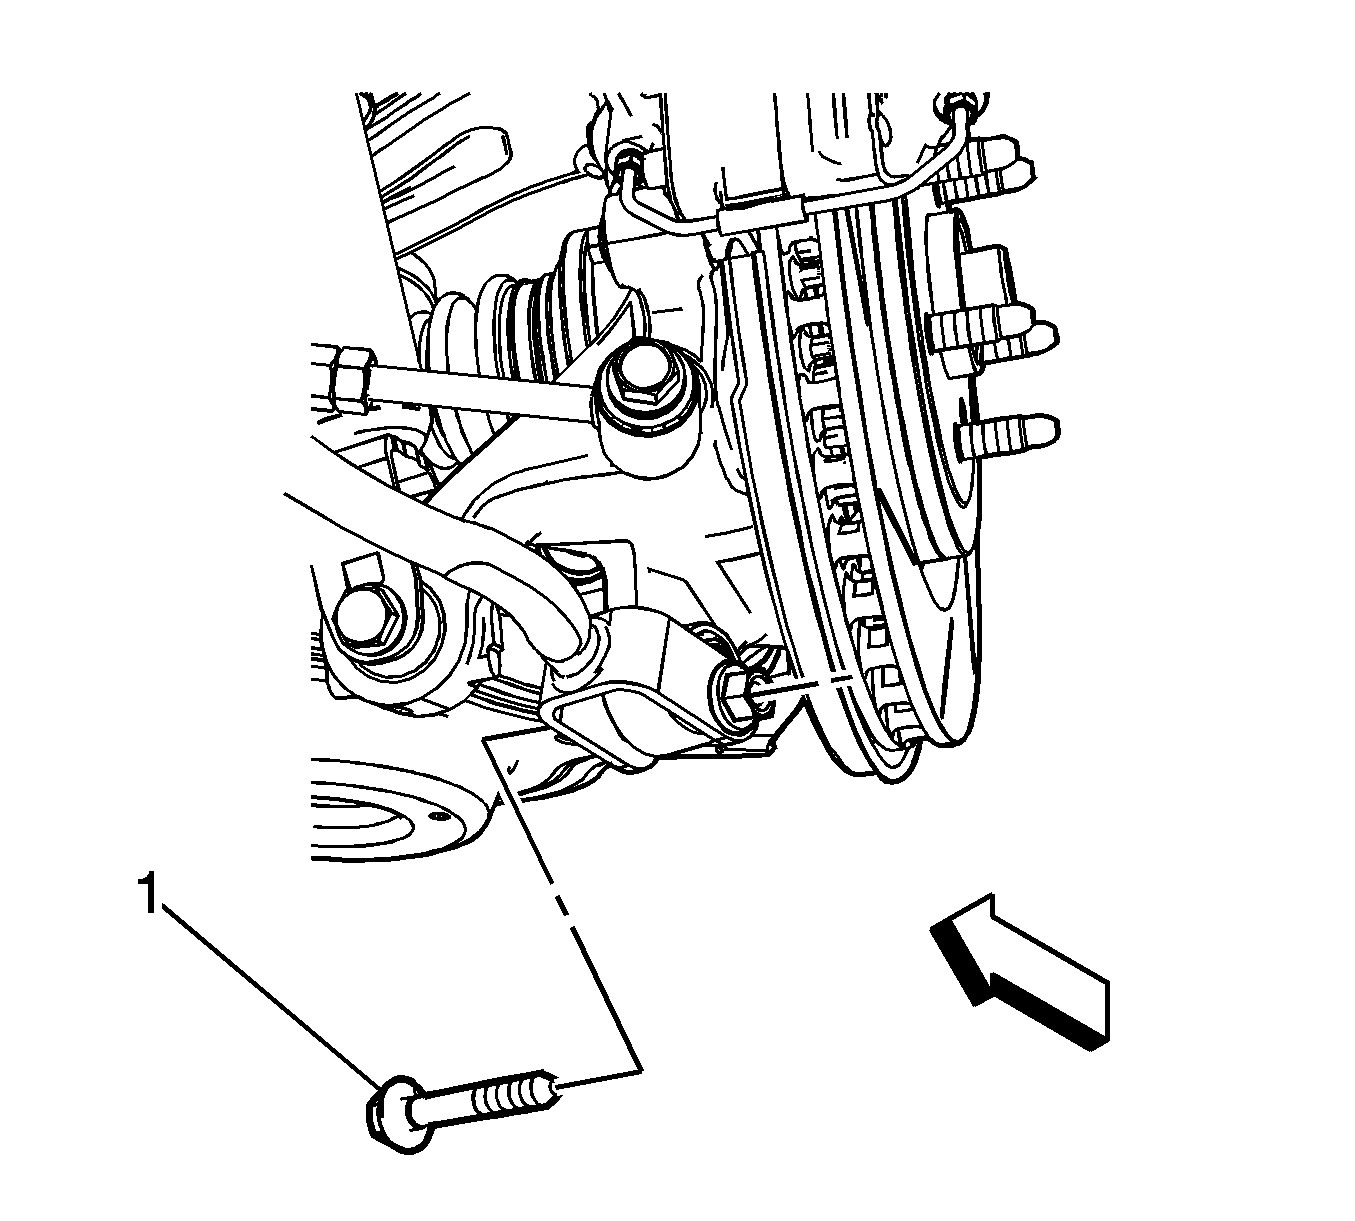
- Remove the rear trailing arm mounting bolt (1) from the knuckle.
- Support the front of the rear suspension support.
- Remove the front mounting bolts for the rear suspension support. Refer to Rear Frame Replacement.
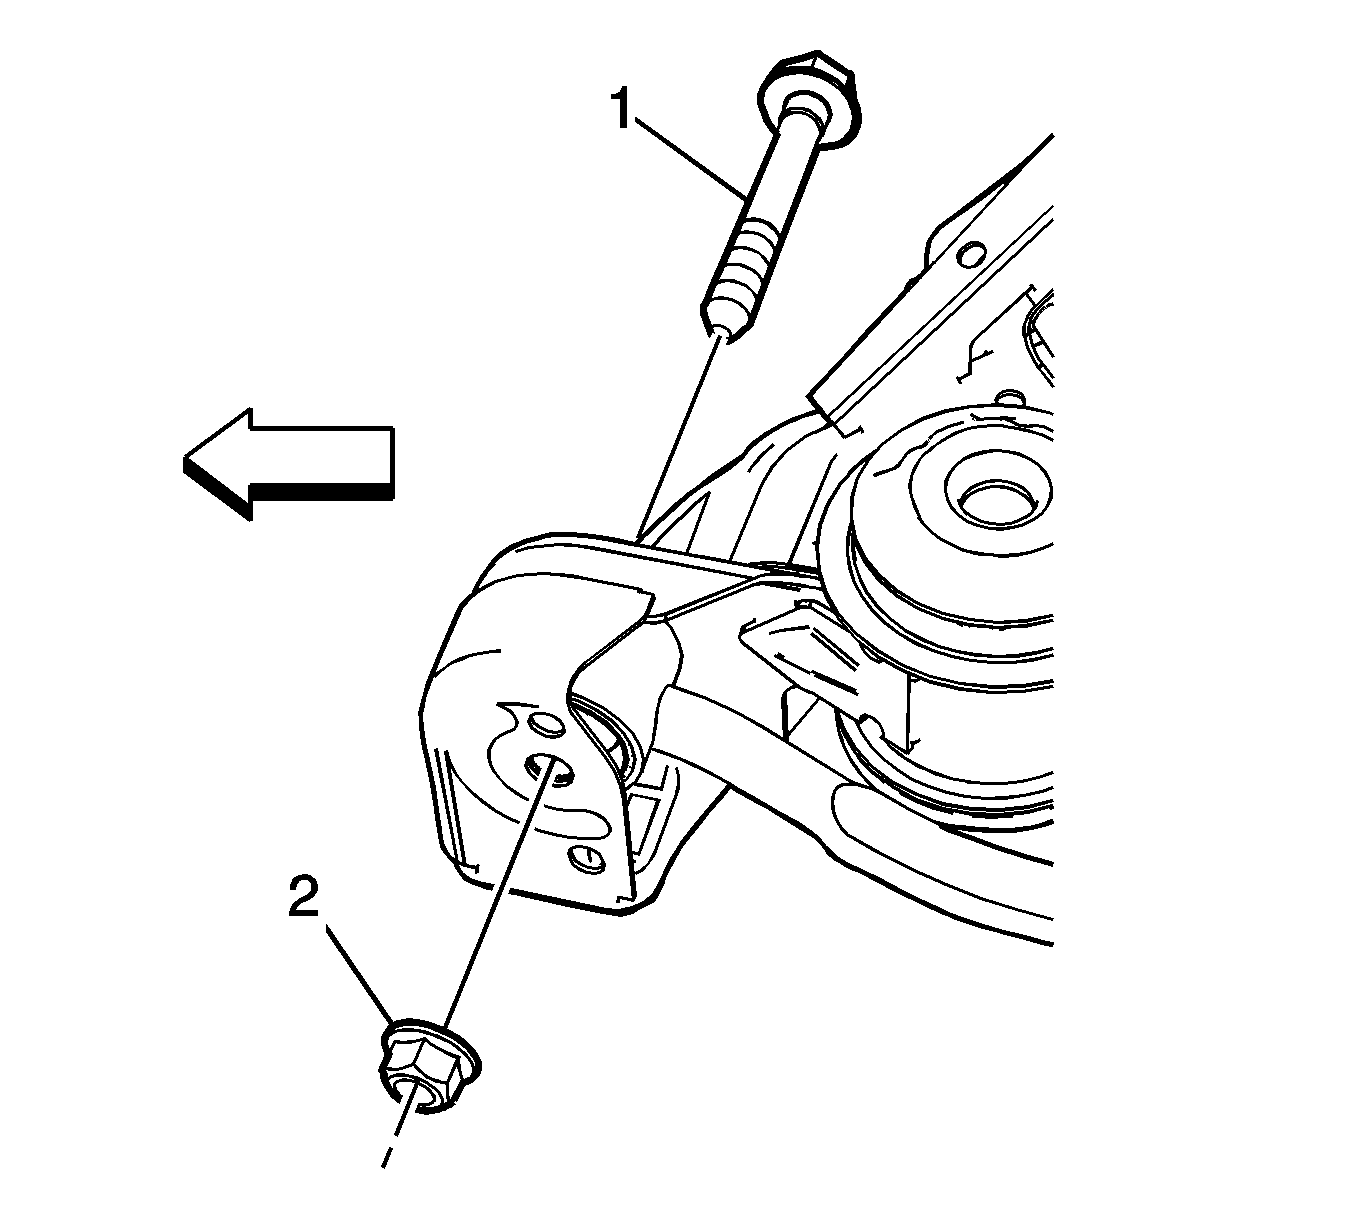
- Remove the front mounting nut (2) and bolt (1) for the trailing arm.
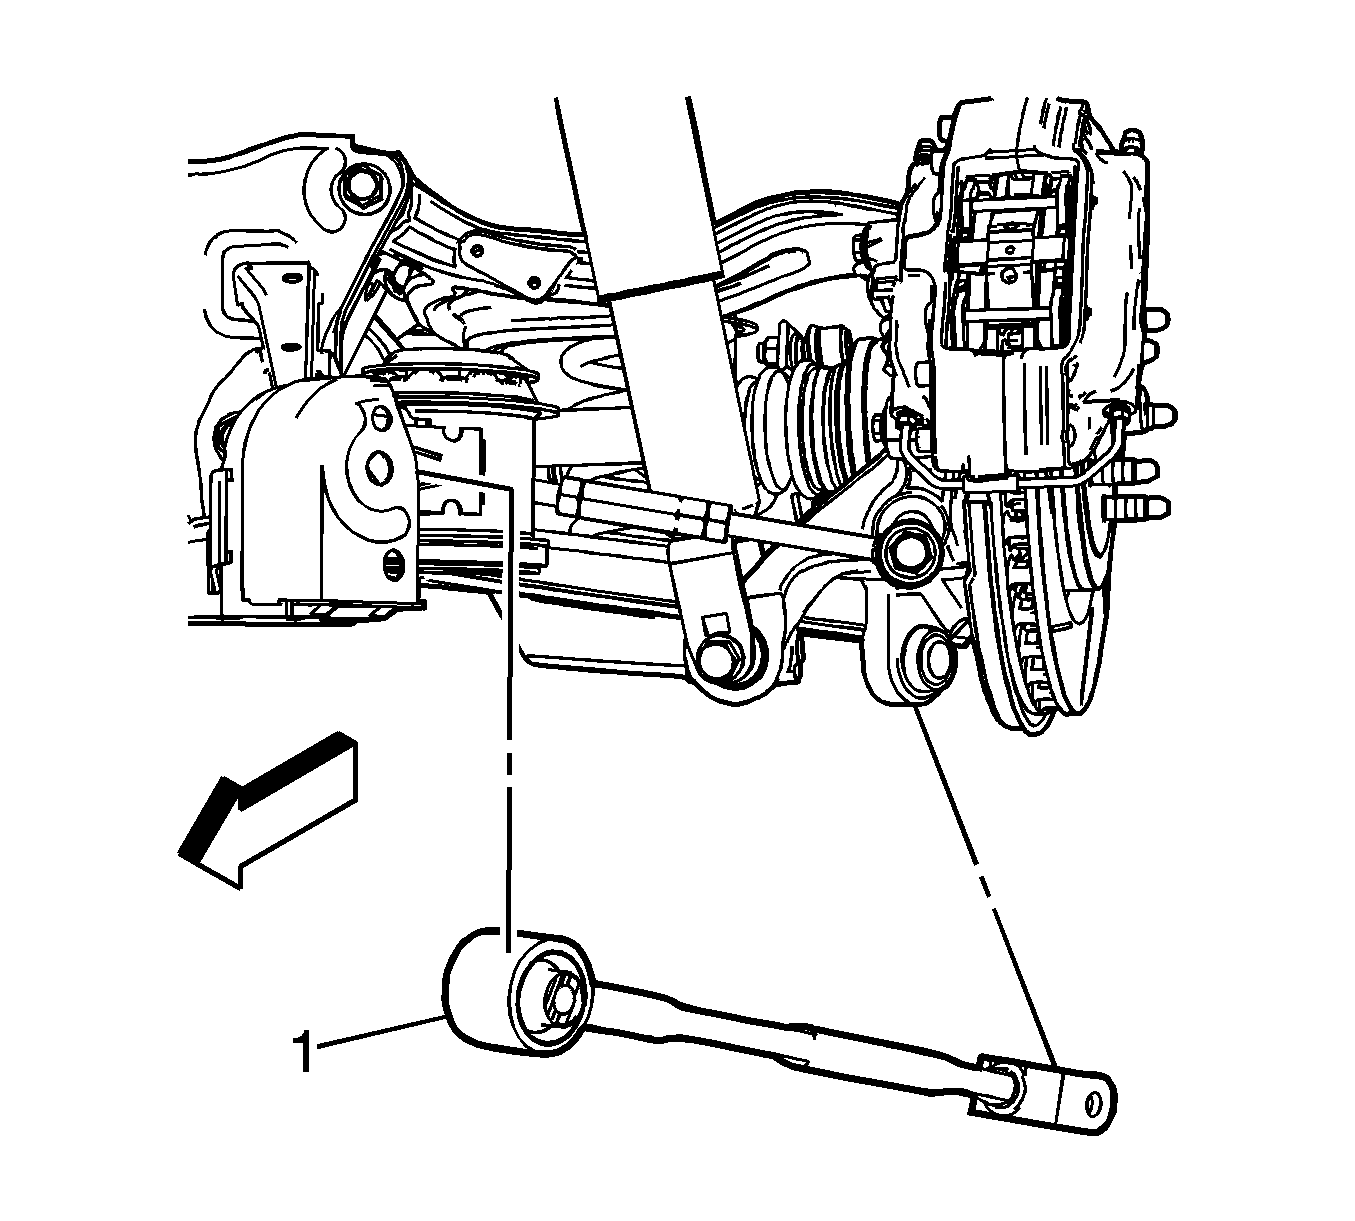
- Remove the rear trailing arm (1) in the following manner:

Important: Lower the rear suspension support enough to gain access to the front trailing arm mounting bole and nut.


| 5.1. | Lower the trailing arm from the knuckle. |
| 5.2. | Move the trailing arm toward the rear of the vehicle. |
| 5.3. | Remove the trailing arm from the mounting bracket. |
Installation Procedure
- Install the trailing arm in the following manner:
- Install the trailing arm bolt (1).
- Install the front trailing arm nut (2).
- Install the front mounting bolts for the rear suspension support. Refer to Rear Frame Replacement.
- Install the rear trailing arm mounting bolt (1).
- Install the tire and wheel. Refer to Tire and Wheel Removal and Installation.
- Remove the support from the vehicle.
- Lower the vehicle.
- Check the alignment of the rear suspension. Refer to Wheel Alignment Specifications.

| 1.1. | Position the trailing arm in the mounting bracket. |
| 1.2. | Position trailing arm on the knuckle. |
Notice: Refer to Fastener Notice in the Preface section.

Tighten
Tighten the front trailing arm nut (2) to 150 N·m (111 lb ft).

Tighten
Tighten the trailing arm bolt (1) to 170 N·m (125 lb ft).
