Exhaust System Replacement LY7/LLT
Removal Procedure
Caution: Refer to Exhaust Service Caution in the Preface section.
Caution: Refer to Protective Goggles and Glove Caution in the Preface section.
- Raise and support the vehicle. Refer to Lifting and Jacking the Vehicle.
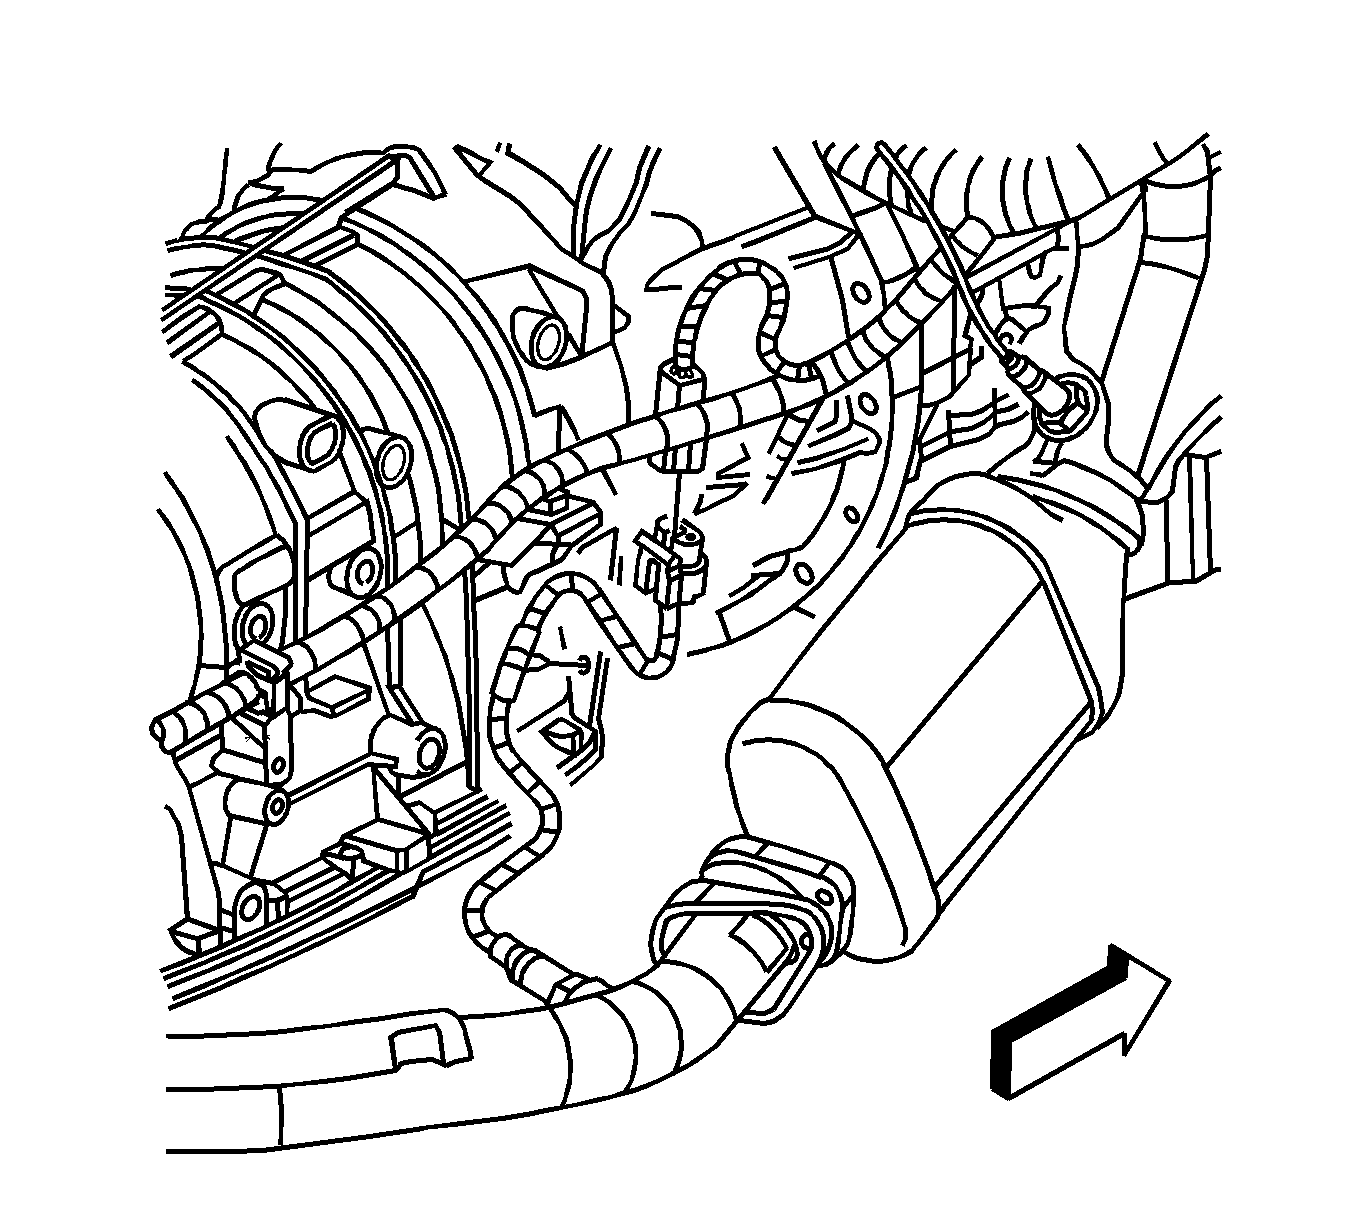
- Disconnect the left bank and the right bank heated oxygen sensor (HO2S) electrical connectors (bank 1 shown, bank 2 similar).
- Disconnect both the HO2S harnesses from the transmission case.
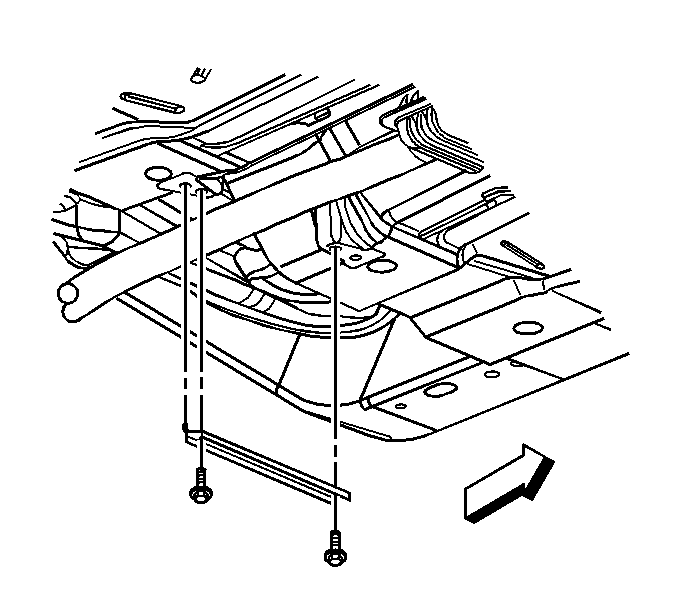
- Remove the floor panel tunnel brace bolts.
- Remove the floor panel tunnel brace from the floor panel.
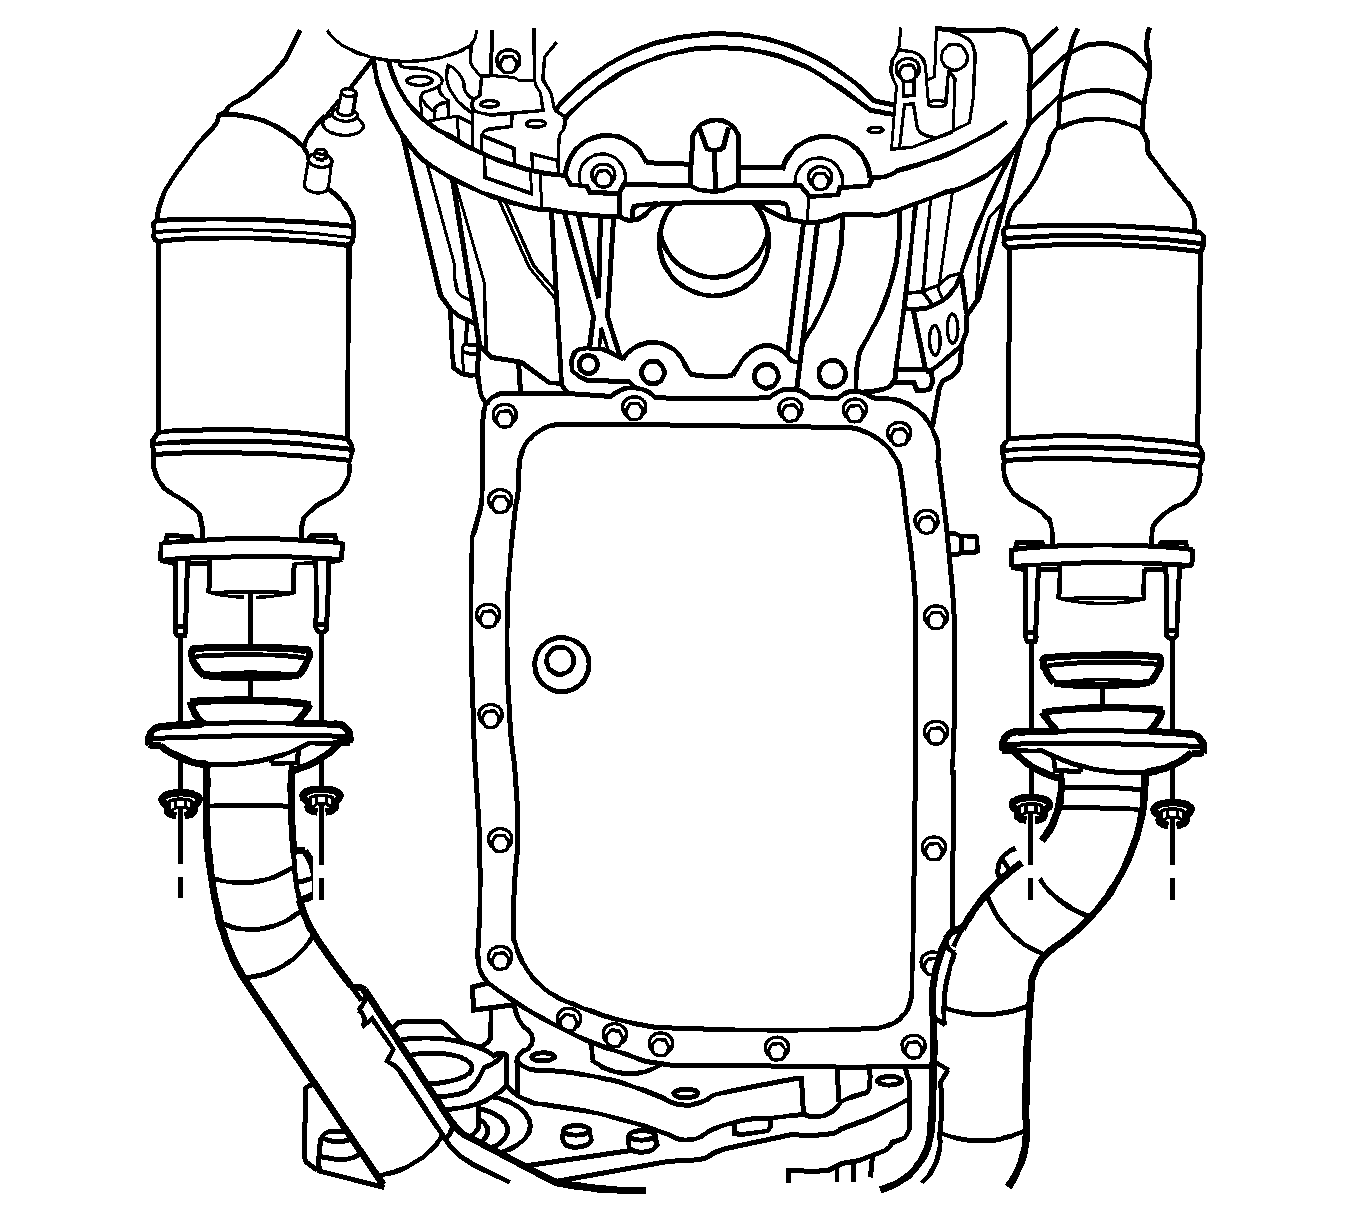
- Remove the catalytic converter to the exhaust pipe nuts and separate the exhaust system from the catalytic converters.
- Using an adjustable jack stand, support the rear of the exhaust system.
- Apply a non petroleum based lubricant to the exhaust insulators and the hanger rods to aid in removal and installation.
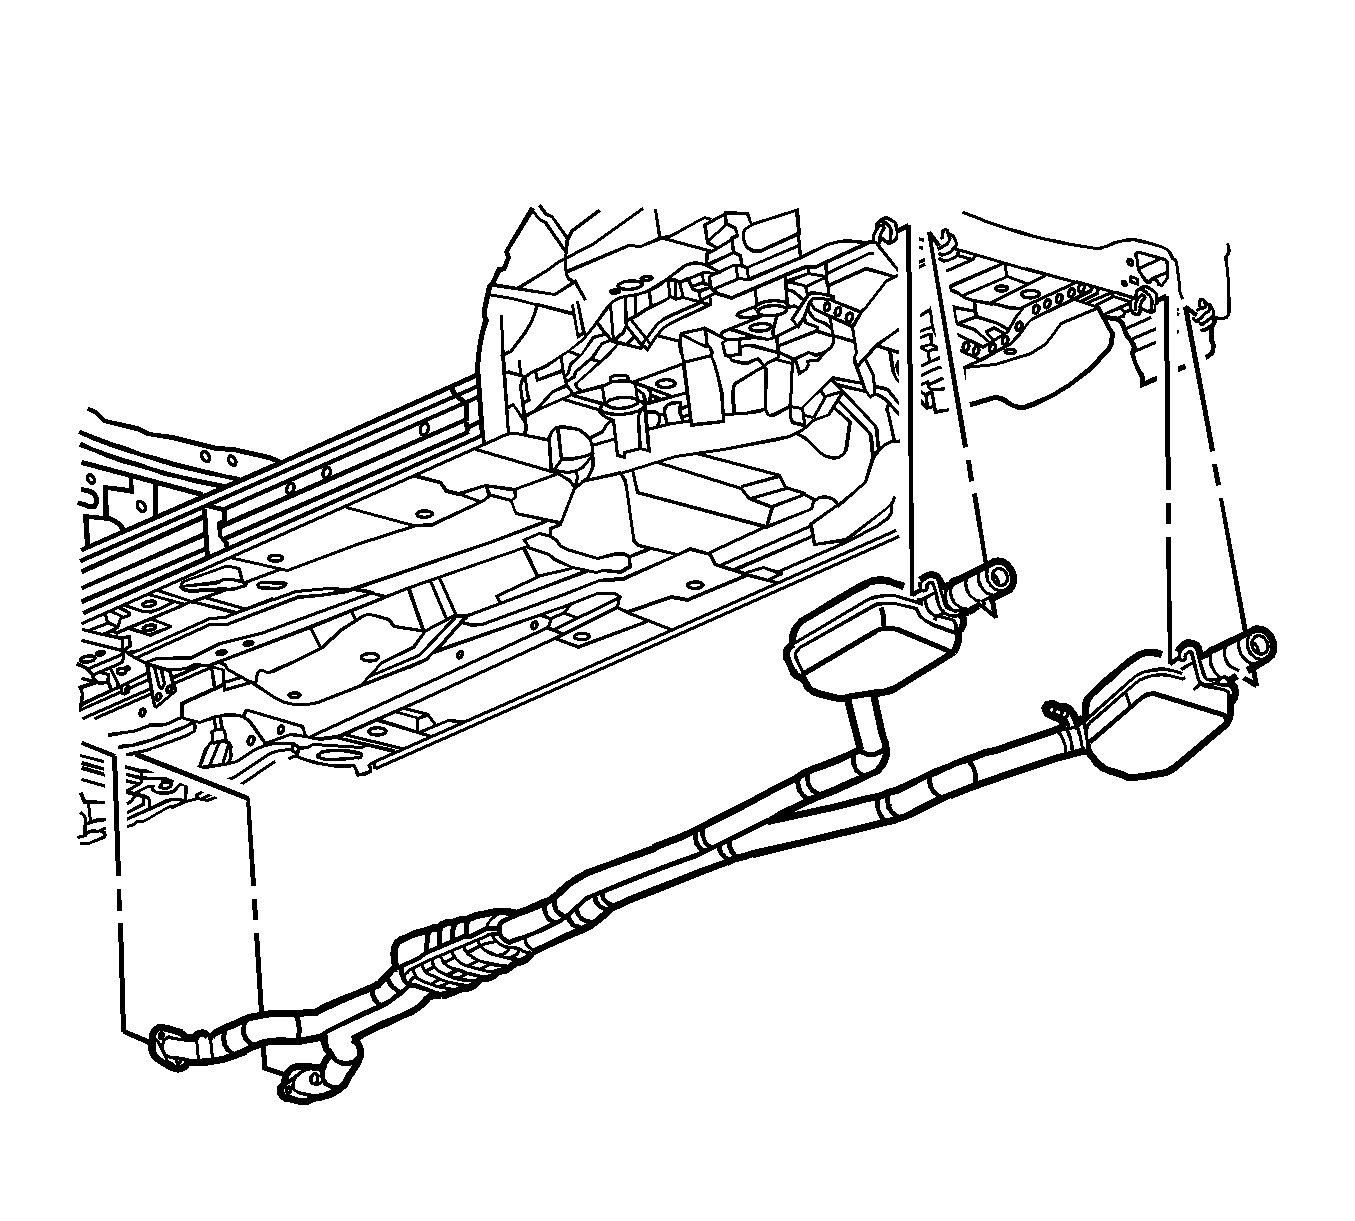
- Remove the rear exhaust system insulators from the exhaust hangers, leaving the insulators attached to the body hangers. Refer to Exhaust System Insulator, Hanger, Bracket Replacement.
- With the aid of an assistant, lower the exhaust system from the vehicle.
- Remove the left bank and the right bank HO2S from the exhaust system. Refer to Heated Oxygen Sensor Replacement - Bank 1 Sensor 2 and Heated Oxygen Sensor Replacement - Bank 2 Sensor 2.
Installation Procedure
- Install both the HO2S to the exhaust system. Refer to Heated Oxygen Sensor Replacement - Bank 1 Sensor 2 and Heated Oxygen Sensor Replacement - Bank 2 Sensor 2.
- With the aid of an assistant, raise the exhaust system to the insulators and to the catalytic converters.
- Install the muffler hanger rods to the body insulators. Refer to Exhaust System Insulator, Hanger, Bracket Replacement.
- Position the exhaust pipe to the catalytic converters.
- Install the catalytic converter to the exhaust pipe nuts.
- Install the floor panel tunnel brace to the floor panel.
- Install the floor panel tunnel brace bolts.
- Connect the left bank and the right bank 2 HO2S electrical connectors (bank 1 shown, bank 2 similar).
- Install the HO2S wiring harnesses to the transmission case.
- Lower the vehicle.
- Inspect for exhaust leaks.
Notice: Refer to Exhaust System Inspection Notice in the Preface section.
Notice: Refer to Flex Decoupler Notice in the Preface section.


Notice: Refer to Fastener Notice in the Preface section.
Tighten
Tighten the exhaust pipe nuts to 17 N·m (13 lb ft).

Tighten
Tighten the floor panel tunnel brace bolts to 25 N·m (18 lb ft).

Exhaust System Replacement LP1
Removal Procedure
Caution: Refer to Exhaust Service Caution in the Preface section.
Caution: Refer to Protective Goggles and Glove Caution in the Preface section.
- Raise and support the vehicle. Refer to Lifting and Jacking the Vehicle.
- Disconnect the left bank and the right bank 2 heated oxygen sensor (HO2S) electrical connectors (bank 1 shown, bank 2 similar) from the harnesses.
- Remove the HO2S wiring harnesses from the transmission case.
- Remove the floor panel tunnel brace bolts.
- Remove the floor panel tunnel brace from the floor panel.
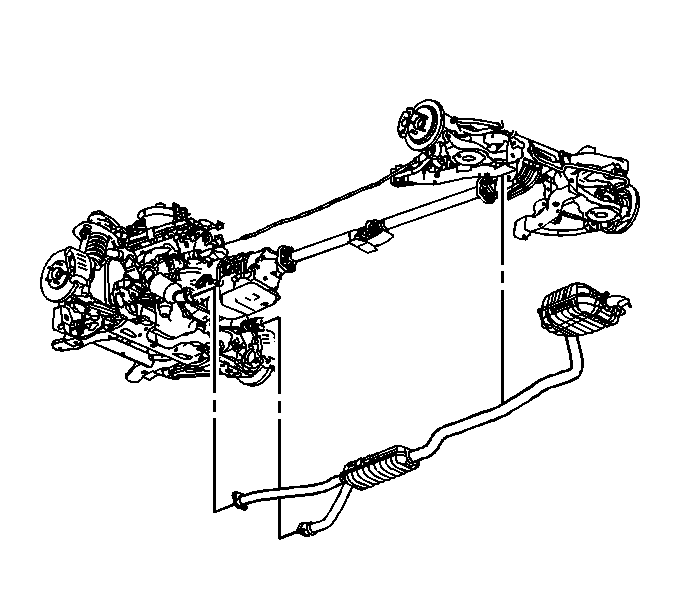
- Remove the catalytic converter to the exhaust pipe nuts and separate the exhaust system from the catalytic converters.
- Using an adjustable jack stand, support the rear of the exhaust system.
- Apply a non petroleum based lubricant to the exhaust insulators and the muffler hanger rods to aid in removal and installation.
- Remove the rear muffler insulators from the muffler hanger rods leaving the insulators attached to the vehicle. Refer to Exhaust System Insulator, Hanger, Bracket Replacement.
- With the aid of an assistant, lower the exhaust system from the vehicle.
- Remove the left bank and the right bank HO2S from the exhaust system. Refer to Heated Oxygen Sensor Replacement - Bank 1 Sensor 2.


Installation Procedure
- Install the left bank and the right bank HO2S to the exhaust system. Refer to Heated Oxygen Sensor Replacement - Bank 1 Sensor 2.
- With the aid of an assistant, raise the exhaust system to the body insulators and to the catalytic converters.
- Install the muffler hanger rods to the muffler insulators. Refer to Exhaust System Insulator, Hanger, Bracket Replacement.
- Position the exhaust pipe to the catalytic converts.
- Install the catalytic converter to exhaust pipe nuts.
- Install the floor panel tunnel brace to the floor panel.
- Install the floor panel tunnel brace bolts.
- Connect the left and right bank 2 HO2S electrical connectors (bank 1 shown, bank 2 similar) to the harnesses.
- Install the HO2S wiring harnesses to the transmission case.
- Lower the vehicle.
Notice: Refer to Exhaust System Inspection Notice in the Preface section.
Notice: Refer to Flex Decoupler Notice in the Preface section.


Notice: Refer to Fastener Notice in the Preface section.
Tighten
Tighten the exhaust pipe nuts to 17 N·m (13 lb ft).

Tighten
Tighten the floor panel tunnel brace bolts to 25 N·m (18 lb ft).

