For 1990-2009 cars only
Stabilizer Shaft Insulator Replacement AWD
Removal Procedure
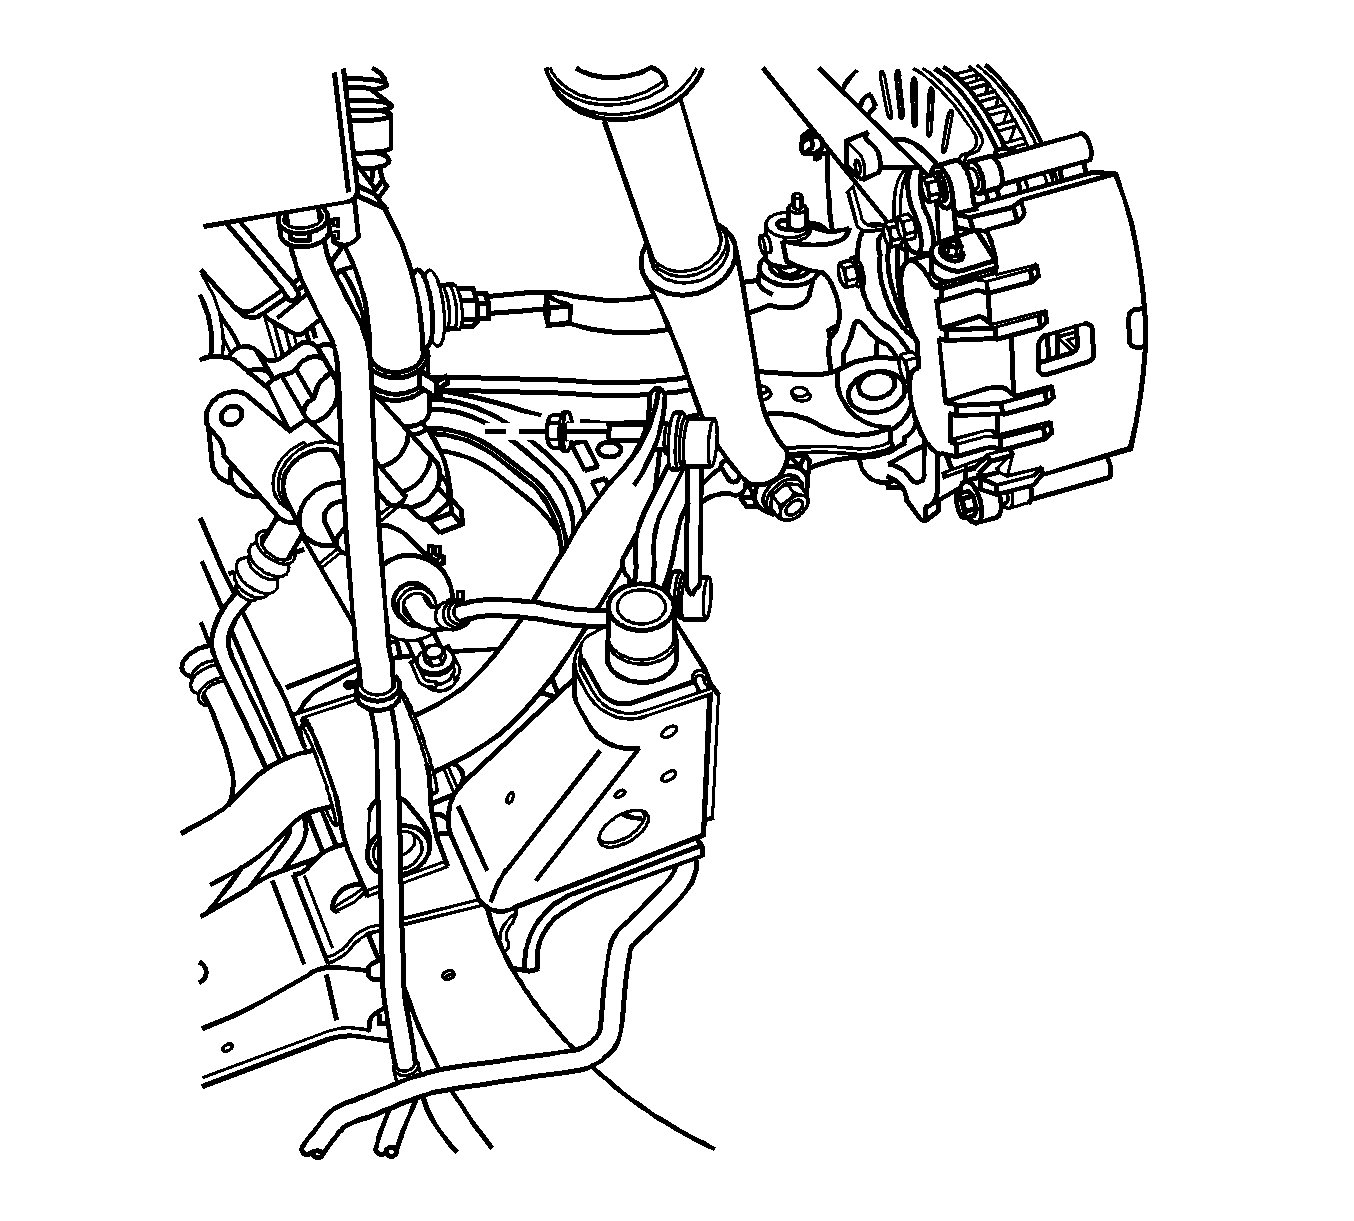
- Raise and support the vehicle. Refer to Lifting and Jacking the Vehicle.
- Remove the tires and wheels. Refer to Tire and Wheel Removal and Installation.
- Remove stabilizer shaft link to stabilizer shaft retaining nut.
- Separate the stabilizer shaft link from the stabilizer shaft.
- Remove the stabilizer shaft bracket mounting bolts.
- Remove the stabilizer shaft bracket.
- Remove the stabilizer shaft insulator. Note the position of the Insulator for installation.

Installation Procedure
- Install the stabilizer shaft insulator to the stabilizer shaft with the slit facing rearward.
- Install the stabilizer shaft bracket.
- Install the stabilizer shaft bracket mounting bolts.
- Install the stabilizer shaft link to the stabilizer shaft.
- Install stabilizer shaft link to stabilizer shaft retaining nut.
- Install the tires and wheels. Refer to Tire and Wheel Removal and Installation.
- Lower the vehicle.
Notice: Refer to Fastener Notice in the Preface section.
Tighten
Tighten the bolts to 110 N·m (81 lb ft).

Tighten
Tighten the nut to 125 N·m (92 lb ft).
Stabilizer Shaft Insulator Replacement RWD
Removal Procedure
- Raise and support the vehicle. Refer to Lifting and Jacking the Vehicle.
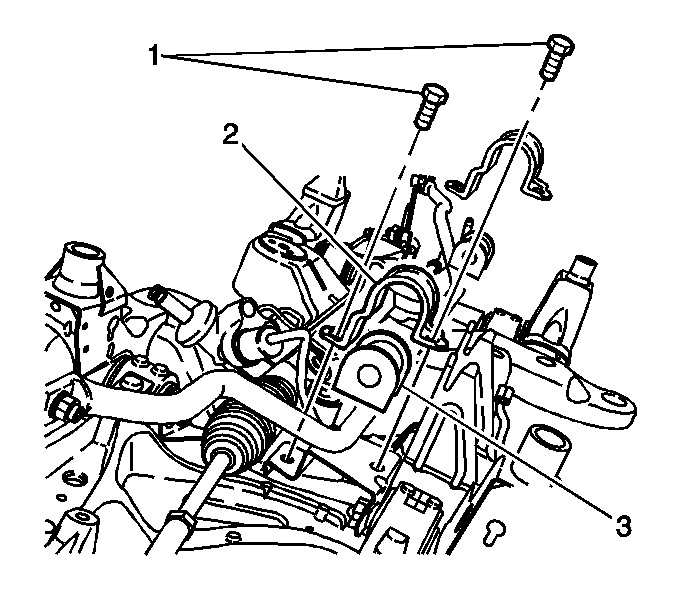
- Remove the stabilizer shaft mounting bolts (1) and bracket (2).
- Remove the stabilizer shaft insulators from the stabilizer shaft.

Installation Procedure
- Install the stabilizer shaft insulators (3) to the stabilizer shaft with the slit facing rearward.
- Install the stabilizer shaft bracket (2) and mounting bolts (1).
- Lower the vehicle.

Notice: Refer to Fastener Notice in the Preface section.
Tighten
Tighten the bolts to 65 N·m (48 lb ft).
