Windshield Washer Solvent Container Replacement w/o CE4
Removal Procedure
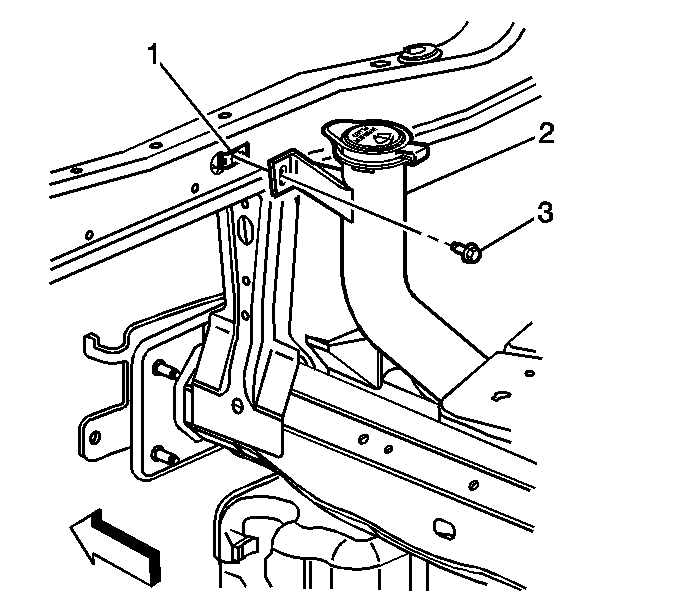
- Open the hood.
- Lift the corner of the condenser seal in order to access the bolt securing the washer solvent container neck to the upper tie bar.
- Remove the washer solvent container cap from the container.
- Remove the bolt (3) securing the washer solvent container fill neck (2) to the upper tie bar (1).
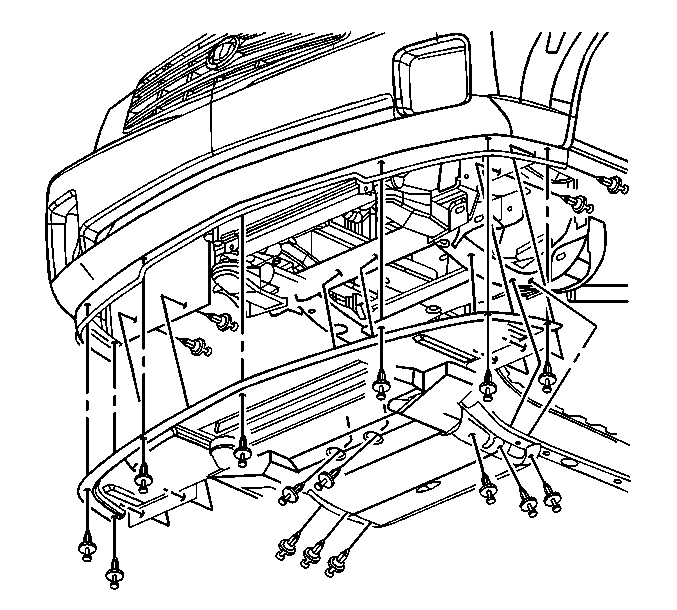
- Remove the lower air deflector. Refer to
Front Air Deflector Replacement.
- Remove the front bumper fascia. Refer to
Front Bumper Fascia Replacement.
- Remove the passenger side headlamp for LHD or the driver side headlamp for RHD. Refer to
Headlamp Assembly or Headlamp Bulb and/or Cornering, Sidemarker, Park, Turn Signal Bulb Replacement.
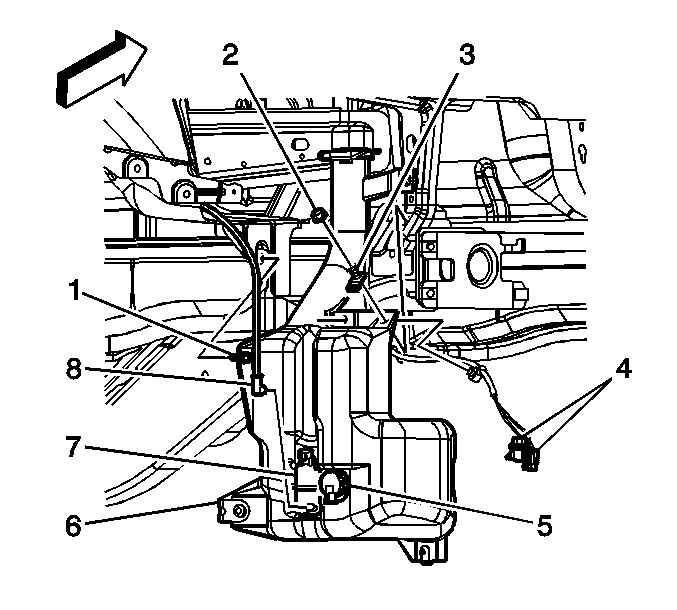
- Drain the solvent from the washer solvent container.
- Disconnect the washer hose (8) from the washer pump (7).
- Disengage the electrical harness retainer clip from the washer solvent container (6).
- Disconnect the electrical connectors (4) from the washer pump and washer solvent level sensor.
- Remove the fasteners from the washer solvent container.
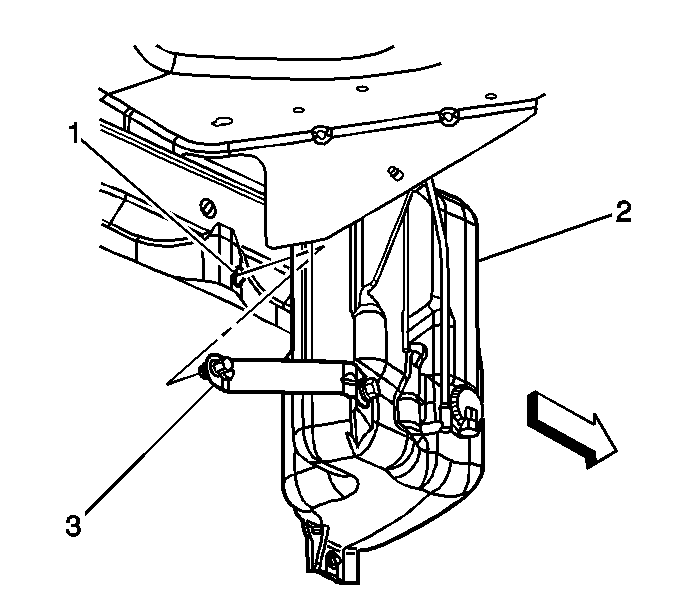
- Loosen the clinch nut (3) from the horizontal bracket to the body rail.
- Carefully lift the washer solvent container from the key hole slot (1) in the body rail.
- Guide the fill neck down through the radiator support.
- Remove the washer solvent container from the vehicle.
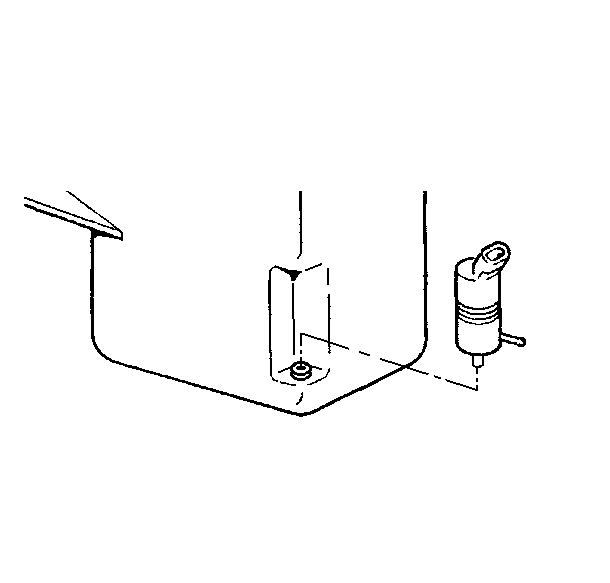
- Remove and transfer the following components from the washer solvent container:
| • | The washer level sensor |
| • | The washer container cap |
Installation Procedure

- Install the following components to the washer solvent container:
| • | The washer level sensor |
| • | The washer container cap |

- Position the washer solvent container filler neck up through the radiator support.
- Engage the electrical harness retainer clip to the washer solvent container.
- Engage the container over the stud on the tie bar outer reinforcement panel.
- Engage the clinch nut stud (3) to the key hole slot (1) in the body rail.

- Ensure the washer solvent container is positioned over the stud (3) on the tie bar outer reinforcement panel.
Notice: Refer to Fastener Notice in the Preface section.
- Install the nuts (1,2,6) to the washer solvent container.
Tighten
Tighten the nuts (1,2,6) to 6 N·m (53 lb in).
- Tighten the clinch nut.
Tighten
Tighten the clinch nut to 6 N·m (53 lb in).
- Secure the horizontal bracket nut.
Tighten
Tighten the horizontal bracket nut to 6 N·m (53 lb in).
- Connect the washer hose (8) to the washer pump (7).
- Connect the electrical connector (4) to the washer pump.
- Connect the electrical connector to the washer solvent level sensor (5).
- Install the headlamp assembly. Refer to
Headlamp Assembly or Headlamp Bulb and/or Cornering, Sidemarker, Park, Turn Signal Bulb Replacement.
- Install the front bumper fascia. Refer to
Front Bumper Fascia Replacement.

- Install the lower air deflector. Refer to
Front Air Deflector Replacement.

- Install the bolt (3) in order to secure the washer solvent container filler neck (2) to the upper tie bar (1).
Tighten
Tighten the bolt to 6 N·m (53 lb in).
- Reposition the condenser seal to the upper tie bar.
- Fill the washer solvent container.
- Install the washer solvent container cap to the washer solvent container.
- Close the hood.


