Removal Procedure
- Disconnect the battery negative cable. Refer to Battery Negative Cable Disconnection and Connection .
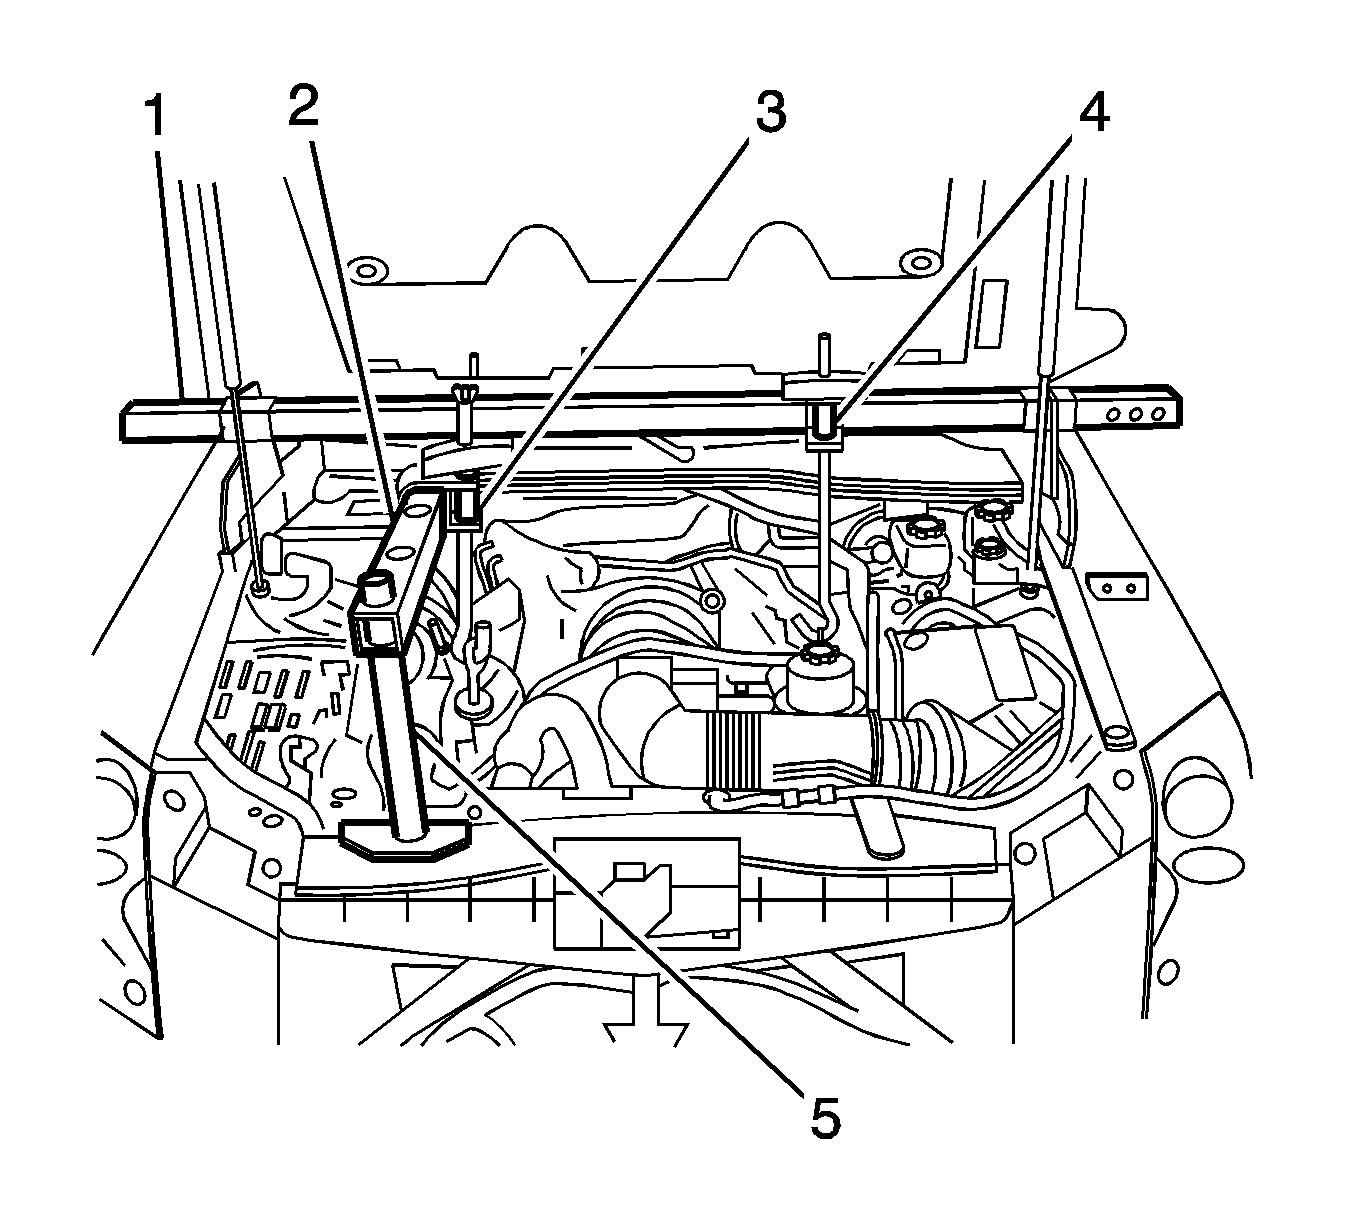
- Install the engine support fixture (1-5). Refer to Engine Support Fixture .
- Raise the vehicle. Refer to Lifting and Jacking the Vehicle .
- Drain the engine oil. Refer to Engine Oil and Oil Filter Replacement .
- Re-install the engine oil drain plug until snug.
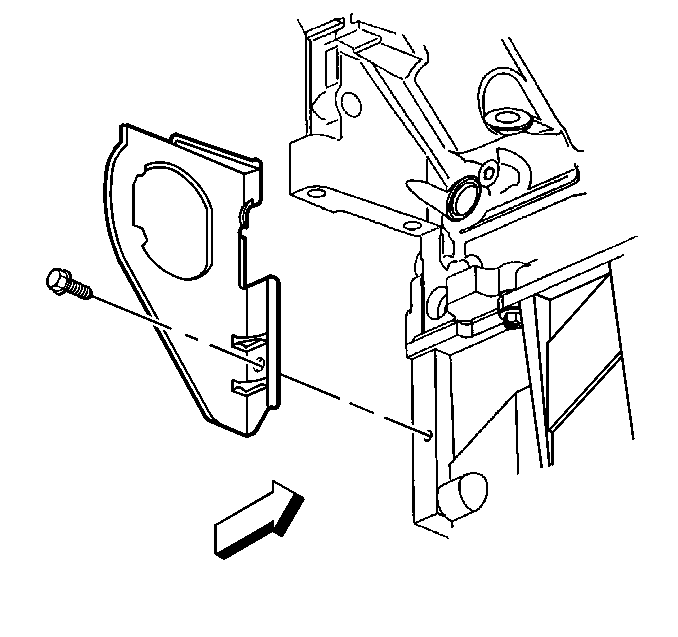
- Remove the left closeout cover and bolt.
- Remove the starter motor. Refer to Starter Motor Replacement .
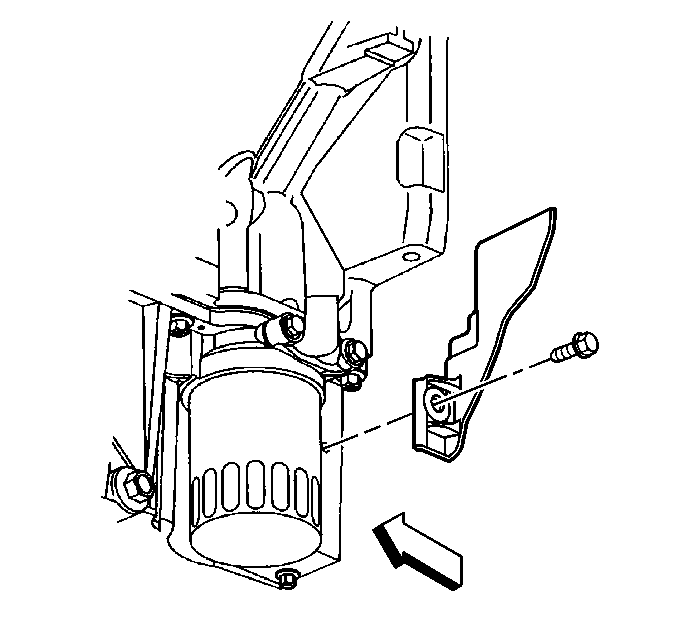
- Remove the right transmission closeout cover and bolt.
- Remove and drain the engine oil filter.
- Re-install the engine oil filter until snug.
- Remove the bottom two transmission housing-to-oil pan bolts.
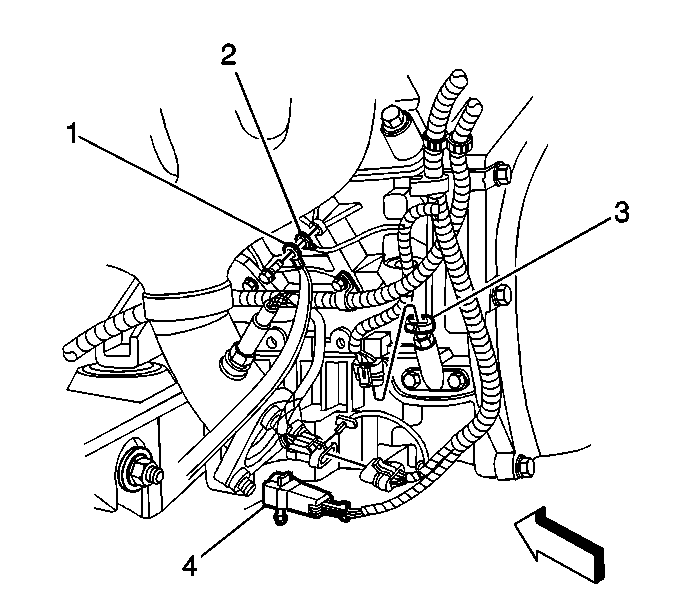
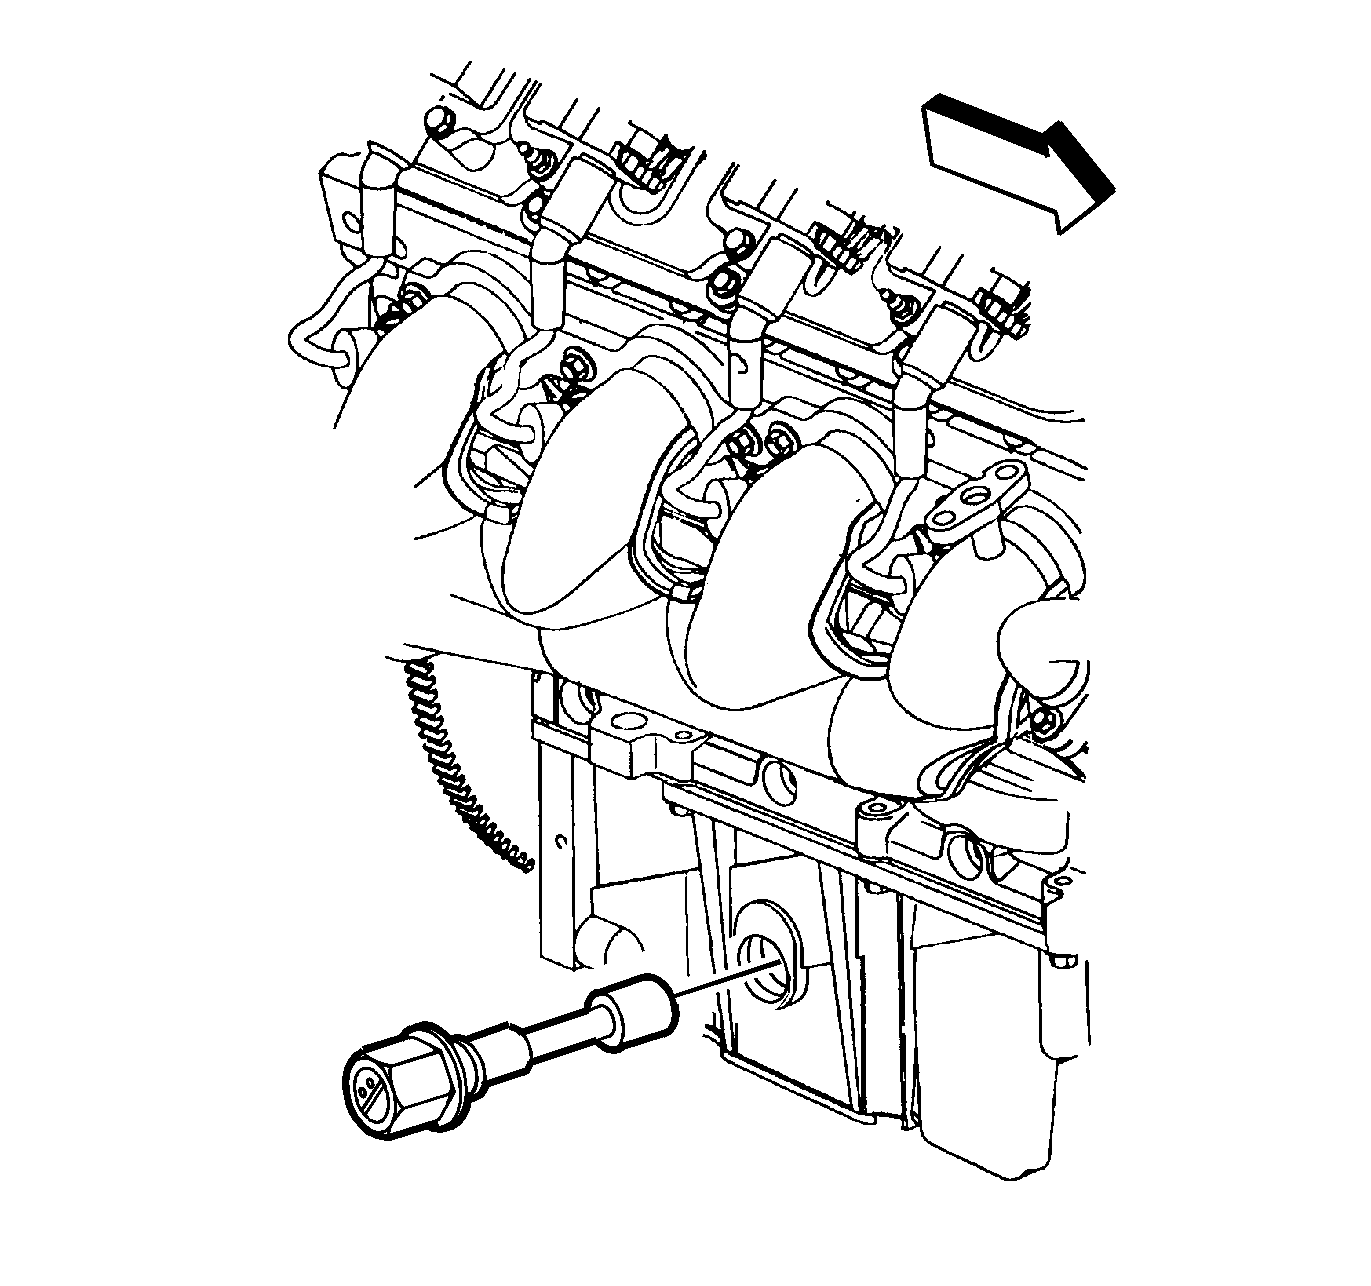
- Disconnect the engine oil temperature sensor (3) electrical connector.
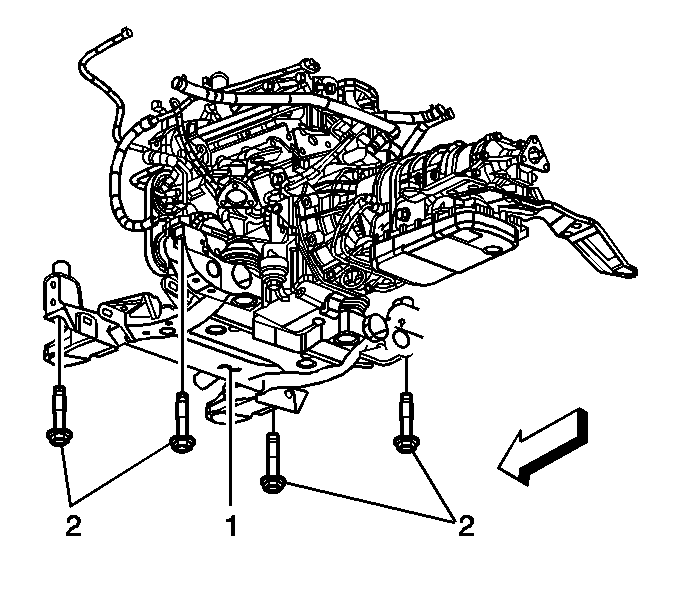
- Remove the front frame assembly (1). Refer to Front Frame Replacement .
- Remove the power steering and air conditioning line retainers from the front of the oil pan and position aside.
- Reposition the power steering rack in order to gain access to the oil pan bolts and to provide clearance while removing the oil pan.
- Remove the oil level sensor from the oil pan. Refer to Engine Oil Level Sensor and/or Switch Replacement .
- Remove the oil pan bolts.
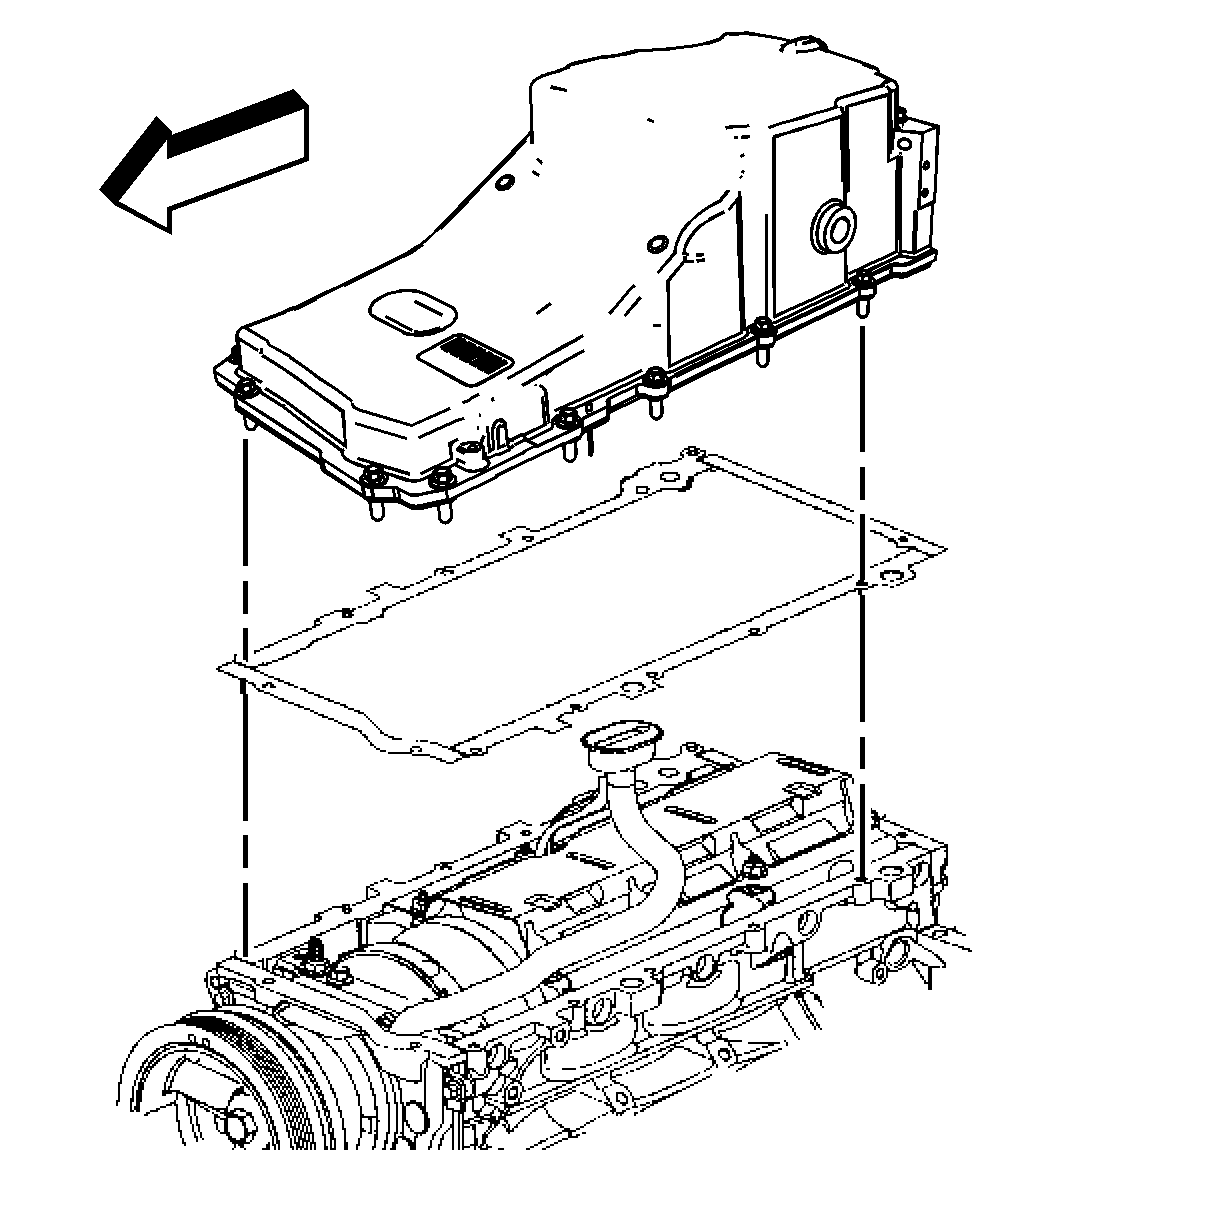
- Remove the oil pan and gasket. Refer to Oil Pan Removal .
- Clean and inspect the oil pan. Refer to Oil Pan Cleaning and Inspection .
Installation Procedure
- Install the oil pan and gasket. Refer to Oil Pan Installation .
- Install the oil level sensor . Refer to Engine Oil Level Sensor and/or Switch Replacement .
- Install the power steering and air conditioning line retainers to the front of the oil pan.
- Install the front frame assembly (1). Refer to Front Frame Replacement .
- Connect the engine oil temperature sensor (3) electrical connector.
- Install the transmission housing-to-oil pan bolts.
- Install a NEW engine oil filter.
- Tighten the oil drain plug. Refer to Engine Oil and Oil Filter Replacement .
- Install the right transmission closeout cover and bolt.
- Install the starter motor. Refer to Starter Motor Replacement .
- Install the left transmission closeout cover and bolt.
- Lower the vehicle.
- Remove the engine support fixture (1-5). Refer to Engine Support Fixture .
- Connect the negative battery cable. Refer to Battery Negative Cable Disconnection and Connection .
- Add engine oil as necessary. Refer to Approximate Fluid Capacities .
- Check for oil leaks.

Important:
• The alignment of the structural oil pan is critical. The rear bolt hole locations of the oil pan provide mounting points for the transmission housing. To ensure the rigidity of the powertrain and correct transmission alignment, it is important that
the rear of the block and the rear of the oil pan are flush or even. The rear of the oil pan must NEVER protrude beyond the engine block and transmission housing plane. • DO NOT use the oil pan gasket again. • It is not necessary to rivet the NEW gasket to the oil pan.


Notice: Refer to Fastener Notice in the Preface section.
Tighten
Tighten the clutch housing bolts to 50 N·m (37 lb ft).

Tighten
Tighten the transmission closeout cover bolt to 12 N·m (106 lb in).

Tighten
Tighten the transmission closeout cover bolt to 12 N·m (106 lb in).

