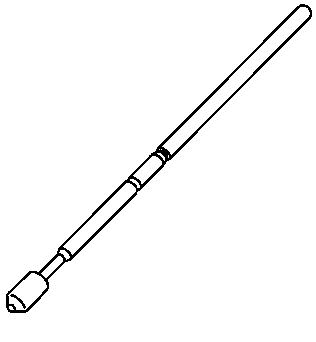
Tools Required
J 42640
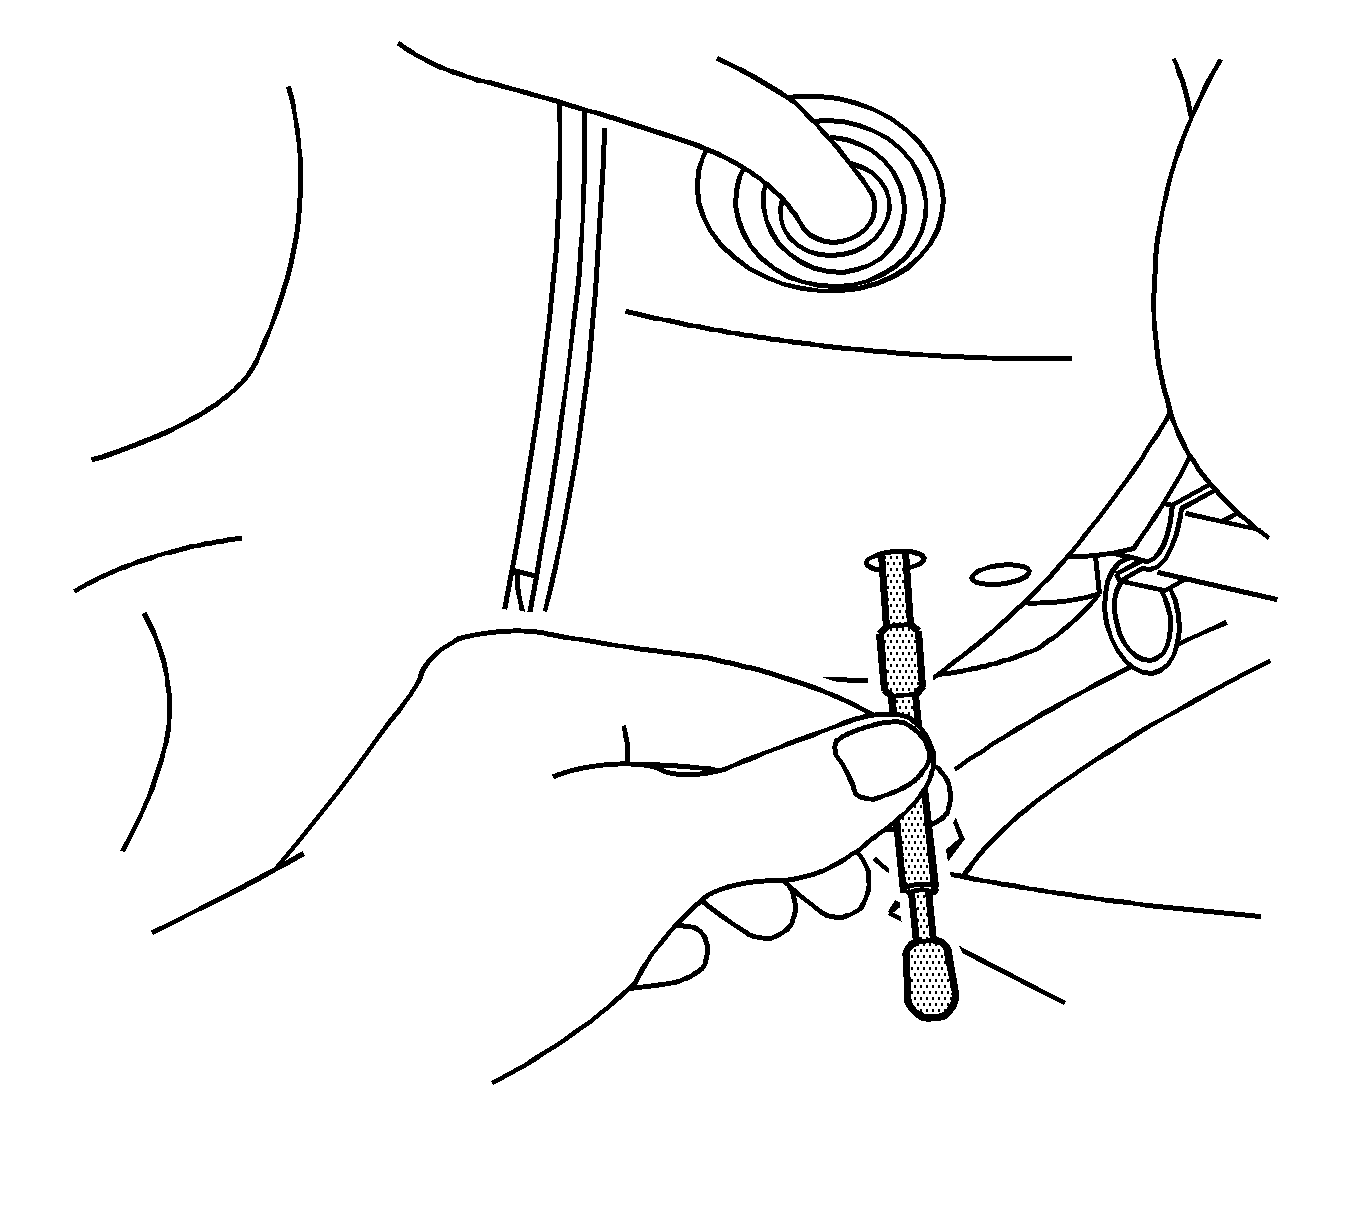
Steering Column Anti-Rotation Pin
Removal Procedure
Notice: The front wheels of the vehicle must be maintained in the straight ahead
position and the steering column must be in the LOCK position before disconnecting
the steering column or intermediate shaft. Failure to follow these procedures
will cause improper alignment of some components during installation and result
in damage to the SIR coil assembly.
- Turn the steering wheel so that the front wheels are pointing straight ahead.
- Turn the ignition lock cylinder to the lock position and remove the key.
- Lock the steering column through the access hole in the lower steering column trim cover using
J 42640
.
- Remove the bank 2 sensor 1 heated oxygen sensor (HO2S). Refer to one of the following:
- Remove the exhaust system. Refer to
Exhaust System Replacement
.
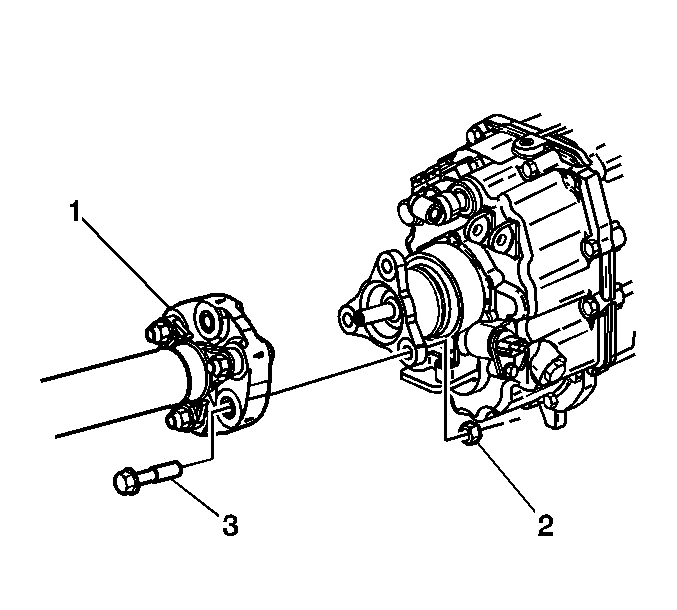
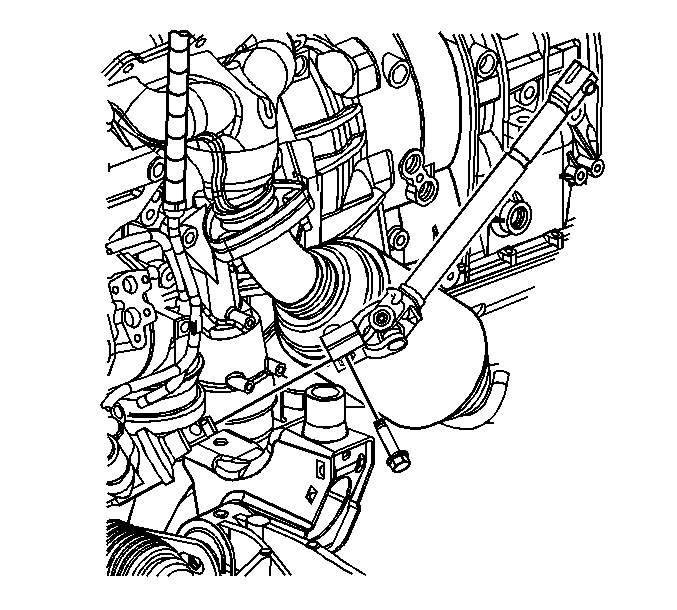
- Disconnect the propeller shaft coupler (1) from the transmission flange. Refer to
Propeller Shaft Replacement
.
- Push the front propeller shaft toward the rear of the vehicle in order to release the propeller shaft coupler (1) from the transmission flange.
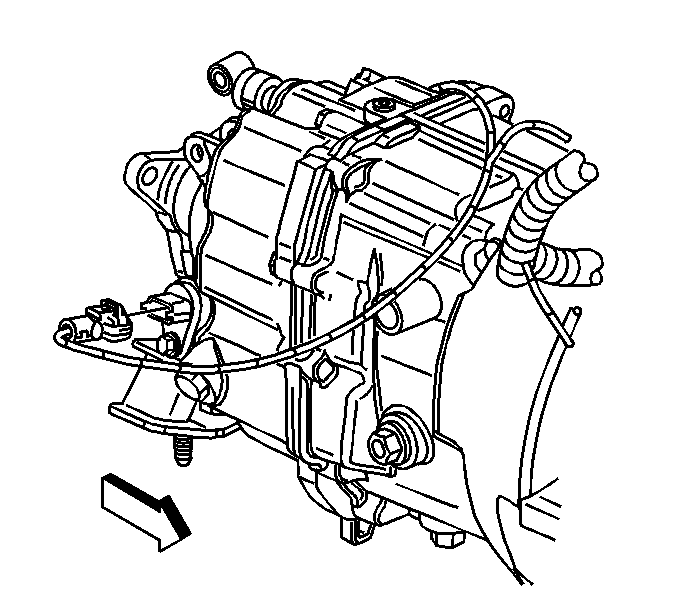
- Disconnect the vehicle speed sensor electrical connector.
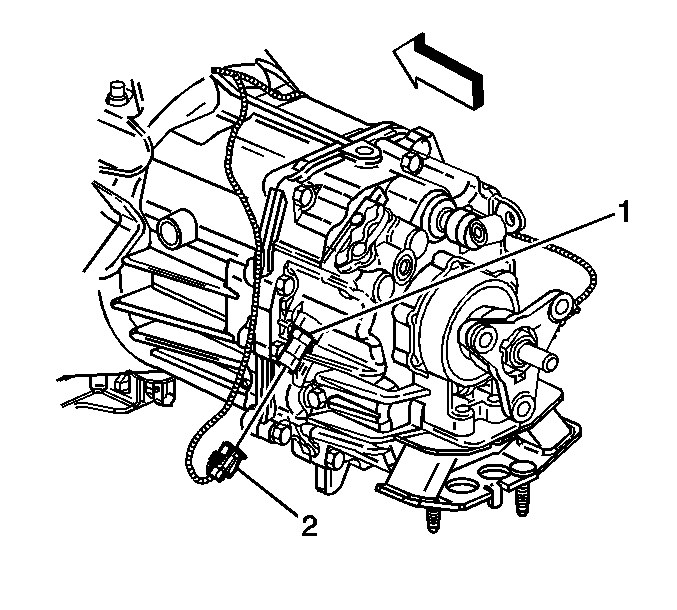
- Disconnect the backup lamp electrical connector (2) from the backup lamp switch (1).
- Support and secure the transmission with a suitable transmission jack.
- Remove the shift control. Refer to
Shift Control Assembly Replacement
.
- Remove the steering gear intermediate shaft retaining bolt.
- Disconnect the intermediate shaft from the power steering gear.
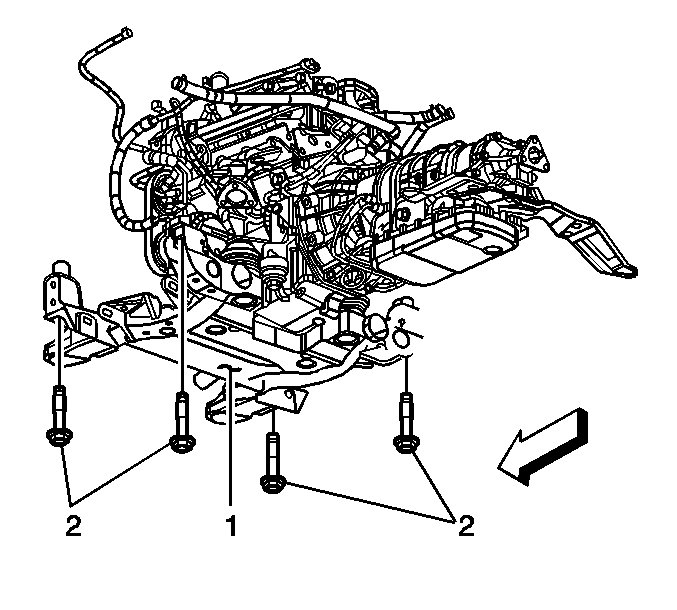
- Support the rear of the frame (1) with an adjustable jack stand.
- Remove the 2 rear frame mounting bolts (2).
- Loosen the 2 front frame mounting bolts (2).
- Lower the jack stand and rear of the frame 51 mm (2 in).
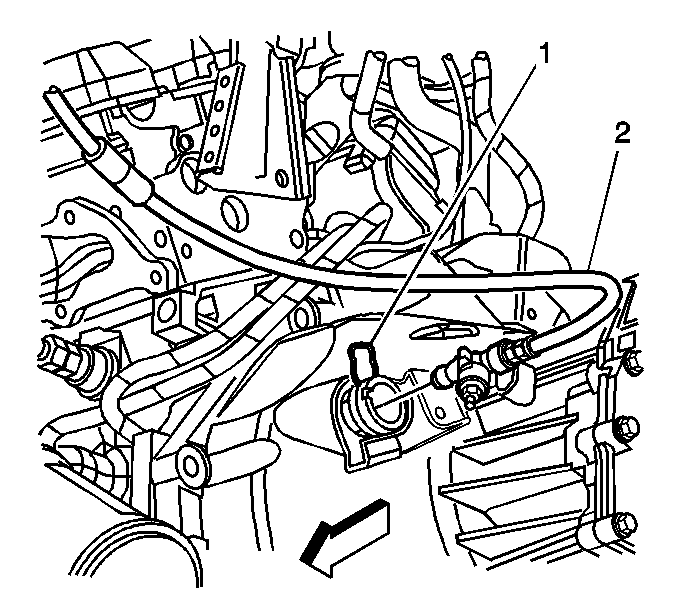
- Remove the clutch hydraulic hose retaining clip (1) from the clutch slave cylinder.
- Disconnect the clutch hydraulic hose (2) from the clutch slave cylinder. It is not necessary to plug the lower hose end or slave cylinder fitting as they are equipped with check valves. Only minimal fluid loss may be experienced.
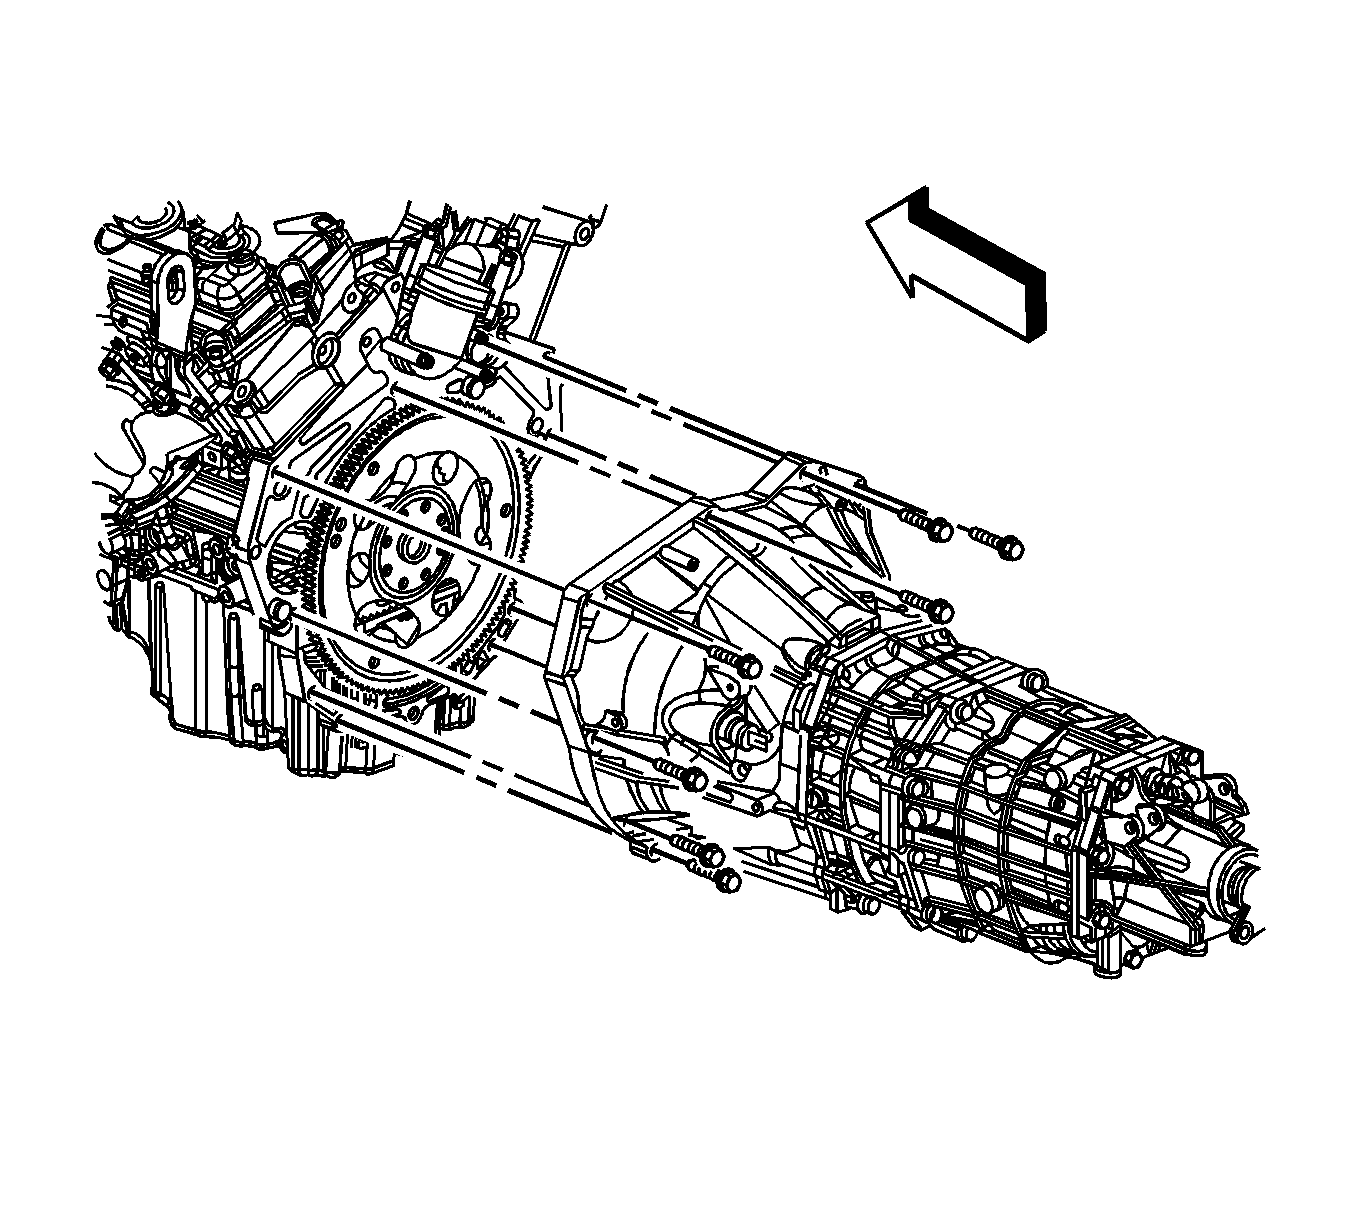
- Remove the left side transmission bolts.
- Remove the 2 battery cable/wiring harness retainers from the upper bellhousing area of the transmission.
- Remove the right side transmission bolts.
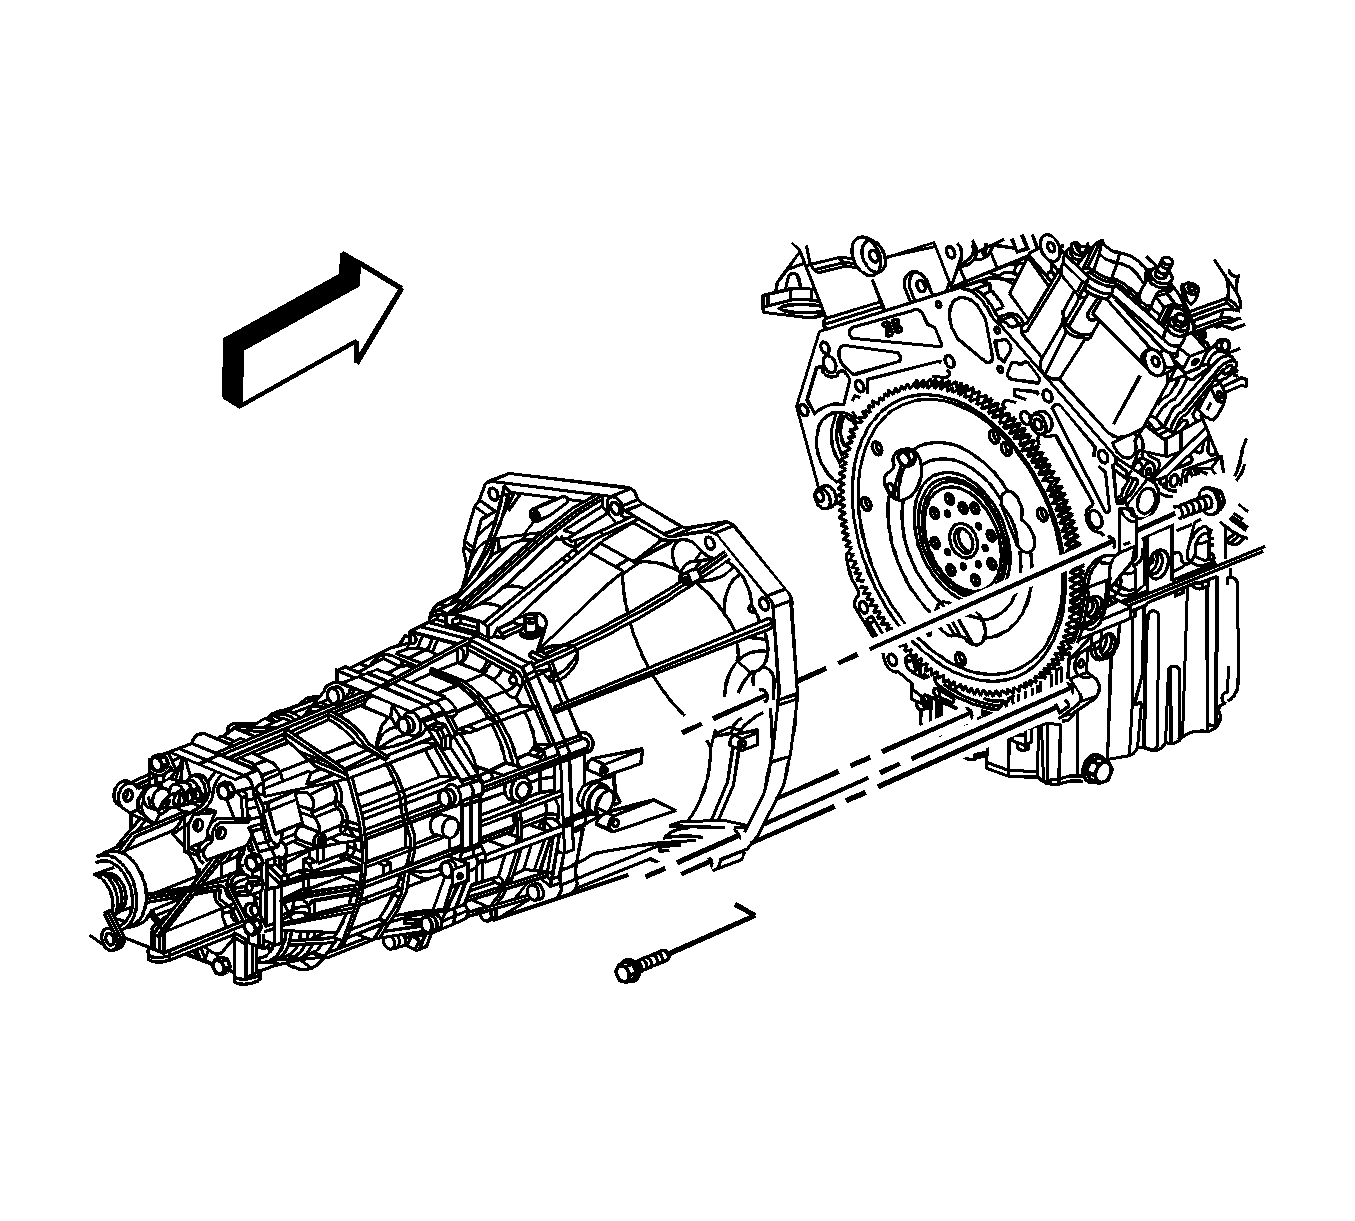
- Pull the transmission free from the engine dowels.
- Swing the rear of the transmission to the right side of the vehicle in order to gain additional clearance between the clutch pressure plate and the transmission input shaft.
Important: Ensure clearance is maintained between the transmission and the following:
| • | The catalytic converters |
- Using the transmission jack, carefully lower the transmission from the vehicle.
Installation Procedure
Important: Ensure clearance is maintained between the transmission and the following:
| • | The catalytic converters |
- Using the transmission jack, carefully raise the transmission to the vehicle.
- Align the transmission with the engine dowels.
Notice: Refer to Fastener Notice in the Preface section.
- Install the right side transmission bolts.
Tighten
Tighten the bolts to 50 N·m (37 lb ft).
- Install the left side transmission bolts.
Tighten
Tighten the bolts to 50 N·m (37 lb ft).
Important: If necessary install NEW battery cable/wiring harness retainers.
- Install the 2 battery cable/wiring harness retainers to the upper bellhousing area of the transmission.
- Install the clutch hydraulic hose retaining clip (1) to the clutch slave cylinder.
Important: Ensure the clutch hydraulic hose is routed in an upward direction above the clutch slave cylinder with no sharp bends, kinks, or downward loops. Ensure the clutch hydraulic hose does not come in contact with any sharp
or potentially hot surfaces.
- Install the clutch hydraulic hose to the vehicle.
- Align the clutch hydraulic hose locating tab with the notch in the slave cylinder hose fitting.
- Push the clutch hydraulic hose (2) into the clutch slave cylinder until a "click" is heard.
- Tug gently on the clutch hydraulic hose (2) to ensure proper retention to the clutch slave cylinder.
- Raise the jack stand supporting the frame (1).
- Install the 2 rear frame mounting bolts (2).
Tighten
Tighten all 4 frame bolts (2) to 191 N·m (141 lb ft).
- Remove the jack stand supporting the frame.
- Connect the intermediate shaft to the steering gear.
- Install the power steering gear intermediate shaft retaining bolt.
Tighten
Tighten the bolt to 48 N·m (35 lb ft).
- Install the shift control. Refer to
Shift Control Assembly Replacement
.
- Remove the transmission jack.
- Install the propeller shaft coupler (1) to the transmission flange. Refer to
Propeller Shaft Replacement
.
- Install the exhaust system. Refer to
Exhaust System Replacement
.
- Install the bank 2 sensor 1 HO2S. Refer to one of the following:
- Connect the vehicle speed sensor electrical connector.
- Connect the backup lamp electrical connector (2) to the backup lamp switch (1).
- Inspect the transmission fluid level. Refer to
Transmission Fluid Level Inspection
.
- Lower the vehicle.
- Unlock the steering column by removing the
J 42640
from the steering column lower trim cover access
hole.
- Bleed the clutch hydraulic system. Refer to
Hydraulic Clutch Bleeding
.
Transmission Final Test and Inspection
Complete the following procedure after the transmission is installed in the vehicle:
- With the ignition OFF or disconnected and clutch pedal depressed, crank the engine several times. Listen for any unusual noises or evidence that any parts are binding.
- Place transmission in neutral, start the engine and listen for any unusual noises or evidence that any parts are binding.
- While the engine continues to idle raise and support the vehicle. Refer to
Lifting and Jacking the Vehicle
.
- Perform a final inspection for the proper fluid level. Refer to
Transmission Fluid Level Inspection
.
- Lower the vehicle.
- Road test the vehicle.
