Removal Procedure
Tools Required
J 34757 Output Shaft C-Ring Remover and Installer
- Disconnect the negative battery cable. Refer to
Caution: Unless directed otherwise, the ignition and start switch must be in the OFF or LOCK position, and all electrical loads must be OFF before servicing any electrical component. Disconnect the negative battery cable to prevent an electrical spark should a tool or equipment come in contact with an exposed electrical terminal. Failure to follow these precautions may result in personal injury and/or damage to the vehicle or its components.
in General Information. - Raise the vehicle. Support the vehicle. Refer to Vehicle Lifting and Jacking in General Information.
- Remove the vehicle speed sensor. Refer to Vehicle Speed Sensor Replacement .
- Remove the right front tire and the wheel assembly. Refer to Wheel Removal in Suspension.
- Remove the right drive axle from the transmission. Refer to Drive Axle in Driveline/Axle.
- Remove the torque strut bracket from the transmission.
- Loosen the torque strut to bracket bolt as needed.
- Swing the bracket out of the way.
- Remove the transmission brace from the engine bracket.
- Remove the case extension bolts.
- Remove the case extension assembly and the seal.
- Remove the thrust bearing and the thrust bearing washer.
- Rotate the final drive assembly until the opening in the snap ring is visible. Use the J 34757 to push the snap ring partially off the output shaft.
- Remove the final drive sun gear.
- Remove the parking gear.
- Remove the thrust bearing.
- Remove the final drive sun gear shaft.
Important: Carefully guide the right drive axle output shaft past the lip seal. Do not allow the shaft splines to contact any portion of the lip seal surface; otherwise, damage to the seal will occur.
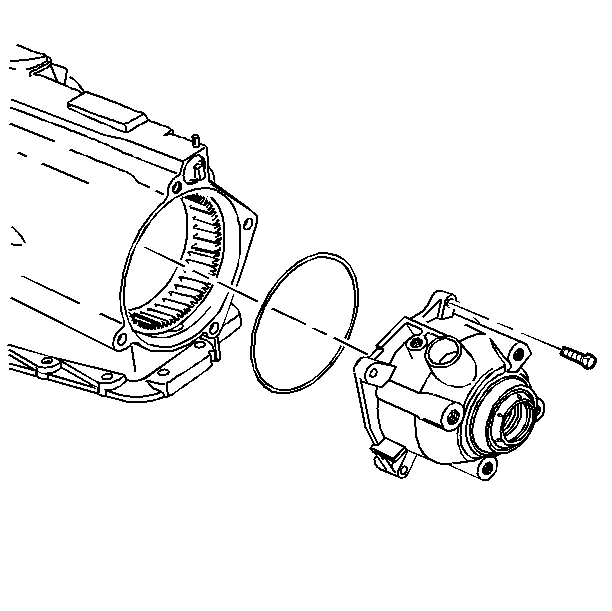
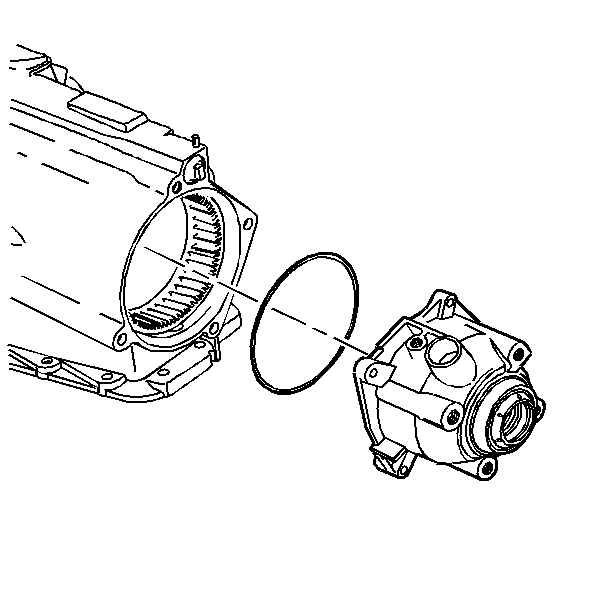
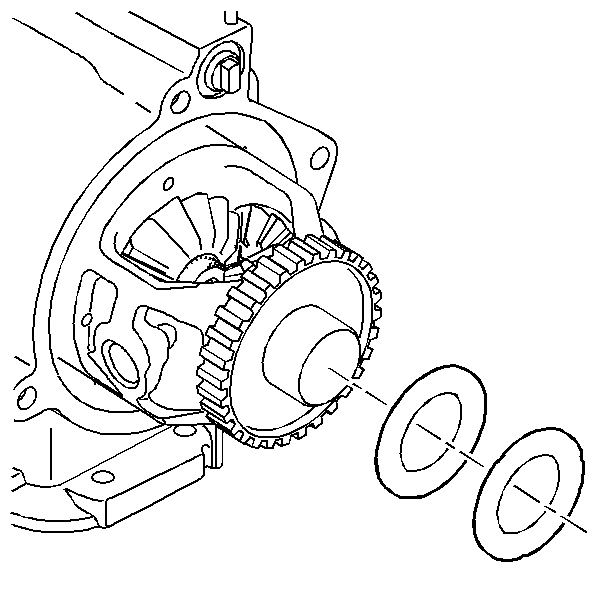
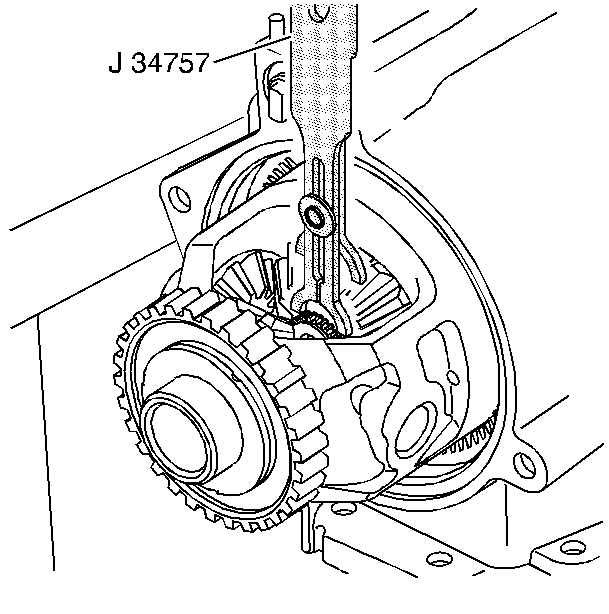
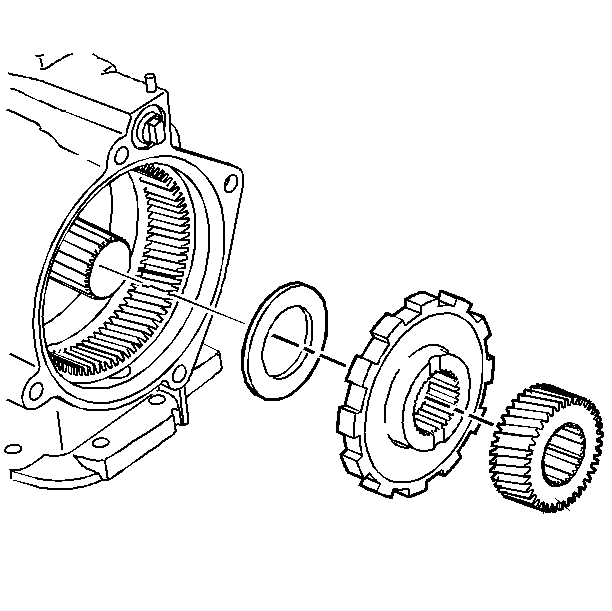
Important: Refer to Transmission Unit Repair Manual if further service is needed on the final drive assembly.
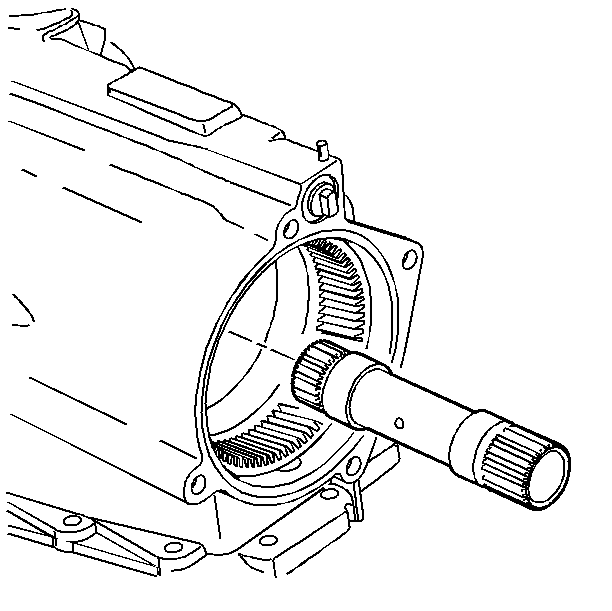
Installation Procedure
Tools Required
| • | J 36850 Transjel |
| • | J 34757 Output Shaft C-Ring Remover and Installer |
| • | J 37292-B Axle Seal Protector |
- Install the final drive sun gear shaft.
- Install the thrust bearing.
- Install the parking gear.
- Install the final drive sun gear.
- Install the final drive assembly onto the output shaft. Use the J 34757 in order to install the snap ring onto the output shaft.
- Install the washer and the thrust bearing onto the final drive assembly. Use the J 36850 or the equivalent (petroleum jelly), in order to retain the washer and the bearing.
- Install the seal and the case extension.
- Install the case extension bolts.
- Install the transmission brace to the engine bracket.
- Install the torque strut bracket to the transmission.
- Install the right drive axle to the transmission. Refer to Drive Axle in Driveline/Axle.
- Install the right front tire and wheel assembly. Refer to Wheel Installation in Suspension.
- Remove the J 37292-B . Pull in line with the handle. Ensure that the tool is completely removed, and no pieces remain inside the transmission.
- Install the vehicle speed sensor. Refer to Vehicle Speed Sensor Replacement .
- Lower the vehicle.
- Connect the negative battery cable.


Tighten
Tighten the bolts to 36 N·m (27 lb ft).
Notice: Use the correct fastener in the correct location. Replacement fasteners must be the correct part number for that application. Fasteners requiring replacement or fasteners requiring the use of thread locking compound or sealant are identified in the service procedure. Do not use paints, lubricants, or corrosion inhibitors on fasteners or fastener joint surfaces unless specified. These coatings affect fastener torque and joint clamping force and may damage the fastener. Use the correct tightening sequence and specifications when installing fasteners in order to avoid damage to parts and systems.
Important: Before installing the right side drive axle, install the J 37292-B . Install the tool in a position so that it can be pulled out after the drive axle is installed (T-handle between 5 and 7 o'clock).
